Hitachi NC40G Instruction Manual
Hitachi NC40G - 1 1/2" Concrete Nailer Manual
 |
View all Hitachi NC40G manuals
Add to My Manuals
Save this manual to your list of manuals |
Hitachi NC40G manual content summary:
- Hitachi NC40G | Instruction Manual - Page 1
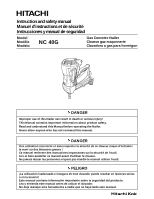
and safety manual Manuel d'instructions et de sécurité Instrucciones y manual de seguridad Model Modèle Modelo NC 40G Gas Concrete Nailer Cloueur gaz maçonnerie Clavadora a gas para hormigon DANGER Improper use of this Nailer can result in death or serious injury! This Manual contains important - Hitachi NC40G | Instruction Manual - Page 2
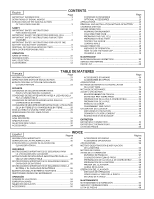
13 EXPLANATION OF THE NAILING ACTION APPLICATIONS 13 OF THE HITACHI NAILER 3 REMOVAL AND INSTALLATION METHOD OF BATTERY ........ 13 SAFETY IMPORTANT SAFETY INSTRUCTIONS FOR USING NAILERS 4 IMPORTANT SAFETY INSTRUCTIONS FOR FUEL CELL 7 IMPORTANT SAFETY INSTRUCTIONS FOR BATTERY CHARGER - Hitachi NC40G | Instruction Manual - Page 3
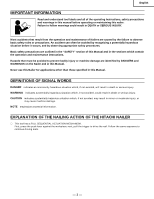
of the operating instructions, safety precautions and warnings in this manual before operating or maintaining this nailer. Failure to follow damage. NOTE emphasizes essential information. EXPLANATION OF THE NAILING ACTION OF THE HITACHI NAILER ⅜ This tool has a FULL SEQUENTIAL ACTUATION MECHANISM. - Hitachi NC40G | Instruction Manual - Page 4
the propellant will remain in the fuel cell. Faillure to follow instructions may result in explosion or fire. Keep the Nailer, fuel cells and battery away from sunshine and from temperature exceeding 120°F (50°C). Fuel cell and/or battery may burst, releasing flammable gas. Do not pierce or burn - Hitachi NC40G | Instruction Manual - Page 5
range. The device may fail to operate below 32°F (0°C) or above 104°F (40°C). 10. STORE NAILER PROPERLY WITH FUEL CELL AND BATTERY REMOVED. When not in use, the Nailer, fuel 120°F MAX (50°C) cell and battery should be store in tool case and in a dry place. Store indoors at temperature below - Hitachi NC40G | Instruction Manual - Page 6
immediately and arrange for repairs by a Hitachi authorized service center. 24. TAKE FUEL CELL AND BATTERY OUT OF NAILER WHEN: 1) doing maintenance and inspection; you drowsy. 26. HANDLE NAILER CORRECTLY. Operate the Nailer according to this Manual. Never allow the Nailer to be operated by children - Hitachi NC40G | Instruction Manual - Page 7
- Continued IMPORTANT SAFETY INSTRUCTIONS FOR FUEL CELL READ ALL INSTRUCTIONS DANGER Fuel cell, fuel and propellant are flammable under pressure. Explosion / Fire Hazard Failure to follow all instructions may result in fire and explosion when handling dispensers for combustible gas for the purpose - Hitachi NC40G | Instruction Manual - Page 8
battery charger; take it to a qualified serviceman when service or repair is required. Incorrect reassembly may result in Nailer. Before using the model UC7SD battery charger, be sure to read all instructions and cautionary statements on it, the battery and in this manual. REMEMBER: USE ONLY HITACHI - Hitachi NC40G | Instruction Manual - Page 9
1. Ensure that this MANUAL is available to operators and personnel performing maintenance. 2. Ensure that Nailers are used only when Nailers in safe working order. 5. Maintain Nailers properly. 6. Ensure that Nailers which require repair are not further used before repair. SAVE THESE INSTRUCTIONS - Hitachi NC40G | Instruction Manual - Page 10
designed to assist you in the safe operation of the Nailer. Some illustrations in this Manual may show details or attachments that differ from those on your own Nailer. NAME OF PARTS 1. Gas Concrete Nailer Top cover Latch Cell cover Handle Chamber Piston Driver blade Trigger Battery Knob Push - Hitachi NC40G | Instruction Manual - Page 11
SPECIFICATIONS 1.Gas Concrete Nailer (NC40G) Dimensions Length × Height × Width Weight Includes battery and fuel cell Nail capacity Cycle rate Battery Fuel Cell 16-1/2" × 13-7/8" × 4-1/4" (420 mm × 352 mm × 108 mm) 7.5 lbs. (3.4 kg) 8.2 lbs. (3.7 kg) 40 nails (4 strip) Intermittent: 1 nail per - Hitachi NC40G | Instruction Manual - Page 12
16" (2.6 mm × 30 mm) .102" × 1-3/8" (2.6 mm × 35 mm) .102" × 1-9/16" (2.6 mm × 40 mm) Wood Approx. .315" (8 mm) countersink. Intrusion depth into concrete Concrete Choose nail to secure approx. .590" - 787" (15 mm - 20 mm) intrusion depth. Example Wood thickness .393" (10 mm) .590" (15 mm) .787 - Hitachi NC40G | Instruction Manual - Page 13
Fuel Cell (Code No. 728-980) 45 ⅜ Gas Strip Nailer Lubricant 8 oz. (250 cc) oil feeder (Code No. 885-546) NOTE: Accessories are subject to change without any obligation on the part of HITACHI. APPLICATIONS ⅜ Attaching a partition runner to concrete your HITACHI AUTHORIZED SERVICE CENTER. - 13 - - Hitachi NC40G | Instruction Manual - Page 14
the battery from the battery charger. Supporting the battery charger with hand, pull out Take it to your authorized Service Center. BEFORE OPERATION Read section gas, liquid or other flammable objects at worksite. ⅷ Use outside or well- ventilated areas. Do not inhale. ⅷ Keep the Nailer, fuel cell - Hitachi NC40G | Instruction Manual - Page 15
beginning the nailing work, test the Nailer by using the checklist below. Conduct the tests in the following order. If abnormal operation occurs, stop using the Nailer and contact a Hitachi authorized service center immediately. (1) REMOVE ALL NAILS, FUEL CELL AND BATTERY FROM NAILER. Ⅺ ALL SCREWS - Hitachi NC40G | Instruction Manual - Page 16
English Ⅺ THE PUSH LEVER AND TRIGGER MUST MOVE SMOOTHLY with pulling back the feeder knob. Trigger 2 Insert the fuel cell into nailer. Fuel cell Feeder knob Push lever (2) Installing the battery. Do not operate the push lever or trigger while installing the battery. Make sure the battery - Hitachi NC40G | Instruction Manual - Page 17
(6) Without touching the trigger, depress the push lever against the workpiece. Pull the trigger. Ⅺ THE NAILER MUST OPERATE. (7) If no abnormal operation is observed, you may load nails in the Nailer. Drive nails into the workpiece that is the same type to be used in the actual application. Ⅺ THE - Hitachi NC40G | Instruction Manual - Page 18
sides of a wall at the same time. Nails can be driven into and through the wall and hit a person on the opposite side. ⅷ Never use Nailer which is defective or operating abnormally. ⅷ Do not use Nailer as hammer. ⅷ Disconnect battery and fuel cell from Nailer when: 1) it is not in use; 2) leaving - Hitachi NC40G | Instruction Manual - Page 19
ⅷ Handle with care to avoid burning yourself, since the nails and nose may become very hot. If nails are jammed in firing head, remove it, and adjust the nailing in the following order. 1 Remove the fuel cell and the battery from the Nailer. Push lever HOW TO USE THE NOSE CAP WARNING ⅷ Before - Hitachi NC40G | Instruction Manual - Page 20
and all nails from Nailer when: 1) doing maintenance and inspection; and 2) clearing a jam. 1. Inspecting the magazine 1 REMOVE FUEL CELL and BATTERY. 2 Clean the magazine. Remove any plastic chips and concrete dust which may have accumulated in the magazine. Lubricate it with Hitachi Gas tool - Hitachi NC40G | Instruction Manual - Page 21
5. Operator troubleshooting (See page 22) 6. Service parts list A: Item No. B: Code No. C: No. Used D: Remarks CAUTION ⅷ Repair, modification and inspection of Hitachi Power Tools must be carried out by an Hitachi Authorized Service Center. This Parts List will be helpful if presented with the tool - Hitachi NC40G | Instruction Manual - Page 22
push lever working properly. WHY Prevent a jam. Promote operator safety and efficient Nailer operation. HOW Blow clean daily. Blow clean daily. Operator troubleshooting PROBLEM CHECK METHOD CORRECTION Nailer operates, but no nail is driven. Check for a jam. Clear a jam. Check function of - Hitachi NC40G | Instruction Manual - Page 23
" du manuel et dans les sections relatives aux instructions d'utilisation et d'entretien. Les dangers à éviter utiliser ce cloueur pour des applications autres que celles qui sont spécifiées dans ce manuel EXPLICATION DE L'ACTION DE CLOUAGE DU CLOUEUR HITACHI ⅜ Cet outil dispose d'un MÉCANISME DE - Hitachi NC40G | Instruction Manual - Page 24
au contenu 120°F MAX (50°C) inflammable. Le contenant sous pression et le propulseur doivent demeurer dans la pile à combustible. Le non-respect des instructions peut provoquer une explosion ou un incendie. Garder le cloueur, la pile à combustible et la pile à l'abri des rayons du soleil et - Hitachi NC40G | Instruction Manual - Page 25
Français SECURITE - suite AVERTISSEMENT 5. NE JAMAIS DIRIGER L'OUTIL VERS SOI NI VERS QUELQU'UN D'AUTRE DANS L'AIRE DE TRAVAIL. Toujours supposer que le cloueur renferme des clous. Ne jamais diriger le cloueur vers soi ni vers quelqu'un d'autre, qu'il renferme des clous ou non. Si l'on enfonce - Hitachi NC40G | Instruction Manual - Page 26
diatement de l'utiliser et le faire réparer par un service après-vente Hitachi agréé. 24. SORTIR LA PILE À COMBUSTIBLE ET LA . Utiliser le cloueur en suivant les instructions du manuel. Ne jamais permettre que LE CLOUEUR POUR DES APPLICATIONS AUTRES QUE CELLES QUI SONT SPECIFIEES DANS CE MANUEL. 28 - Hitachi NC40G | Instruction Manual - Page 27
DANGER La pile à combustible, le combustible et le propulseur sont inflammables sous pression. Danger d'explosion / d'incendie Un non-respect de toutes les instructions peut occasionner un incendie et une explosion lorsqu'on manipule des distributeurs de gaz combustible en vue de les stocker, de les - Hitachi NC40G | Instruction Manual - Page 28
de blessures, recharger des batteries rechargeables HITACHI type EB714S. Les autres types de rallonge ont les mêmes numéro, taille et forme que celles de la fiche du chargeur; b. Le cordon de rallonge est batterie modèles UC7SD, bien lire toutes les instructions et les précautions spécifiées sur le - Hitachi NC40G | Instruction Manual - Page 29
les lois des états et les lois locales, il peut être illégal de jeter cette batterie aux ordures ménagères. Vérifier auprès de son service de ramassage d'ordures les options de recyclage et la procédure correcte de mise au rebut. RESPONSABILITES DE L'EMPLOYEUR 1. Veiller à ce que ce MANUEL reste - Hitachi NC40G | Instruction Manual - Page 30
Français SECURITE - suite CONSERVER CES INSTRUCTIONS ET LES METTRE A LA DISPOSITION DES AUTRES UTILISATEURS ET PROPRIETAIRES DE CET OUTIL! - 30 - - Hitachi NC40G | Instruction Manual - Page 31
(sortie) Magasin ⅜ Pile (EB714S) Orifice de prise 2. Chargeur de batterie (UC7SD) Cordon Taquet Event d'air Orifice d'installation de la batterie Lampe témoin Fiche Plaque Etiquette Hitachi signalétique - 31 - - Hitachi NC40G | Instruction Manual - Page 32
la température et de la tension de la source d'alimentation. SELECTION DES CLOUS AVERTISSEMENT ⅷ Bien utiliser exclusivement les clous HITACHI d'origine avec le NC40G. L'utilisation d'autres clous risque de provoquer un mauvais fonctionnement de l'outil et/ou une rupture des clous, et d'entraîner - Hitachi NC40G | Instruction Manual - Page 33
Français ⅜ Longueur de clou adaptée La profondeur d'intrusion dans le béton est .472" - .866" (12 mm - 22 mm) pour le cloutage de matériaux en bois et de .570" - .787" (15 mm - 20 mm) pour le cloutage de plaques d'acier fines. L'usage de clous plus longs peut entraîner une torsion de ces derniers. - Hitachi NC40G | Instruction Manual - Page 34
(Code No. 728-980) ⅜ Lubrifiant de cloueuse a bande au gas Alimenteur d'huile 8 oz (250 cc) (Code No. 885-546) modification sans préavis et sans aucune obligation de la part de HITACHI. APPLICATIONS ⅜ Fixation d'une porte coulissante sur béton ⅜ Fixation du SERVICE APRES-VENTE HTACHI AGREE. - 34 - - Hitachi NC40G | Instruction Manual - Page 35
pas alors que la batterie est installée correctement, il s'agit probablement d'une anomalie de la batterie ou du chargeur. Les porter au service après-vente agréé. AVANT L'UTILISATION Lire la section intitulée "SECURITE" (pages 24 - 30). Bien vérifier les points suivants avant de travailler - Hitachi NC40G | Instruction Manual - Page 36
les points ci-dessous. Effectuer les essais dans l'ordre indiqué. S'il se produit un fonctionnement anormal, cesser immédiatement d'utiliser le cloueur et contacter un service après-vente agréé Hitachi. - 36 - - Hitachi NC40G | Instruction Manual - Page 37
(1) SORTIR TOUS LES CLOUS, LA PILE À COMBUSTIBLE ET LA PILE DU CLOUEUR. Ⅺ TOUTES LES VIS DOIVENT ETRE SERREES A FOND. Français (3) INSÉRER LA PILE À COMBUSTIBLE DANS LE CLOUEUR. 1 Tirer le taquet et ouvrir le couvercle de pile combustible. Taquet Ⅺ LE BRAS DE CONTACT ET LA DÉTENTE DOIVENT SE - Hitachi NC40G | Instruction Manual - Page 38
Français (4) Retirer le doigt de la détente et presser le bras de contact contre la pièce à usiner en tirant le bouton d'alimentation vers l'arrière. Ⅺ LE CLOUEUR NE DOIT PAS FONCTIONNER. Ne pas tirer sur la gâchette Approvisionnement en deux pas! (1) Insérer la recharge de clous dans le dos du - Hitachi NC40G | Instruction Manual - Page 39
Bouton d'alimentation Alimenteur de clous (B) Français 120°F MAX (50°C) ⅷ Danger d'explosion et d'incendie Garder à l'abri des rayons du soleil et des températures supérieures à 120°F (50°C). ⅷ Garder à l'écart des sources d'inflammation. ⅷ Ne pas fumer. Butée de clous Clous UTILISATION DU - Hitachi NC40G | Instruction Manual - Page 40
Français Si l'on presse de nouveau la détente et que l'on ne cloue pas à une température sous 30°F (0°C), un clou superflu sera enfoncé. ⅷ Maintenez la clouteuse perpendiculairement à la pièce à clouter. Le clou risque sinon de ricocher et de blesser les personnes à proximité. Ce cloueur est muni - Hitachi NC40G | Instruction Manual - Page 41
2 Reverrouiller le fouloir dans le magasin et retirer les clous. 3 Détacher les boulons avec une clé. Bouton 4 Écarter le magasin de la tête de clouage et éliminer le blocage. 5 Brancher la pile à combustible et la batterie dans le cloueur. TOUJOURS PORTER DES LUNETTES DE PROTECTION. Français - 41 - Hitachi NC40G | Instruction Manual - Page 42
de portée des enfants. 3. ETIQUETTE D'AVERTISSEMENT Remplacer l'ETIQUETTE D'AVERTISSEMENT si elle manque ou qu'elle est endommagée. Se procurer une nouvelle ETIQUETTE D'AVERTISSEMENT auprès d'un service après-vente Hitachi agréé. - 42 - - Hitachi NC40G | Instruction Manual - Page 43
44) 5. Guide de dépannage de l'opérateur (voir page 44) 6. Liste des pièces de rechange A: No. élément B: No. code C: No. utilisé D: Remarques ATTENTION ⅷ Les réparations, modifications et inspections des outils électriques Hitachi doivent être confiées à un service après-vente Hitachi agréé. Il - Hitachi NC40G | Instruction Manual - Page 44
Nettoyer en soufflant de l'air tous les jours. Guide de dépannage de l'opérateur PROBLEME Le cloueur fonctionne, mais les clous ne s' °F (50°C). Vérifier que le piston se déplace en douceur. Contacter Hitachi pour le remplacement. Remplacer le segment de piston. Remplacer le piston. Remplacer - Hitachi NC40G | Instruction Manual - Page 45
funcionamiento, las precauciones de seguridad y las advertencias de este manual antes de realizar la operación o el mantenimiento de NOTA enfatiza información esencial. EXPLICACIÓN LA ACCIÓN DE CLAVADO DEL CLAVADOR HITACHI ⅜ Esta herramienta es un MECANISMO DE ACTUACIÓN SECUENCIAL COMPLETO. En - Hitachi NC40G | Instruction Manual - Page 46
INSTRUCCIONES Esta Clavadora funciona con un dispositivo de combustión interno. La clavadora sólo deberá utilizarse con lo dispensadores de gas combustible enumerados en este manual de instrucciones. PELIGRO 1. LOS OPERADORES Y DEMÁS PERSONAS QUE SE ENCUENTREN EN EL ÁREA DE TRABAJO DEBEN USAR GAFAS - Hitachi NC40G | Instruction Manual - Page 47
Español SEGURIDAD - Continuación ADVERTENCIA 5. NO DIRIJA NUNCA LA HERRAMIENTA HACIA SÍ MISMO O HACIA OTRAS PERSONAS DEL ÁREA DE TRABAJO. Piense siempre que el clavador puede tener clavos cargados. No dirija nunca el clavador hacia sí mismo o hacia otras personas, independientemente de que - Hitachi NC40G | Instruction Manual - Page 48
UTILICE NUNCA EL CLAVADOR PARA APLICACIONES QUE NO SEAN LAS ESPECIFICADAS EN ESTE MANUAL. 28. MANEJE EL CLAVADOR CON CUIDADO. No deje caer la Clavadora ni podría resultar en lesiones. El clavador solamente deberá ser reparado por Hitachi, un distribuidor, o el empresario. 31. NO MODIFIQUE NI ALTERE - Hitachi NC40G | Instruction Manual - Page 49
presión. Peligro de fuego o explosión El incumplimiento de las instrucciones puede provocar un incendio o explosión al manejar los dispensadores de gas combustible para su almacenamiento, transporte, inserción y extracción de la herramienta y para deshacerse de éstos. No fume mientras manipule la - Hitachi NC40G | Instruction Manual - Page 50
de baterías puede utilizarse con herramientas alimentadas con batería HITACHI como accesorio estándar. En este caso, antes de utilizarlo, lea los manuales de instrucciones de las herramientas alimentadas con batería HITACHI. INSTRUCCIONES IMPORTANTES DE SEGURIDAD PARA LA BATERÍA Y EL CARGADOR DE - Hitachi NC40G | Instruction Manual - Page 51
sobre las opciones de reciclado o de la forma de deshacerse apropiadamente de la batería. RESPONSABILIDADES DEL EMPRESARIO 1. Asegúrese de que este MANUAL esté al alcance de los operadores y del personal de mantenimiento. 2. Asegúrese de que el clavador se utilice solamente cuando el operador - Hitachi NC40G | Instruction Manual - Page 52
Español SEGURIDAD - Continuación ¡GUARDE ESTAS INSTRUCCIONES Y PÓNGALAS A DISPOSICIÓN DE OTROS USUARIOS Y PROPIETARIOS DE ESTA HERRAMIENTA! - 52 - - Hitachi NC40G | Instruction Manual - Page 53
de las ilustraciones de este manual pueden mostrar detalles o accesorios diferentes a los de su propio clavador. NOMBRE DE LAS PIEZAS 1. Clavadora a gas para hormigon Cubierta superior Seguro ón de la batería Cable Lámpara piloto Clavija Placa de Etiqueta de Hitachi características - 53 - - Hitachi NC40G | Instruction Manual - Page 54
Español ESPECIFICACIONES 1. Clavadora a gas para hormigon (NC40G) Dimensiones Length × Height × Width Peso ncluye batería y ÓN DE CLAVOS ADVERTENCIA ⅷ Asegúrese de usar únicamente clavos legítimos Hitachi para el NC40G. El uso de otros clavos puede producir un fallo de funcionamiento de la - Hitachi NC40G | Instruction Manual - Page 55
Español ⅜ Longitud de clavo adecuada La longitud de inserción adecuada para clavos que se van a clavar en cemento es de .472" - .866" (12 mm - 22 mm) para materiales de madera y de .570" - .787" (15 mm - 20 mm) para finas hojas de acero. Si se usan clavos más largos, pueden doblarse. Seleccione la - Hitachi NC40G | Instruction Manual - Page 56
Célula de combustible (Nº de código 728-980) ⅜ Lubricante para Clavadora a gas Aceitera de 8 oz. (250 cc) (Nº de código 885-546) NOTA: Los accesorios están sujetos a cambios sin ninguna obligación por parte de HITACHI. APLICACIONES ⅷ No cargue con una tensión superior a la indicada en la placa - Hitachi NC40G | Instruction Manual - Page 57
más de cuatro horas desde que comenzó la carga, interrumpa la carga y póngase en contacto con el CENTRO DE SERVICIO AUTORIZADO DE HITACHI. 4. Desconecte el cargador de baterías del tomacorriente. PRECAUCIÓN No desconecte el cable del tomacorriente tirando delmismo. Cerciórese de tirar del - Hitachi NC40G | Instruction Manual - Page 58
dos o tres veces contra un objeto que no esté en movimiento y suéltelo. Si no sale gas, la célula de combustible está vacía. Cámbiela. Cumpla la normativa de seguridad. La célula de combustible est ngase inmediatamente en contacto con un centro de reparaciones autorizado por Hitachi. - 58 - - Hitachi NC40G | Instruction Manual - Page 59
Español (1) RETIRE LOS CLAVOS, LA CÉLULA DE COMBUSTIBLE Y LA BATERÍA DE LA CLAVADORA. Ⅺ TODOS LOS TORNILLOS DEBERÁN ESTAR APRETADOS. (3) CÓMO INSERTAR LA CÉLULA DE COMBUSTIBLE EN LA CLAVADORA. 1 Tire del seguro y abra la cubierta de la célula. Seguro Cubierta de la célula Ⅺ LA PALANCA DE EMPUJE - Hitachi NC40G | Instruction Manual - Page 60
Español (4) Retire el dedo del gatillo y pulse la palanca de empuje contra la pieza de trabajo, al tiempo que tira hacia atrás del pomo de alimentación. Ⅺ EL CLAVADOR NO DEBERÁ FUNCIONAR. No empuje el gatillo 2 Acción de alimentación de clavos! (1) Inserte la tira de clavos en la parte trasera del - Hitachi NC40G | Instruction Manual - Page 61
Extraiga los clavos: 1 Tire del pomo de alimentación hacia atrás. 2 Vuelva a echar hacia delante el pomo de alimentación con cuidado al tiempo que empuja el alimentador de clavos (B). 3 Empuje el tapón de clavo. 4 Retire los clavos del fondo del almacén. Pomo alimentador Alimentador de clavos (B) - Hitachi NC40G | Instruction Manual - Page 62
Español ⅷ No utilice el cable de alimentación si está dañado. Llévelo a reparar de inmediato. ⅷ No coloque lo rostro, las manos ni los pies a una distancia inferior a 8 pulgadas (200 mm) del cabezal de disparo mientras lo utiliza. ⅷ No introduzca los clavos sobre la cabeza de otros clavos, ni con - Hitachi NC40G | Instruction Manual - Page 63
Palanca Tapa de la punta Español 4 Retire el almacén del cabezal de disparo y desatasque la unidad. Destornillador Palanca Tapa de la punta 5 Inserte la célula de combustible y la pila en la clavadora. UTILICE SIEMPRE GAFAS DE SEGURIDAD. EN CASO DE ATASCO ADVERTENCIA ⅷ Tenga cuidado de no - Hitachi NC40G | Instruction Manual - Page 64
a mantener con seguridad este clavador. Algunas ilustraciones de este manual pueden mostrar detalles o dispositivos diferentes a los de su propio el almacén. Lubrique la herramienta con un lubricante para herramientas de gas de Hitachi. PRECAUCIÓN ⅷ Compruebe si el alimentador de clavos se desliza - Hitachi NC40G | Instruction Manual - Page 65
la ETIQUETA DE PRECAUCIÓN se pierde o daña, cámbiela por otra. Solicite la nueva ETIQUETA DE PRECAUCIÓN a un centro de reparaciones autorizado por Hitachi. Etiqueta de precaución 4. Tabla de mantenimiento (Consulte la página 66.) 5. Solución de problemas por parte del operador (Consulte la página 66 - Hitachi NC40G | Instruction Manual - Page 66
completamente. Si la temperatura es demasiado baja, caliente la célula de combustible sin superar los 120°F (50°C). Póngase en contacto con Hitachi para reemplazarla. Cambie el anillo del pistón. Cambie el pistón. Cambie el O-ring del cilindro. Utilice solamente los clavos recomendados. Póngase - Hitachi NC40G | Instruction Manual - Page 67
- 67 - - Hitachi NC40G | Instruction Manual - Page 68
- 68 - - Hitachi NC40G | Instruction Manual - Page 69
PLATE PIN WIRING PLATE ADAPTER ROLL PIN D2×8 RATCH CELL LEVER(A) SPRING CELL COVER CELL RUBBER PLATE HOUSING ASS'Y ADIABATIC SHEET M5 SCREW HOUSING HITACHI PLATE TAPPING SCREW D4×20 HANDLE(B) TAPPING SCREW (B) TAPPING SCREW (W/FLANGE) D4×14 WASHER NAIL STOPPER SPRING (C) SQ.NUT M6 MAGAZINE MAGAZINE - Hitachi NC40G | Instruction Manual - Page 70
- 70 - - Hitachi NC40G | Instruction Manual - Page 71
- 71 - - Hitachi NC40G | Instruction Manual - Page 72
(llamada gratis), o con HITACHI AUTORIZED POWER TOOL SERVICE CENTER. Issued by Hitachi Koki Co., Ltd. Shinagawa Intercity Tower A, 15-1, Konan 2-chome, Minato-ku, Tokyo 108-6020, Japan Distributed by Hitachi Koki U.S.A., Ltd. 3950 Steve Reynolds Blvd. Norcross, GA 30093 Hitachi Koki Canada Co. 450
-
 1
1 -
 2
2 -
 3
3 -
 4
4 -
 5
5 -
 6
6 -
 7
7 -
8
-
9
-
10
-
11
-
12
-
13
-
14
-
15
-
16
-
17
-
18
-
19
-
20
-
21
-
22
-
23
-
24
-
25
-
26
-
27
-
28
-
29
-
30
-
31
-
32
-
33
-
34
-
35
-
36
-
37
-
38
-
39
-
40
-
41
-
42
-
43
-
44
-
45
-
46
-
47
-
48
-
49
-
50
-
51
-
52
-
53
-
54
-
55
-
56
-
57
-
58
-
59
-
60
-
61
-
62
-
63
-
64
-
65
-
66
-
67
-
68
-
69
-
70
-
71
-
72
 |
 |

Model
Modèle
Modelo
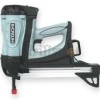
NC 40G
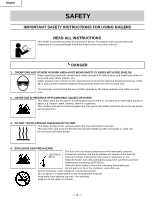
DANGER
Improper use of this Nailer can result in death or serious injury!
This Manual contains important information about product safety.
Read and understand this Manual before operating the Nailer.
Never allow anyone who has not reviewed this manual.
PELIGRO
¡La utilización inadecuada e insegura de este clavador puede resultar en lesiones serias
o en la muerte!
Este manual contiene información importante sobre la seguridad del producto.
Lea y entienda este manual antes de utilizar el clavador.
No deje manejar esta herramienta a nadie que no haya leído este manual.
Instruction and safety manual
Manuel d'instructions et de sécurité
Instrucciones y manual de seguridad
DANGER
Une utilisation incorrecte et sans respecter la sécurité de ce cloueur risque d’entraîner
la mort ou des blessures graves !
Ce manuel renferme des instructions importantes sur la sécurité de l’outil.
Lire et bien assimiler ce manuel avant d’utiliser le cloueur.
Ne jamais laisser les personnes n'ayant pas étutdié le manuel utiliser l'outil.
Gas Concrete Nailer
Cloueur gaz maçonnerie
Clavadora a gas para hormigon