Honeywell CT2800 Owner's Manual - Page 6
Step 4. Set Thermostat for Your Type of Heating System, IMPORTANT - thermostat program
 |
View all Honeywell CT2800 manuals
Add to My Manuals
Save this manual to your list of manuals |
Page 6 highlights
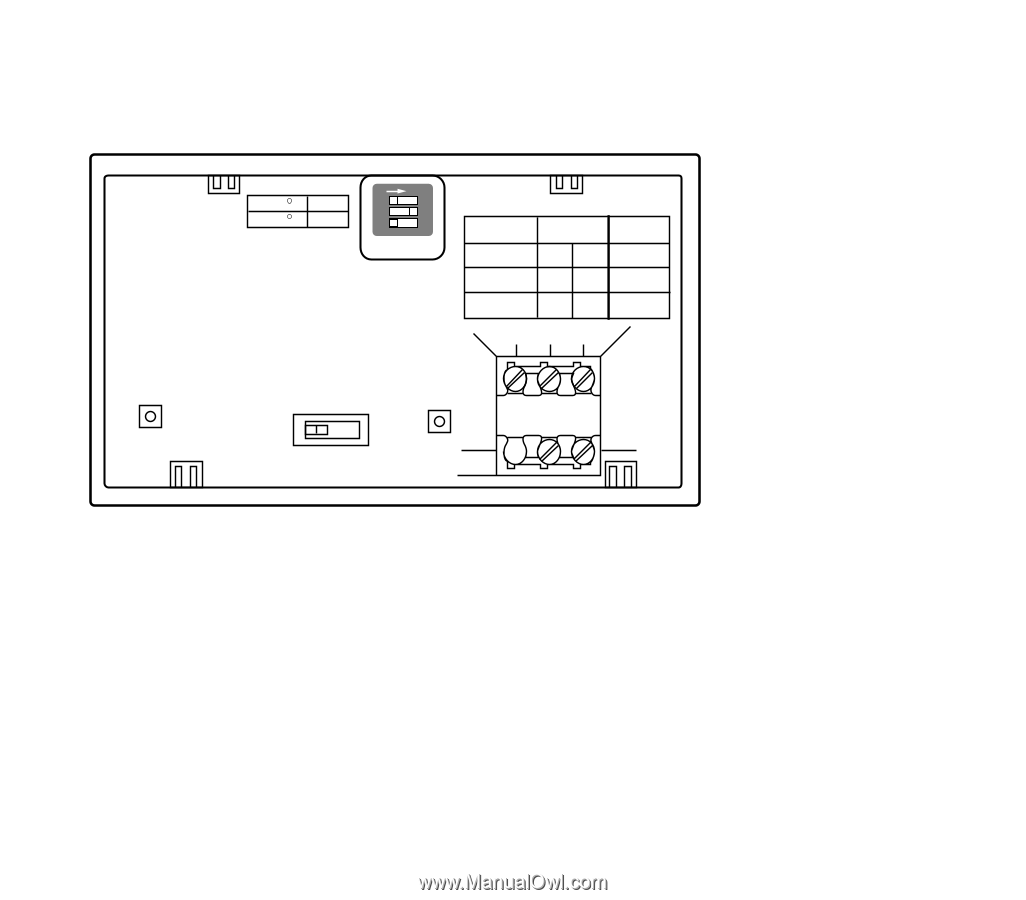
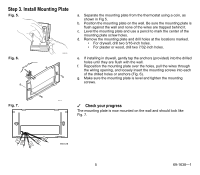
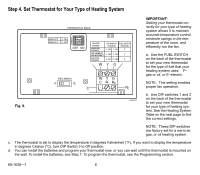
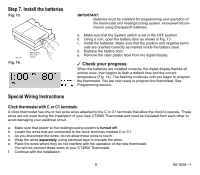
Step 4. Set Thermostat for Your Type of Heating System Fig. 8. THERMOSTAT BACK DISPLAY F DISPLAY C 3 - ON 3 - OFF 11 ON 22 33 OFF ON HEATING SYSTEM WARM AIR FURNACE HOT WATER OR HIGH EFFICIENCY ELECTRIC FURNACE DIP SWITCH FUEL SWITCH POSITION POSITION 1 - ON 2 - ON F 1 - OFF 2 - ON F 1 - ON 2 - OFF E W Y G FUEL SWITCH F E W Y G C R RC C RC M20637 IMPORTANT: Setting your thermostat correctly for your type of heating system allows it to maintain accurate temperature control, minimize swings in the temperature of the room, and efficiently run the fan. a. Use the FUEL SWITCH on the back of the thermostat to set your new thermostat for the type of fuel that your heating system uses: F- gas or oil, or E-electric. NOTE: This setting enables proper fan operation. b. Use DIP switches 1 and 2 on the back of the thermostat to set your new thermostat for your type of heating system. See the Heating System Table on the next page to find the correct settings. NOTE: These DIP switches are factory-set for a warm air, gas, or oil heating system. c. The thermostat is set to display the temperature in degrees Fahrenheit (°F). If you want to display the temperature in degrees Celsius (°C), turn DIP Switch 3 to Off position. d. You can install the batteries and program your thermostat now, or you can wait until the thermostat is mounted on the wall. To install the batteries, see Step 7. To program the thermostat, see the Programming section. 69-1638-1 6
-
 1
1 -
 2
2 -
 3
3 -
 4
4 -
 5
5 -
 6
6 -
 7
7 -
 8
8 -
 9
9 -
 10
10 -
 11
11 -
 12
12 -
13
-
14
-
15
-
16
-
17
-
18
-
19
-
20
-
21
-
22
-
23
-
24
 |
 |