Honeywell CT2800 Owner's Manual - Page 7
Heating System Table, Step 5. Wire Thermostat Terminals, Type of System, DIP Switches, and 2 - dip switch setting
 |
View all Honeywell CT2800 manuals
Add to My Manuals
Save this manual to your list of manuals |
Page 7 highlights
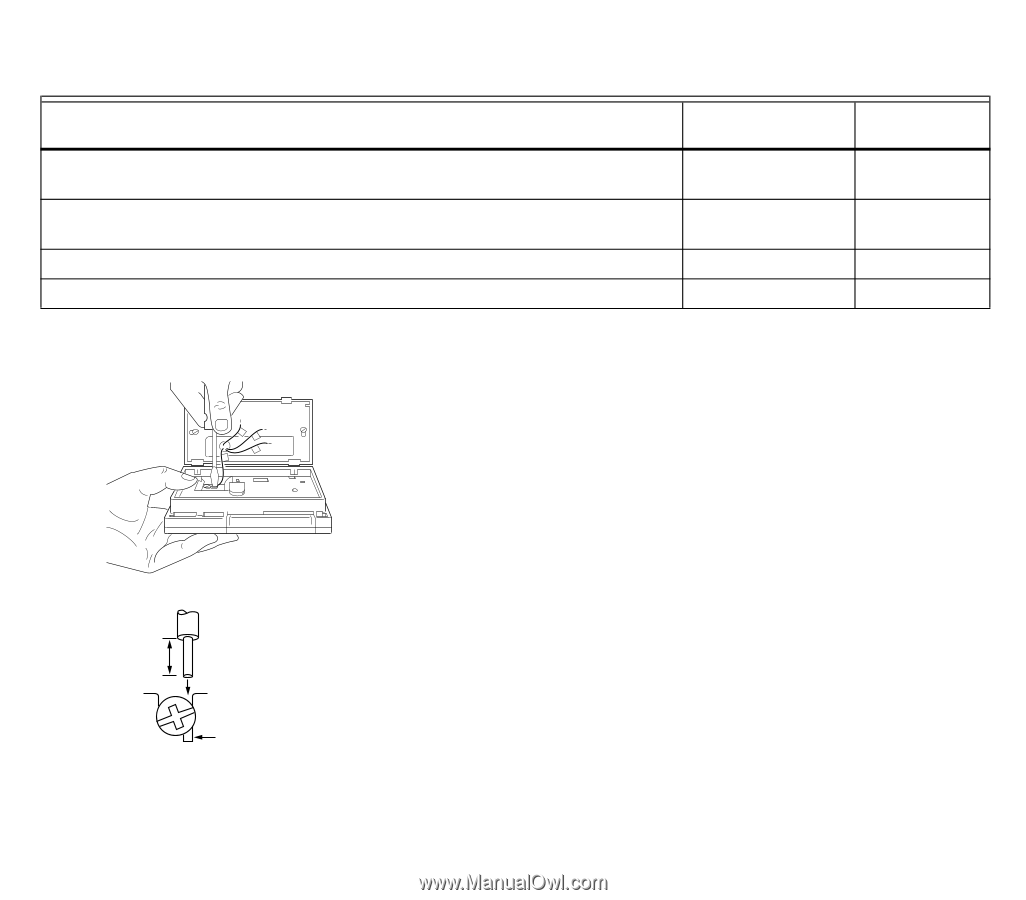
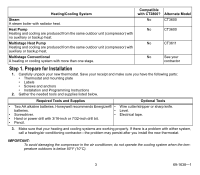
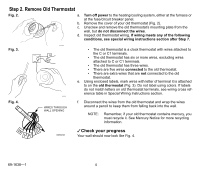
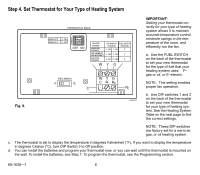
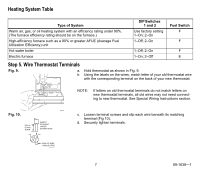
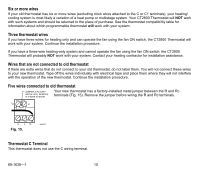
Heating System Table Type of System Warm air, gas, or oil heating system with an efficiency rating under 90%. (The furnace efficiency rating should be on the furnace.) High-efficiency furnace such as a 90% or greater AFUE (Average Fuel Utilization Efficiency) unit Hot water boiler Electric furnace DIP Switches 1 and 2 Use factory setting 1-On; 2-On 1-Off; 2-On Fuel Switch F F 1-Off; 2-On F 1-On; 2-Off E Step 5. Wire Thermostat Terminals Fig. 9. a. Hold thermostat as shown in Fig. 9. b. Using the labels on the wires, match letter of your old thermostat wire with the corresponding terminal on the back of your new thermostat. G Y W R NOTE: If letters on old thermostat terminals do not match letters on new thermostat terminals, all old wires may not need connecting to new thermostat. See Special Wiring Instructions section. Fig. 10. 5/16 in. (8 mm) STRIP M20125 INSERT STRAIGHT UNDER SCREW HEAD c. Loosen terminal screws and slip each wire beneath its matching terminal (Fig 10). d. Securely tighten terminals. END OF WIRE VISIBLE HERE M20126 7 69-1638-1
-
 1
1 -
 2
2 -
 3
3 -
 4
4 -
 5
5 -
 6
6 -
 7
7 -
 8
8 -
 9
9 -
 10
10 -
 11
11 -
 12
12 -
13
-
14
-
15
-
16
-
17
-
18
-
19
-
20
-
21
-
22
-
23
-
24
 |
 |