Honeywell CT2800 Owner's Manual - Page 9
Step 7. Install the batteries, Special Wiring Instructions, Clock thermostat with C or C1 terminals
 |
View all Honeywell CT2800 manuals
Add to My Manuals
Save this manual to your list of manuals |
Page 9 highlights
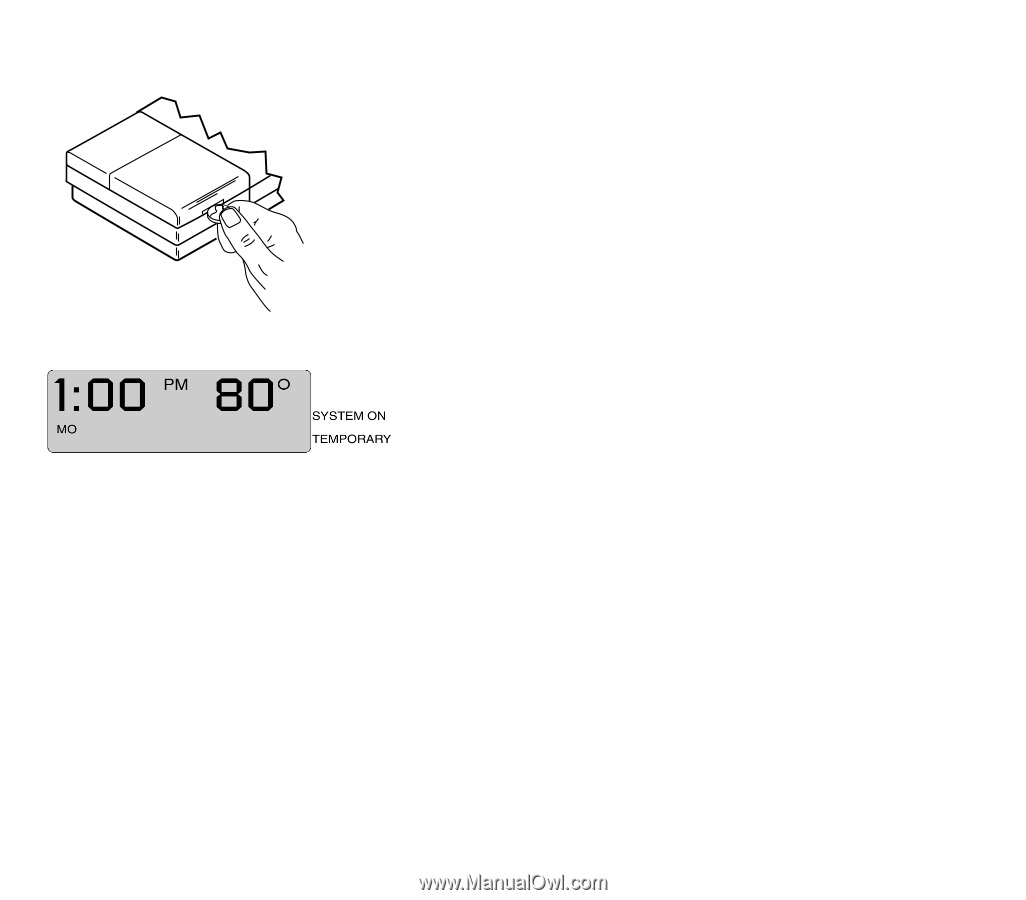
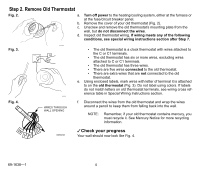
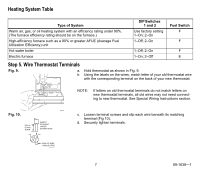
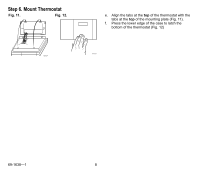
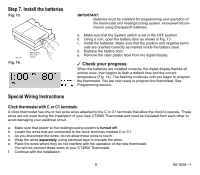
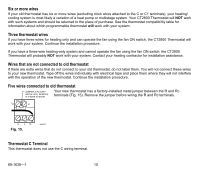
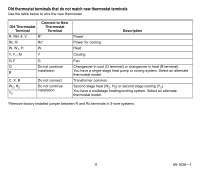
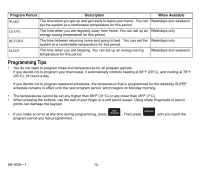
Step 7. Install the batteries Fig. 13. M1719C Fig. 14. REMOVING BATTERY DOOR IMPORTANT: Batteries must be installed for programming and operation of the thermostat and heating/cooling system. Honeywell recommends using Energizer® batteries. a. Make sure that the System switch is set in the OFF position. b. Using a coin, open the battery door as shown in Fig. 13. c. Install the batteries. Make sure that the positive and negative termi- nals are oriented correctly as marked inside the battery case. d. Replace the battery door. e. Remove the clear plastic label from the digital display. ✓ Check your progress When the batteries are installed correctly, the digital display flashes all entries once, then begins to flash a default time and the current temperature (Fig. 14). The flashing continues until you begin to program the thermostat. You are now ready to program the thermostat. See Programming section. Special Wiring Instructions Clock thermostat with C or C1 terminals A clock thermostat has one or two extra wires attached to the C or C1 terminals that allow the clock to operate. These wires are not used during the installation of your new CT2800 Thermostat and must be insulated from each other to avoid damaging your electrical circuit. a. Make sure that power to the heating/cooling system is turned off. b. Locate the wires that are connected to the clock terminals marked C or C1. c. As you disconnect the wires, do not allow these wires to touch. d. Wrap the wires separately, using electrical tape to insulate the wires. e. Place the wires where they do not interfere with the operation of the new thermostat. You will not connect these wires to your CT2800 Thermostat. f. Continue with the installation. 9 69-1638-1
-
 1
1 -
2
-
3
-
 4
4 -
 5
5 -
 6
6 -
 7
7 -
 8
8 -
 9
9 -
 10
10 -
 11
11 -
 12
12 -
 13
13 -
 14
14 -
15
-
16
-
17
-
18
-
19
-
20
-
21
-
22
-
23
-
24
 |
 |