Hoover FH40010B Manual - Page 6
HOW TO USE - filter
 |
UPC - 073502032183
View all Hoover FH40010B manuals
Add to My Manuals
Save this manual to your list of manuals |
Page 6 highlights
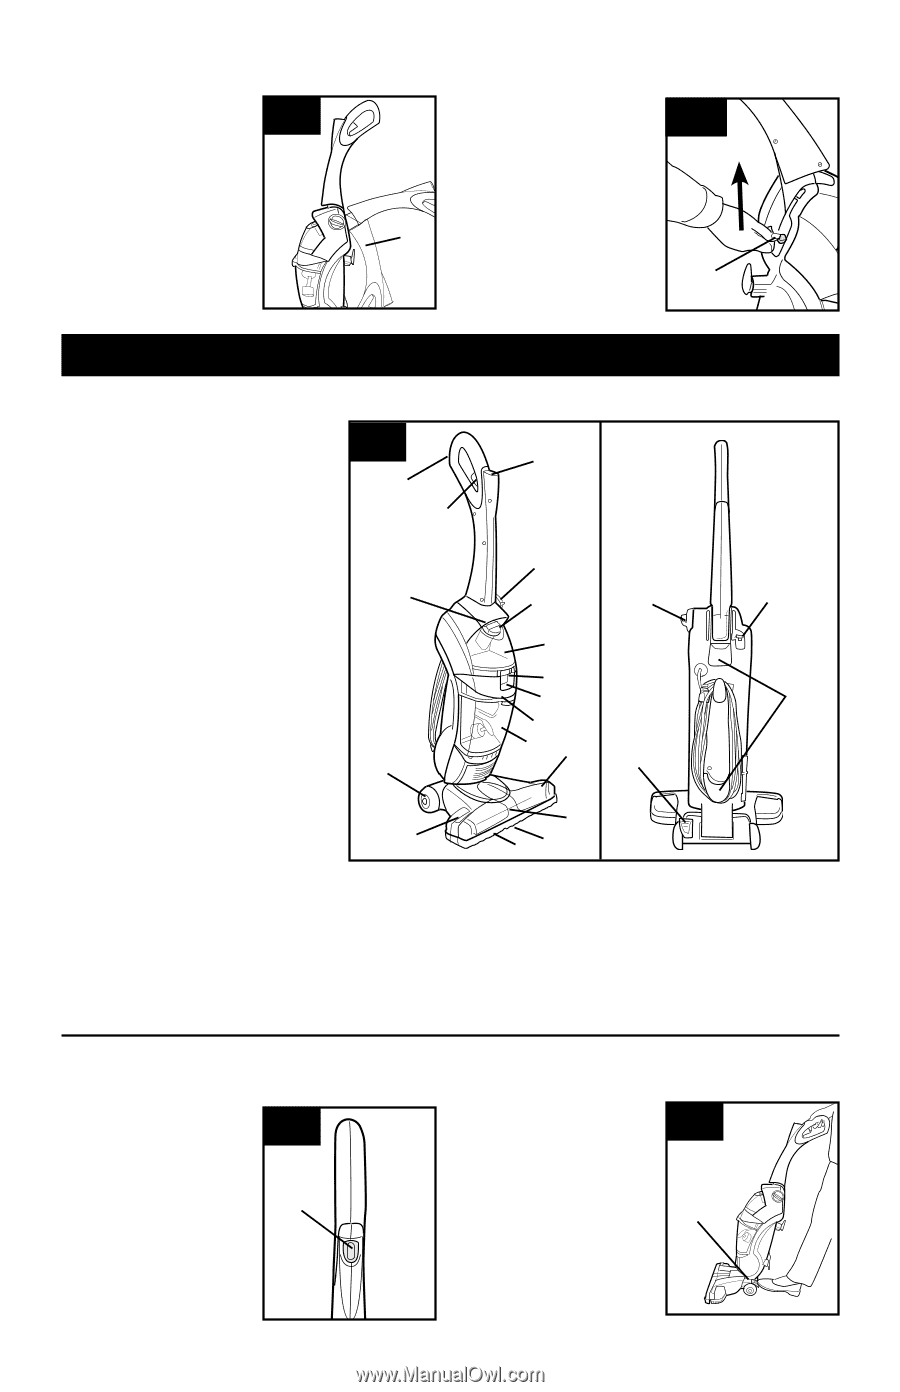
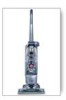
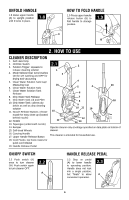
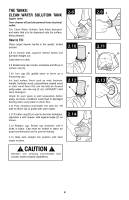
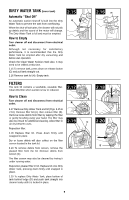
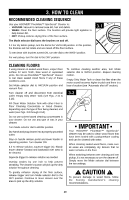
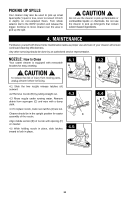
Unfold handle 1.8 Raise upper handle (A) to upright position until it locks in place. 1.8 How to fold handle 1.9 Press upper handle release button (B) to fold handle to storage position. 1.9 A B 2. HOW TO USE Cleaner Description 1. Soft Hand Grip 2. ON/OFF Switch 3. Solution Trigger: squeeze to 2.1 2 release cleaning solution 1 4. Mode Selector Dial: turns brushes 3 ON for wet washing and OFF for drying and vacuuming 5. Clean Water Solution Tank Cap/ 4 Measuring Cup 16 6. Clean Water Solution Tank 5 4 20 7. Clean Water Solution Tank Release 6 8. Dirty Water Tank Release 7 9. Dirty Water Tank Lid and Filter 10. Dirty Water Tank: collects dry debris as well as dirty cleaning solution 11. Nozzle Release Buttons: release 15 8 18 9 10 11 19 nozzle for easy clean-up (located behind nozzle) 12. Nozzle 11 13. Squeegee (underneath nozzle) 12 14 13 14. Bumper Operate cleaner only at voltage specified on data plate on bottom of 15. Soft-tread Wheels cleaner. 16. Carrying Handle 17. Upper Handle Release Button This cleaner is intended for household use. 18. Cord Hooks: top hook rotates for quick cord release 19. Handle Release Pedal ON/OFF switch 2.2 Push switch (A) once to turn cleaner ON. Push switch again to turn cleaner OFF. 2.2 A Handle release pedal 2.3 Step on pedal (A) to lower handle to operating position. Handle does not lock into a single position, but "floats" to allow convenient operation. 2.3 A 6
-
 1
1 -
 2
2 -
 3
3 -
 4
4 -
 5
5 -
 6
6 -
 7
7 -
 8
8 -
 9
9 -
 10
10 -
 11
11 -
 12
12 -
13
-
14
-
15
-
16
-
17
-
18
-
19
-
20
-
21
-
22
-
23
-
24
-
25
-
26
-
27
-
28
-
29
-
30
-
31
-
32
-
33
-
34
-
35
-
36
-
37
-
38
-
39
-
40
-
41
-
42
-
43
-
44
-
45
-
46
-
47
-
48
 |
 |