Hunter 18860 Owners Manual - Page 6
Basic, Steps, Install, Ceiling
 |
View all Hunter 18860 manuals
Add to My Manuals
Save this manual to your list of manuals |
Page 6 highlights
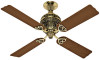
The Basic Steps to Take to Install Your Ceiling Fan 1., Select your installation site. If your ceiling is 8' to 81/z 1, use Step 4A ethe installation instruc- tions. If your ceiling is 812/ ' or higher, use Step 413 of the installation instrii9tions. 2. Inspect your fan. Check motor, sacked parts, and blades. See page 8. 3. Install the ceiling mounting hardware. Run electrical power off. Support electrical box. Drill holes for bracket. Place bushing in bracket and install bracket. See page 9. 4. Hang your fan. Securely install hanger bracket, pipe and canopies (1 or 2) in top of fan. TIGHTEN ALL SET SCREWS. Hang fan. See pages 11 and 12. 8-8 1/2 FT CEILING 8 1/2 FT & UP CEILING 5. Wire the fan. Make all electrical connec- tions and connect ground wire to hanger bracket. Install canopy. See page 13. 6
-
 1
1 -
 2
2 -
 3
3 -
 4
4 -
 5
5 -
 6
6 -
 7
7 -
 8
8 -
 9
9 -
 10
10 -
 11
11 -
 12
12 -
13
-
14
-
15
-
16
-
17
-
18
-
19
-
20
 |
 |
