Husqvarna 572 XP G Owner Manual - Page 21
Maintenance
 |
View all Husqvarna 572 XP G manuals
Add to My Manuals
Save this manual to your list of manuals |
Page 21 highlights
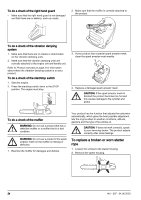
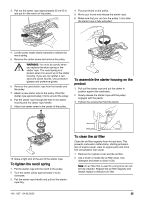
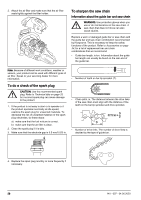
• For temperatures below -5°C/23°F or in conditions with snow, a winter cover is available. Assemble the winter cover on the starter housing. The winter cover decreases the flow of cool air and keeps snow away from the carburetor space. 23°F. Risk of too high engine temperature and damage to the engine. Heated handles (572XPG) The product has heated front and rear handles. The electrical heating coils are powered by a generator. Push the switch in the direction of the arrow to engage the function. Push the switch in the opposite direction to disengage the function. Note: Part number for winter cover: 575 52 75-01 CAUTION: Remove the winter cover if the temperature increases above -5°C/ Electrical carburetor heating (572XPG) Adjustment of the carburetor heating is done electrically through a thermostat. This keeps the correct carburetor temperature and prevents ice in the carburetor. Maintenance Introduction WARNING: Read and understand the safety chapter before you do maintenance on the product. Maintenance schedule Daily maintenance Weekly maintenance Monthly maintenance Clean the external parts of the prod- Clean the cooling system. Refer to Do a check of the brake band. Refer uct and make sure that there is no oil To clean the cooling system on page to To do a check of the brake band on the handles. 31. on page 22. Do a check of the throttle trigger and Do a check of the starter, starter rope Do a check of the clutch centre, throttle trigger lockout. Refer to To do and return spring. clutch drum and clutch spring. a check of the throttle trigger and throttle trigger lockout on page 23. Make sure that there is no damage on the vibration damping units. Lubricate the needle bearing. Refer Clean the spark plug. Refer to To do to To lubricate the needle bearing on a check of the spark plug on page page 29. 26. Clean and do a check of the chain brake. Refer to To do a check of the chain brake on page 23To do a check of the chain brake on page 23. Remove burrs from the edges of the guide bar. Refer to To do a check of the front hand guard and the chain brake activation on page 22. Clean the external parts of the carburettor. Do a check of the chain catcher. Re- Clean or replace the spark arrestor fer to To do a check of the chain mesh on the muffler. catcher on page 23. Do a check of the fuel filter and the fuel hose. Replace if necessary. 140 - 007 - 04.06.2020 21
-
 1
1 -
2
-
3
-
4
-
5
-
6
-
7
-
8
-
9
-
10
-
11
-
12
-
13
-
14
-
15
-
 16
16 -
 17
17 -
 18
18 -
 19
19 -
 20
20 -
 21
21 -
 22
22 -
 23
23 -
 24
24 -
 25
25 -
 26
26 -
27
-
28
-
29
-
30
-
31
-
32
-
33
-
34
-
35
-
36
-
37
-
38
-
39
-
40
-
41
-
42
-
43
-
44
-
45
-
46
-
47
-
48
-
49
-
50
-
51
-
52
-
53
-
54
-
55
-
56
-
57
-
58
-
59
-
60
-
61
-
62
-
63
-
64
-
65
-
66
-
67
-
68
-
69
-
70
-
71
-
72
-
73
-
74
-
75
-
76
-
77
-
78
-
79
-
80
-
81
-
82
-
83
-
84
-
85
-
86
-
87
-
88
-
89
-
90
-
91
-
92
-
93
-
94
-
95
-
96
-
97
-
98
-
99
-
100
-
101
-
102
-
103
-
104
-
105
-
106
-
107
-
108
-
109
-
110
-
111
-
112
-
113
-
114
-
115
-
116
-
117
-
118
-
119
-
120
 |
 |
