Husqvarna L321AH Owner Manual - Page 15
To set the cutting height, To start the product, To use the drive on the wheels, To adjust the drive
 |
View all Husqvarna L321AH manuals
Add to My Manuals
Save this manual to your list of manuals |
Page 15 highlights
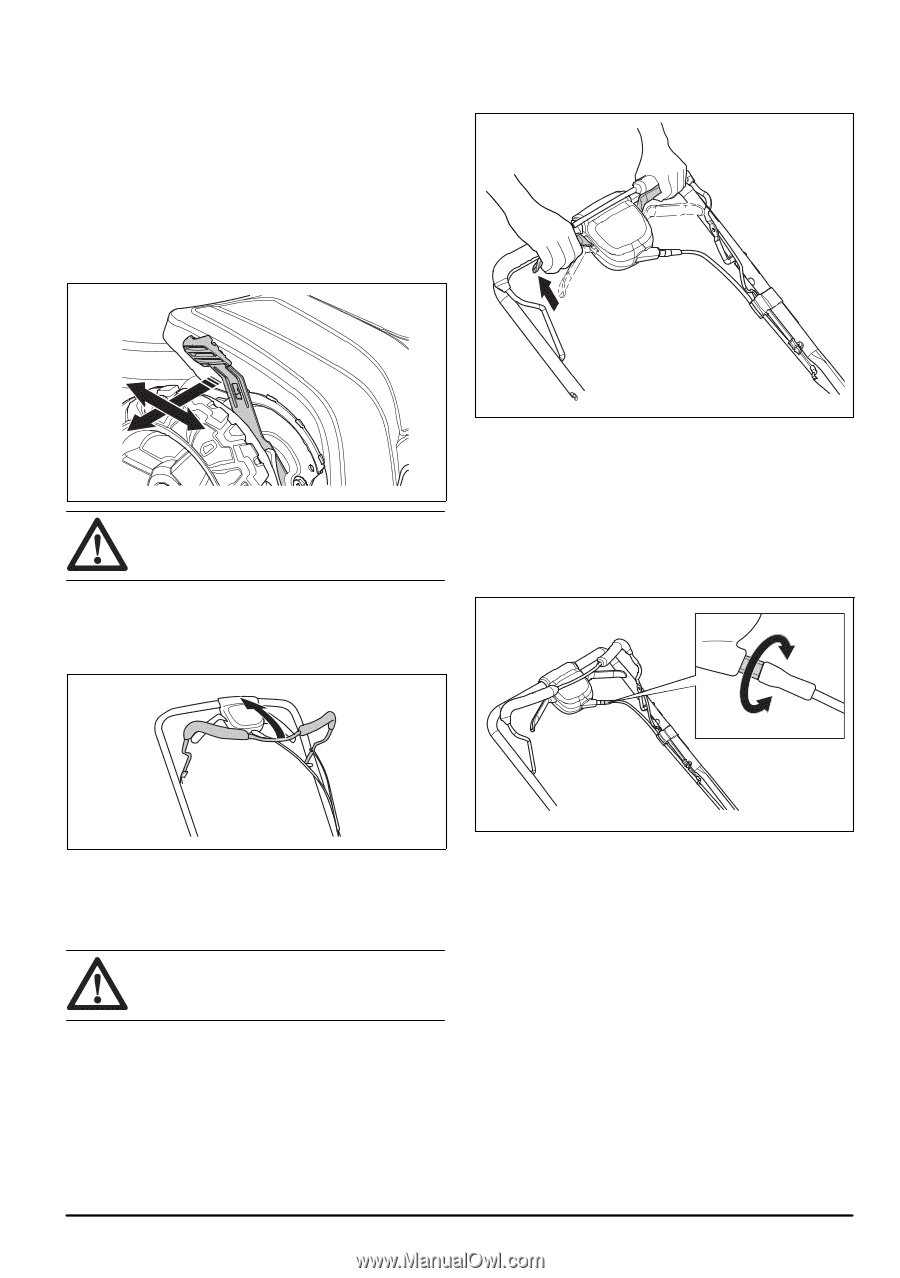
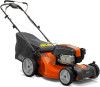
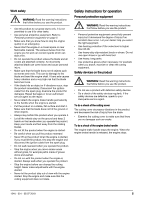
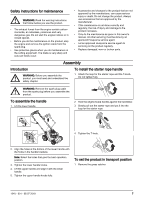
5. Move the product a minimum of 3 m (10 ft) from the position where you filled the tank before a start. To set the cutting height The cutting height can be adjusted in 9 levels. 1. Push the cutting height control in the direction of the wheel and then rearward to increase the cutting height. 2. Push the cutting height control in the direction of the wheel and then forward to decrease the cutting height. To use the drive on the wheels • Pull the drive levers in the direction of the handlebar. CAUTION: Do not set the cutting height too low. The blades can hit the ground if the surface of the lawn is not level. To start the product 1. Stay behind the product. 2. Hold the engine brake handle against the handlebar. • Before you pull the product rearward, disengage the drive and push the product forward approximately 10cm. • Release the drive levers to disengage the drive, for example when you go near an obstacle. To adjust the drive control cable • Use the adjuster screw to adjust the drive control cable. 3. Hold the starter rope handle with your right hand. 4. Slowly pull out the starter rope until you feel some resistance. 5. Pull with force to start the engine. WARNING: Do not twist the starter rope around your hand. • Turn off the engine. Always disconnect the spark plug before you operate the movable parts. • Turn the adjustment screw counterclockwise to tension the wire and increase the speed. • Turn the adjustment screw clockwise to extend the wire and reduce speed. To stop the product • To stop the drive only, release the drive levers. 1240 - 001 - 08.07.2019 9
-
 1
1 -
2
-
3
-
4
-
5
-
6
-
7
-
8
-
9
-
 10
10 -
 11
11 -
 12
12 -
 13
13 -
 14
14 -
 15
15 -
 16
16 -
 17
17 -
 18
18 -
 19
19 -
 20
20 -
21
-
22
-
23
-
24
-
25
-
26
-
27
-
28
-
29
-
30
-
31
-
32
-
33
-
34
-
35
-
36
-
37
-
38
-
39
-
40
-
41
-
42
-
43
-
44
-
45
-
46
-
47
-
48
-
49
-
50
-
51
-
52
-
53
-
54
-
55
-
56
-
57
-
58
-
59
-
60
-
61
-
62
-
63
-
64
-
65
-
66
-
67
-
68
 |
 |