IBM 419452u User Manual - Page 45
Installing, hot-swap, drive
 |
UPC - 883436026604
View all IBM 419452u manuals
Add to My Manuals
Save this manual to your list of manuals |
Page 45 highlights
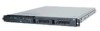
4. Pull the loops of the drive tray toward each other and pull the tray out of the bay. Installing a hot-swap hard disk drive The 3.5-inch drive hot-swap server models support either two SAS 3.5-inch hard disk drives or two SATA 3.5-inch hard disk drives. The 2.5-inch drive hot-swap server models support four 2.5-inch SAS hard disk drives. 2.5-inch drives The installation procedure is the same for any of these drives. The illustrations in this procedure show 3.5-inch SAS drives. To install a hot-swap hard disk drive, complete the following steps. Note: If you have only one hard disk drive, install it in the left or upper-left drive bay. Drive-tray assembly Drive handle (in open position) Filler panel Attention: To avoid damage to the hard disk drive connectors, make sure that the cover is in place and fully closed whenever you install or remove a hard disk drive. 1. Read the safety information that begins on page v and "Installation guidelines" on page 20. 2. Make sure that the server cover is in place and fully closed. 3. Remove the filler panel from the bay. Attention: To maintain proper system cooling, do not operate the server for more than 10 minutes without either a drive or filler panel installed in each bay. 4. Install the hard disk drive in the hot-swap bay: a. Make sure that the tray handle is open (that is, perpendicular to the front of the drive). Chapter 2. Installing optional devices 31
-
 1
1 -
2
-
3
-
4
-
5
-
6
-
7
-
8
-
9
-
10
-
11
-
12
-
13
-
14
-
15
-
16
-
17
-
18
-
19
-
20
-
21
-
22
-
23
-
24
-
25
-
26
-
27
-
28
-
29
-
30
-
31
-
32
-
33
-
34
-
35
-
36
-
37
-
38
-
39
-
 40
40 -
 41
41 -
 42
42 -
 43
43 -
 44
44 -
 45
45 -
 46
46 -
 47
47 -
 48
48 -
 49
49 -
 50
50 -
51
-
52
-
53
-
54
-
55
-
56
-
57
-
58
-
59
-
60
-
61
-
62
-
63
-
64
-
65
-
66
-
67
-
68
-
69
-
70
-
71
-
72
-
73
-
74
-
75
-
76
-
77
-
78
-
79
-
80
-
81
-
82
-
83
-
84
 |
 |
