IBM 419452u User Manual - Page 46
right-rear
 |
UPC - 883436026604
View all IBM 419452u manuals
Add to My Manuals
Save this manual to your list of manuals |
Page 46 highlights
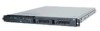
b. Align the drive assembly with the guide rails in the bay. c. Gently push the drive assembly into the bay until the drive stops. d. Push the tray handle to the closed (locked) position. e. Check the hard disk drive status LED to make sure that the hard disk drive is operating correctly. If the amber hard disk drive status LED for a drive is lit continuously, that drive is faulty and must be replaced. If the green hard disk drive activity LED is flashing, the drive is being accessed. If you have other devices to install, do so now. Otherwise, go to "Completing the installation" on page 38. Installing a new CD or DVD drive The server comes with a CD or CD/DVD drive installed. You can remove the drive and install a different one. See http://www.ibm.com/servers/eserver/serverproven/ compat/us/ for a list of CD or CD/DVD drives you can use with the server. To remove a CD or CD/DVD drive, complete the following steps. Release tab 1. Read the safety information that begins on page v and "Installation guidelines" on page 20. 2. Turn off the server and peripheral devices, and disconnect the power cords and all external cables. Remove the cover (see "Removing the cover" on page 22). 3. Pull the release tab (the rear of the drive-retention clip) toward the right side of the server to release the clip; then, while you pull the tab, pull the drive out of the bay. Note: You might have to push the right-rear corner of the drive toward the front of the server to move the drive initially. 32 IBM System x3250 M2 Types 4190 and 4194: User's Guide
-
 1
1 -
2
-
3
-
4
-
5
-
6
-
7
-
8
-
9
-
10
-
11
-
12
-
13
-
14
-
15
-
16
-
17
-
18
-
19
-
20
-
21
-
22
-
23
-
24
-
25
-
26
-
27
-
28
-
29
-
30
-
31
-
32
-
33
-
34
-
35
-
36
-
37
-
38
-
39
-
40
-
 41
41 -
 42
42 -
 43
43 -
 44
44 -
 45
45 -
 46
46 -
 47
47 -
 48
48 -
 49
49 -
 50
50 -
 51
51 -
52
-
53
-
54
-
55
-
56
-
57
-
58
-
59
-
60
-
61
-
62
-
63
-
64
-
65
-
66
-
67
-
68
-
69
-
70
-
71
-
72
-
73
-
74
-
75
-
76
-
77
-
78
-
79
-
80
-
81
-
82
-
83
-
84
 |
 |
