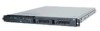
IBM 419452u User Manual - Page 47
Installing, optional, PCI-X, riser-card, assembly
 |
UPC - 883436026604
View all IBM 419452u manuals
Add to My Manuals
Save this manual to your list of manuals |
Page 47 highlights
Drive retention clip Alignment pins 4. Remove the retention clip from the drive and save it for future use. To install a CD or DVD drive, complete the following steps: 1. Read the safety information that begins on page v and "Installation guidelines" on page 20. 2. Make sure that the server and peripheral devices are turned off and that the power cords and all external cables are disconnected. Remove the cover (see "Removing the cover" on page 22). 3. Follow the instructions that come with the drive to set any jumpers or switches. Drive retention clip Alignment pins 4. Attach the drive retention clip to the side of the drive. 5. Slide the drive into the CD/DVD drive bay until the drive clicks into place. If you have other devices to install or remove, do so now. Otherwise, go to "Completing the installation" on page 38. Installing an optional PCI-X riser-card assembly The server comes with a PCI Express riser-card assembly installed. You can remove the assembly and install an optional PCI-X assembly. See http://www.ibm.com/servers/eserver/serverproven/compat/us/ for a list of riser-card assemblies you can install in the server. The PCI-X riser-card assembly provides one PCI-X expansion slot on the riser card. Install only a PCI-X or PCI adapter in the expansion slot. To install a PCI-X riser-card assembly, complete the following steps. 1. Read the safety information that begins on page v and "Installation guidelines" on page 20. 2. Turn off the server and peripheral devices, and disconnect the power cord and all external cables. 3. Remove the cover (see "Removing the cover" on page 22). Chapter 2. Installing optional devices 33
-
 1
1 -
2
-
3
-
4
-
5
-
6
-
7
-
8
-
9
-
10
-
11
-
12
-
13
-
14
-
15
-
16
-
17
-
18
-
19
-
20
-
21
-
22
-
23
-
24
-
25
-
26
-
27
-
28
-
29
-
30
-
31
-
32
-
33
-
34
-
35
-
36
-
37
-
38
-
39
-
40
-
41
-
 42
42 -
 43
43 -
 44
44 -
 45
45 -
 46
46 -
 47
47 -
 48
48 -
 49
49 -
 50
50 -
 51
51 -
 52
52 -
53
-
54
-
55
-
56
-
57
-
58
-
59
-
60
-
61
-
62
-
63
-
64
-
65
-
66
-
67
-
68
-
69
-
70
-
71
-
72
-
73
-
74
-
75
-
76
-
77
-
78
-
79
-
80
-
81
-
82
-
83
-
84
 |
 |
