IBM 8482 User Manual - Page 51
Installing a simple-swap Serial ATA hard disk drive in bay 5
 |
UPC - 000435244659
View all IBM 8482 manuals
Add to My Manuals
Save this manual to your list of manuals |
Page 51 highlights
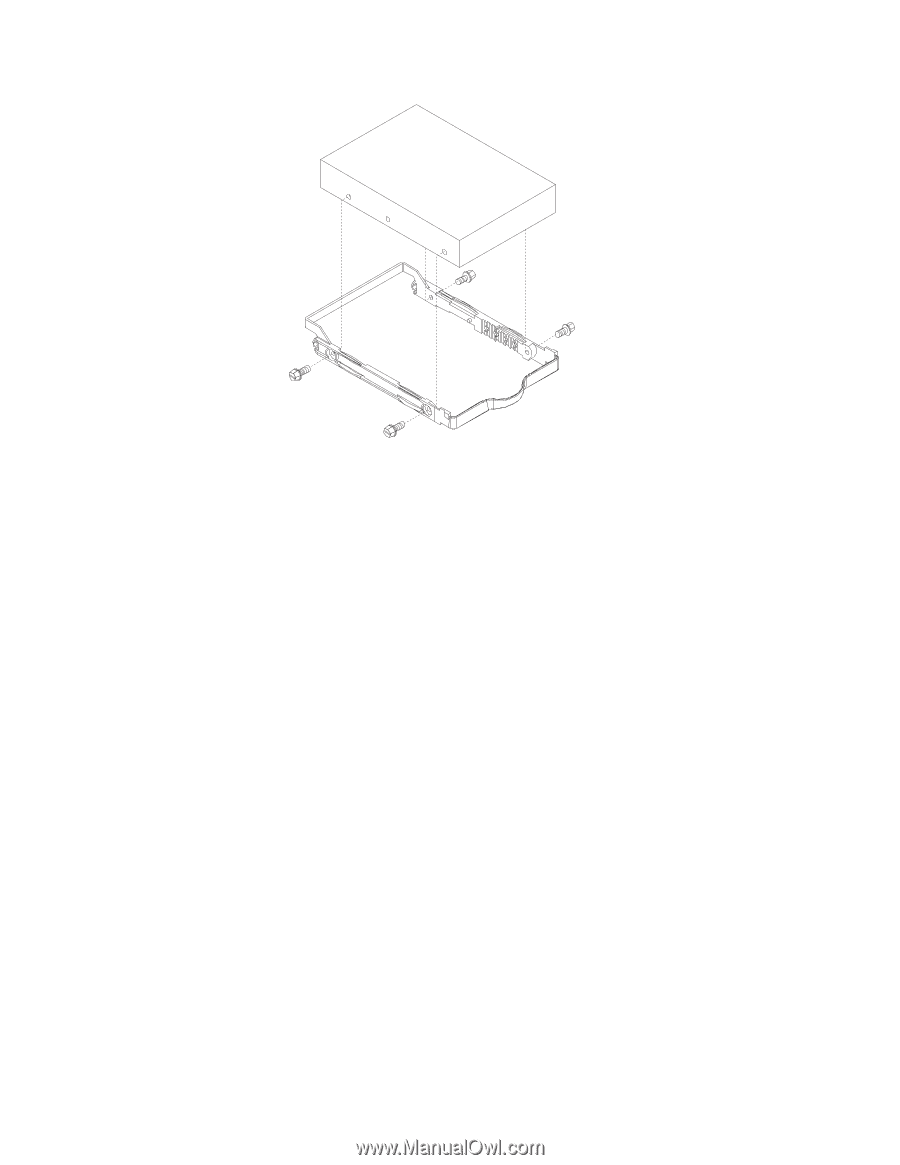
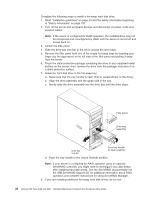
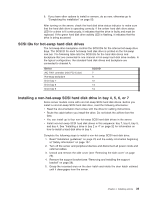
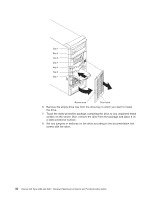
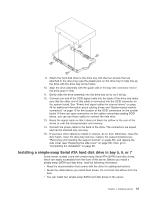
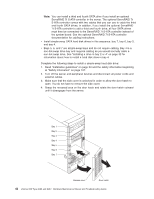
9. Attach the hard disk drive to the drive tray with the four screws that are attached to the drive tray (use the plastic pins on the drive tray to help line up the drive with the drive tray screw holes). 10. Align the drive assembly with the guide rails in the bay (the connector end of the drive goes in first). 11. Gently slide the drive assembly into the drive bay as far as it will go. 12. Connect one end of the SCSI signal cable into the back of the drive and make sure that the other end of this cable is connected into the SCSI connector on the system board. See "Power and signal cables for internal drives" on page 43 for additional information about cabling drives and "System-board internal connectors" on page 70 for the location of the SCSI connectors on the system board. If there are open connectors on the cables connecting existing SCSI drives, you can use these cables to connect the new drive. 13. Route the signal cable so that it does not block the airflow to the rear of the drives or over the microprocessor and memory. 14. Connect the power cable to the back of the drive. The connectors are keyed and can be inserted only one way. 15. If you have other options to install or remove, do so now. Otherwise, close the door hatch, close the drive-bay lock bar, replace the support bracket (see "Removing and installing the support bracket" on page 28), and replace the side cover (see "Replacing the side cover" on page 50); then, go to "Completing the installation" on page 50. Installing a simple-swap Serial ATA hard disk drive in bay 5, 6, or 7 Some server models come with simple-swap Serial ATA (SATA) hard disk drives, which are easily accessible from the front of the server. Before you install a simple-swap SATA hard disk drive, read the following information: v Read the documentation that comes with the drive for cabling instructions. v Route the cable before you install fixed drives. Do not block the airflow from the fans. v You can install two simple-swap SATA hard disk drives in the server. Chapter 4. Installing options 41
-
 1
1 -
2
-
3
-
4
-
5
-
6
-
7
-
8
-
9
-
10
-
11
-
12
-
13
-
14
-
15
-
16
-
17
-
18
-
19
-
20
-
21
-
22
-
23
-
24
-
25
-
26
-
27
-
28
-
29
-
30
-
31
-
32
-
33
-
34
-
35
-
36
-
37
-
38
-
39
-
40
-
41
-
42
-
43
-
44
-
45
-
 46
46 -
 47
47 -
 48
48 -
 49
49 -
 50
50 -
 51
51 -
 52
52 -
 53
53 -
 54
54 -
 55
55 -
 56
56 -
57
-
58
-
59
-
60
-
61
-
62
-
63
-
64
-
65
-
66
-
67
-
68
-
69
-
70
-
71
-
72
-
73
-
74
-
75
-
76
-
77
-
78
-
79
-
80
-
81
-
82
-
83
-
84
-
85
-
86
-
87
-
88
-
89
-
90
-
91
-
92
-
93
-
94
-
95
-
96
-
97
-
98
-
99
-
100
-
101
-
102
-
103
-
104
-
105
-
106
-
107
-
108
-
109
-
110
-
111
-
112
-
113
-
114
-
115
-
116
-
117
-
118
-
119
-
120
-
121
-
122
-
123
-
124
-
125
-
126
-
127
-
128
-
129
-
130
-
131
-
132
-
133
-
134
-
135
-
136
-
137
-
138
-
139
-
140
-
141
-
142
-
143
-
144
-
145
-
146
-
147
-
148
-
149
-
150
-
151
-
152
-
153
-
154
-
155
-
156
-
157
-
158
-
159
-
160
 |
 |