IBM 8676 Hardware Maintenance Manual - Page 33
Viewing, System, Error
 |
UPC - 087944770107
View all IBM 8676 manuals
Add to My Manuals
Save this manual to your list of manuals |
Page 33 highlights
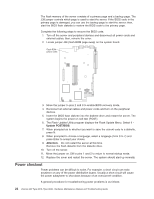
set, you must enter the administrator password, not the power-on password, to run the diagnostic programs. 2. When the message F2 for Diagnostics appears, press F2. 3. Type the appropriate password; then, press Enter. 4. Select either Extended or Basic from the top of the screen. 5. When the Diagnostic Programs screen appears, select the test you want to run from the list that appears; then, follow the instructions on the screen. Notes: a. You can press F1 while running the diagnostic programs to obtain help information. You also can press F1 from within a help screen to obtain online documentation from which you can select different categories. To exit from the help information and return to where you left off, press Esc. b. If the server stops during testing and you cannot continue, restart the server and try running the diagnostic programs again. If the problem remains, replace the component that was being tested when the server stopped. c. The keyboard and mouse (pointing device) tests assume that a keyboard and mouse are attached to the server. d. If you run the diagnostic programs with either no mouse or a USB mouse attached to the server, you will not be able to navigate between test categories using the Next Cat and Prev Cat buttons. All other functions provided by mouse-selectable buttons are also available using the function keys. e. You can test the USB keyboard by using the regular keyboard test. The regular mouse test can test a USB mouse. Also, you can run the USB interface test only if there are no USB devices attached. f. You can view server configuration information (such as system configuration, memory contents, interrupt request (IRQ) use, direct memory access (DMA) use, device drivers, and so on) by selecting Hardware Info from the top of the screen. If the diagnostic programs do not detect any hardware errors but the problem persists during normal server operations, a software error might be the cause. If you suspect a software problem, see the information that comes with the software package. Viewing the test log When the tests are completed, you can view the test log by selecting Utility from the top of the screen and then selecting View Test Log. Notes: 1. You can view the test log only while you are in the diagnostic programs. When you exit the diagnostic programs, the test log is cleared (saved test logs are not affected). To save the test log so that you can view it later, click Save Log on the diagnostic programs screen and specify a location and name for the saved log file. 2. To save the test log to a diskette, you must use a diskette that you have formatted yourself; this function does not work with preformatted diskettes. If the diskette has sufficient space for the test log, the diskette may contain other data. Viewing the System Error log You can also view the System Error log from the diagnostic programs. See the instructions in "POST error logs" on page 21. Chapter 3. Diagnostics 23
-
 1
1 -
2
-
3
-
4
-
5
-
6
-
7
-
8
-
9
-
10
-
11
-
12
-
13
-
14
-
15
-
16
-
17
-
18
-
19
-
20
-
21
-
22
-
23
-
24
-
25
-
26
-
27
-
 28
28 -
 29
29 -
 30
30 -
 31
31 -
 32
32 -
 33
33 -
 34
34 -
 35
35 -
 36
36 -
 37
37 -
 38
38 -
39
-
40
-
41
-
42
-
43
-
44
-
45
-
46
-
47
-
48
-
49
-
50
-
51
-
52
-
53
-
54
-
55
-
56
-
57
-
58
-
59
-
60
-
61
-
62
-
63
-
64
-
65
-
66
-
67
-
68
-
69
-
70
-
71
-
72
-
73
-
74
-
75
-
76
-
77
-
78
-
79
-
80
-
81
-
82
-
83
-
84
-
85
-
86
-
87
-
88
-
89
-
90
-
91
-
92
-
93
-
94
-
95
-
96
-
97
-
98
-
99
-
100
-
101
-
102
-
103
-
104
-
105
-
106
-
107
-
108
-
109
-
110
-
111
-
112
-
113
-
114
-
115
-
116
-
117
-
118
-
119
-
120
-
121
-
122
-
123
-
124
-
125
-
126
-
127
-
128
-
129
-
130
-
131
-
132
-
133
-
134
-
135
-
136
-
137
-
138
-
139
-
140
-
141
-
142
-
143
-
144
-
145
-
146
-
147
-
148
-
149
-
150
-
151
-
152
-
153
-
154
-
155
-
156
-
157
-
158
-
159
-
160
-
161
-
162
-
163
-
164
-
165
-
166
-
167
-
168
-
169
-
170
-
171
-
172
 |
 |
