IBM 8837 User Manual - Page 35
Connecting, cables
 |
UPC - 000435421401
View all IBM 8837 manuals
Add to My Manuals
Save this manual to your list of manuals |
Page 35 highlights
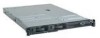
Attention: Before sliding the cover forward, make sure that all the tabs on the front, rear, and side of the cover engage the chassis correctly. If all the tabs do not engage the chassis correctly, it will be very difficult to remove the cover later. 2. Position the cover on top of the server and slide it forward. 3. Press down on the cover release latch until the cover properly engages all the inset tabs on the server. Cover release latch Fan door Fan door 4. Close the fan doors. 5. Install the server in the rack. See the Rack Installation Instructions that come with the server for details. Notes: a. After cabling the server, you might need to run the Configuration/Setup Utility program to update the server configuration, depending on the options that you installed. See "Updating the server configuration" on page 24 for more information. b. If you installed a SCSI drive, check the LEDs to verify proper operation. Connecting the cables The following illustrations show the locations of the input and output connectors on the server. Detailed cabling instructions are in the Rack Installation Instructions that come with the server. Notes: 1. You must turn off the server before connecting cables to or disconnecting any cables from the server (see "Turning off the server" on page 32). 2. See the documentation that comes with your options for additional cabling instructions. It might be easier for you to route cables before you install certain options. 3. Cable identifiers are printed on the cables that come with the server and options. Use these identifiers to connect the cables to the correct connectors. Chapter 2. Installing options 23
-
 1
1 -
2
-
3
-
4
-
5
-
6
-
7
-
8
-
9
-
10
-
11
-
12
-
13
-
14
-
15
-
16
-
17
-
18
-
19
-
20
-
21
-
22
-
23
-
24
-
25
-
26
-
27
-
28
-
29
-
 30
30 -
 31
31 -
 32
32 -
 33
33 -
 34
34 -
 35
35 -
 36
36 -
 37
37 -
 38
38 -
 39
39 -
 40
40 -
41
-
42
-
43
-
44
-
45
-
46
-
47
-
48
-
49
-
50
-
51
-
52
-
53
-
54
-
55
-
56
-
57
-
58
-
59
-
60
-
61
-
62
-
63
-
64
-
65
-
66
-
67
-
68
-
69
-
70
-
71
-
72
-
73
-
74
-
75
-
76
-
77
-
78
-
79
-
80
-
81
-
82
-
83
-
84
-
85
-
86
-
87
-
88
-
89
-
90
-
91
-
92
-
93
-
94
-
95
-
96
-
97
-
98
-
99
-
100
-
101
-
102
-
103
-
104
-
105
-
106
-
107
-
108
-
109
-
110
-
111
-
112
-
113
-
114
 |
 |
