Icom IC-M803 Instruction Manual - Page 81
Mounting, Mounting location, Mounting the remote controller, Mounting the Main unit
 |
View all Icom IC-M803 manuals
Add to My Manuals
Save this manual to your list of manuals |
Page 81 highlights
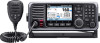
9 CONNECTIONS AND INSTALLATION ■■Mounting DDMounting location Select a location that provides easy access to the controller for navigation safety, has proper ventilation, and is not subject to sea spray. The controller should be in your line of sight when operating it. CAUTION: KEEP the transceiver and microphone at least 1 meter (3.3 ft) away from your vessel's magnetic navigation compass. DDMounting the Main unit You can mount the Main unit using the mounting bracket supplied with your transceiver. RRWARNING! NEVER mount the transceiver's Main unit overhead. The weight of the Main unit is approximately 4.41 kg (9.7 lb), and it could easily fall due to wave shocks or vibration. The unit must be mounted on a flat hard surface only. 1. Mount the bracket securely to a surface that supports more than 10 kg (22 lb) using the 4 supplied screws (5 × 20 mm). 2. Attach the Main unit to the bracket. 3. Attach the 4 bolts (5 × 8 mm) supplied with the mounting kit to both sides of the Main unit. (Torque: 3 N•m) 9 Mounting Example DDMounting the remote controller You can mount the remote controller on a dashboard using the mounting bracket supplied with your transceiver. 1. Mount the bracket securely to a surface which is more than 10 mm thick and can support more than 2 kg (4.4 lb) using the 5 supplied screws (5 × 20 mm). 2. Attach the remote controller to the bracket so that the face of the remote controller is in your line of sight when operating it. LLAdjust the function display angle to be easy-to-read. 3. Attach the supplied knobs to both sides of the remote controller. Mounting Example 73
-
 1
1 -
2
-
3
-
4
-
5
-
6
-
7
-
8
-
9
-
10
-
11
-
12
-
13
-
14
-
15
-
16
-
17
-
18
-
19
-
20
-
21
-
22
-
23
-
24
-
25
-
26
-
27
-
28
-
29
-
30
-
31
-
32
-
33
-
34
-
35
-
36
-
37
-
38
-
39
-
40
-
41
-
42
-
43
-
44
-
45
-
46
-
47
-
48
-
49
-
50
-
51
-
52
-
53
-
54
-
55
-
56
-
57
-
58
-
59
-
60
-
61
-
62
-
63
-
64
-
65
-
66
-
67
-
68
-
69
-
70
-
71
-
72
-
73
-
74
-
75
-
 76
76 -
 77
77 -
 78
78 -
 79
79 -
 80
80 -
 81
81 -
 82
82 -
 83
83 -
 84
84 -
 85
85 -
 86
86 -
87
-
88
-
89
-
90
-
91
-
92
-
93
-
94
-
95
-
96
 |
 |
