JVC GR D770 Instructions - Page 36
Iris Lock, Backlight Compensation, Spot Exposure Control
 |
UPC - 683728163846
View all JVC GR D770 manuals
Add to My Manuals
Save this manual to your list of manuals |
Page 36 highlights
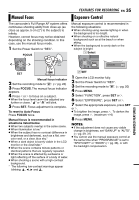
36 EN FEATURES FOR RECORDING Iris Lock Spot Exposure Control Like the pupil of the human eye, the iris contracts in well-lit environments to keep too much light from entering, and dilates in dim environments to allow in more light. Use this function in the following situations: ● When shooting a moving subject. ● When the distance to the subject changes (so its size in the LCD monitor or the viewfinder changes), such as when the subject is backing away. ● When shooting on a reflective natural background such as at the beach or when skiing. ● When shooting objects under a spotlight. ● When zooming. 1 Perform steps 1 - 6 in "Exposure Control" (੬ pg. 35) 2 Adjust zoom so that the subject fills the LCD monitor or the viewfinder, then press and hold SET or 2 for over 2 seconds. The " " indication appears. 3 Press SET or 2. The iris is locked. 4 Press MENU. Backlight Compensation Backlight compensation brightens the subject quickly. With simple operation, backlight compensation feature brightens the dark subject portion by increasing the exposure. 1 Set the Power Switch to "REC". M2 Set the recording mode to SET " ". (੬ pg. 20) 3 Press so that the Backlight Compensation indicator " " appears. To cancel Backlight Compensation Press twice so that the " " indicator disappears. NOTE: Using Backlight Compensation may cause the light around the subject to become too bright and the subject to become white. Selection of a spot metering area enables more precise exposure compensation. M 1 Set the Power Switch to "REC". 2 Set the recording mode to " ". (੬ pg. 20) 3 Press twice so that the Spot Exposure Control indicator " " appears. ● A spot metering area frame appears at the center of the LCD monitor/viewfinder. 4 Press SET. ● Spot Exposure Control is engaged. ● Exposure is adjusted to make the brightness of the selected area most appropriate. To lock the iris After step 3, press and hold SET over 2 seconds. The " " indication appears and the iris is locked. To cancel Spot Exposure Control Press once so that the " " indicator disappears. NOTES: ● Depending on the shooting location and condition, optimum result may not be attained. ● "STROBE" in "EFFECT" cannot be used with Spot Exposure Control.
-
 1
1 -
2
-
3
-
4
-
5
-
6
-
7
-
8
-
9
-
10
-
11
-
12
-
13
-
14
-
15
-
16
-
17
-
18
-
19
-
20
-
21
-
22
-
23
-
24
-
25
-
26
-
27
-
28
-
29
-
30
-
 31
31 -
 32
32 -
 33
33 -
 34
34 -
 35
35 -
 36
36 -
 37
37 -
 38
38 -
 39
39 -
 40
40 -
 41
41 -
42
-
43
-
44
-
45
-
46
-
47
-
48
 |
 |
