Jensen MCD9424RC Operation Manual - Page 10

Installation - owners manual

Page 10 highlights

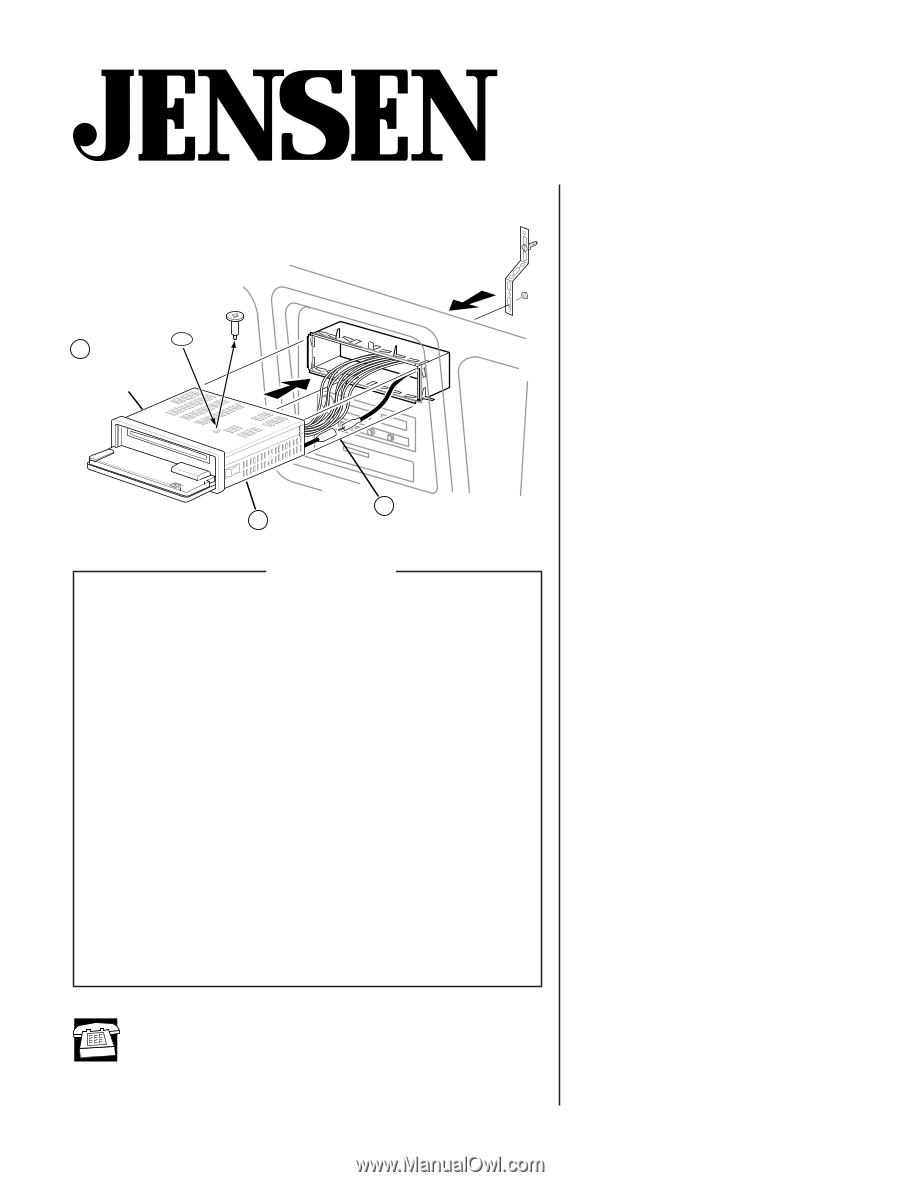
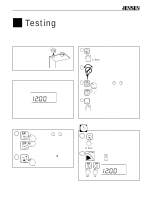
® Installation How to Install the MCD 9424JA Marine AM/FM Stereo Radio/Compact Disc Player Final 3 Installation (page 8) 1 Install wiring 2 Connect and (pages 4 and 5) test radio (pages 6 and 7) Welcome! What you're holding in your hands is no ordinary owner's manual. We've tried to make the instructions in this book clear and easy to follow. For your Jensen stereo to work right, it must be installed correctly. This manual will show you how to install your new stereo like a pro. It's a good idea to read all of these instructions before you begin the installation. Most installations are straightforward and can be handled by a do-it-yourselfer with the right tools, patience, and the ability to follow instructions. But, do-it-yourself installation isn't for everyone. If you still don't feel confident after reading this book, consider turning the installation job over to someone better suited to it. Warranty Service If your Jensen stereo should ever require service, you will need to have the original dated receipt. If you ever need to return the unit for any reason, always include the receipt with the product. Contents Installation 2 Before You Begin Installation ..... 2 Tools and Supplies Needed ....... 2 Speaker Requirements 2 Important Installation Note ......... 2 • Upgrading your System ...... 2 Wiring 3 • Fuse Adapters 3 Disconnect Battery 3 Connect Wires 3 Wiring Diagram 4 Testing 5 Reconnect Battery 5 Test Power Wiring 5 Test Antenna Connection 5 Test Memory Wiring 5 Set the Clock 5 Test Speaker Connections ......... 6 Final Installation 7 Protective Cover 7 Troubleshooting 8 • Securing Wires 8 Reset Button 8 Specifications and Warranty 9 Technical Assistance For technical assistance with the installation of the MCD 9424JA, call 1-800-323-0221.

  • 1
  • 2
  • 3
  • 4
  • 5
  • 6
  • 7
  • 8
  • 9
  • 10
  • 11
  • 12
  • 13
  • 14
  • 15
  • 16
  • 17
  • 18

How to Install the MCD 9424JA Marine
AM/FM Stereo Radio/Compact Disc
Player
®
Contents
Technical Assistance
For technical assistance with the installation of the
MCD 9424JA, call 1-800-323-0221.
Installation
Welcome!
What you're holding in your hands is no ordinary owner's
manual. We've tried to make the instructions in this book
clear and easy to follow.
For your Jensen stereo to work right, it must be installed
correctly. This manual will show you how to install your new
stereo like a pro. It's a good idea to read all of these
instructions before you begin the installation. Most
installations are straightforward and can be handled by a
do-it-yourselfer with the right tools, patience, and the ability
to follow instructions. But, do-it-yourself installation isn't for
everyone. If you still don't feel confident after reading this
book, consider turning the installation job over to someone
better suited to it.
WarrantyService
If your Jensen stereo should ever require service, you will
need to have the original dated receipt. If you ever need to
return the unit for any reason, always include the receipt
with the product.
Installation
.............................
2
Before You Begin Installation
.....
2
Tools and Supplies Needed
.......
2
Speaker Requirements
..............
2
Important Installation Note
.........
2
• Upgrading your System
......
2
Wiring
.......................................
3
Fuse Adapters
....................
3
Disconnect Battery
.....................
3
Connect Wires
...........................
3
Wiring Diagram
..........................
4
Testing
....................................
5
Reconnect Battery
.....................
5
Test Power Wiring
......................
5
Test Antenna Connection
...........
5
Test Memory Wiring
...................
5
Set the Clock
..............................
5
Test Speaker Connections
.........
6
Final Installation
.........................
7
Protective Cover
........................
7
Troubleshooting
...................
8
• Securing Wires
...................
8
Reset Button
..............................
8
Specifications
and Warranty
.........................
9
3
1
2
Install wiring
(pages 4 and 5)
Final
Installation
(page 8)
Connect and
test radio
(pages 6 and 7)