Jensen MCD9424RC Operation Manual - Page 16
Final Installation, Protective Cover - faceplate
 |
UPC - 043258014030
View all Jensen MCD9424RC manuals
Add to My Manuals
Save this manual to your list of manuals |
Page 16 highlights
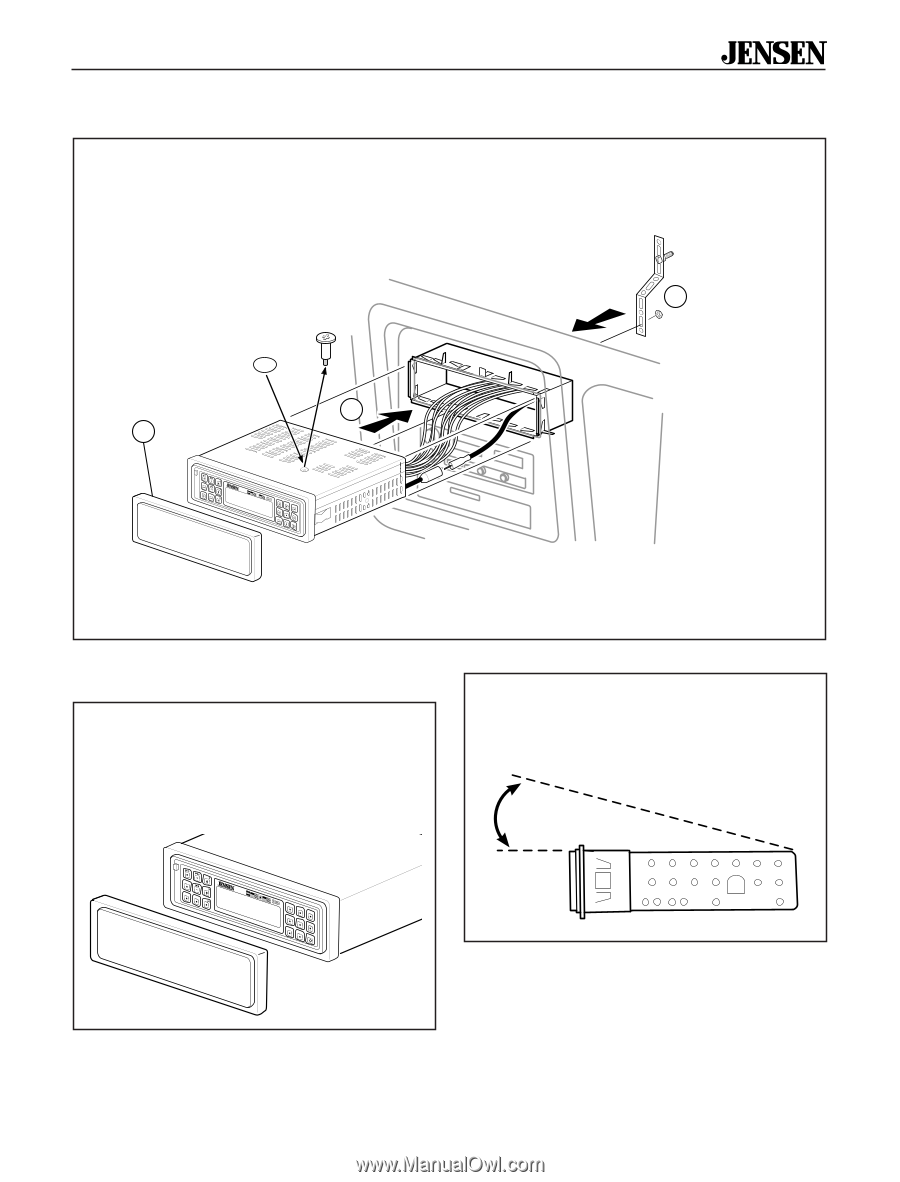
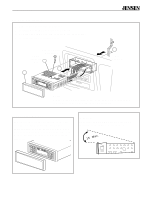
® MCD 9424JA Final Installation 1. Slide radio chassis into half-sleeve. 2. Install the supplied back strap and secure. 3. Reinstall any items you removed from the dashboard. 4. Install protective faceplate cover. Remove Before Installation Apply adhesive dot 1 4 2 Nut (supplied) OPEN VOL AS/PS VOL WB BAND SEL/ ® ST SHUFFLE 8 X OVERSAMPLING • 4 X 25WATTS CH COMPACT DIGITAL AUDIO MCD-9424JA W1 1 W2 2 W3 3 RPT 4 SHF 5 SCN 6 LOUD DISP PWR Note: Always install a back strap to the head unit. Proper installation is essential for good performance and reliability. Protective Cover The translucent rubber protective cover slips over the faceplate to provide protection against water. You can access controls when the cover is installed. Cover must be removed to open the flip-over panel and to insert and eject CDs. OPEN VOL AS/PS VOL WB BAND SEL/ ® ST SHUFFLE 8 X OVERSAMPLING • 4 X 25WATTS CH COMPACT DIGITAL AUDIO MCD-9424JA W1 1 W3 3 SHF 5 W2 2 RPT 4 SCN 6 LOUD DISP PWR Important Excessive skipping may result if the unit is installed at an angle of more than 15°. 15° Max. 7
-
 1
1 -
2
-
3
-
4
-
5
-
6
-
7
-
8
-
9
-
10
-
 11
11 -
 12
12 -
 13
13 -
 14
14 -
 15
15 -
 16
16 -
 17
17 -
 18
18
 |
 |