Kenmore 9742 Use and Care Guide - Page 26
Setting, the Slow, Feature, INSTRUCTIONS, PRESS, DISPLAY - review
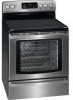 |
View all Kenmore 9742 manuals
Add to My Manuals
Save this manual to your list of manuals |
Page 26 highlights
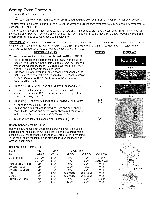
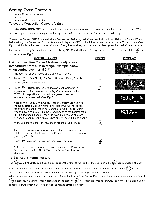
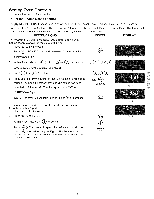
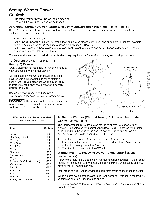
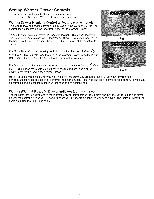
Setting Oven Controls • Setting the Slow Cook Feature Setting the Slow Cook Feature The c,,ooowkSLOW COOK pad is used to activate this feature. The Slow Cook feature may be used to cook foods more slowly, at lower oven temperatures and provides cooking results much the same way as a Slow Cooker or Crock-Pot. The Slow Cook feature is ideal for roasting beef, pork & poultry. Slow Cooking meats may result in the exterior of meats becoming dark but not burnt. This is normal. There are 2 settings available, high (HI) or low (LO). The HI setting is best for cooking foods from a 4 to 5 hour time period. The LOW setting is best for cooking foods from a 8 to 9 hour time period. The maximum cook time for the Slow Cook feature is 12 hours unless the oven control has been changed to the Continuous Bake mode.This feature may be used with the additional settings of a Timed Bake or a Delay Start (Delayed Timed Bake). Some tips you should review for best possible results using Slow Cook feature: • Completely thaw all frozen foods before cooking with the Slow Cook. • When using a single rack, place in position 2 or 3. • Position multiple racks to accommodate size of cooking utensils when cooking multiple food item. • Do not open the oven door often or leave the door open when checking foods. If the oven heat escapes often, the Slow Cook time may need to extended. • Cover the foods to keep them moist or use a loose or vented type cover to allow foods to turn crisp or brown. • Roasts may be left uncovered so browning can occur. Cook times will vary; depending on the weight, fat content, bone & the shape of the roast. • Use the recipe's recommended food temperature and a food thermometer to determine when the food is done. • Preheating the oven will not be necessary when using the Slow Cook feature. • Add any cream or cheese sauces during the last hour of cooking. See the suggested Slow Cook feature recipes provided in the back of this Use & Care Guide. INSTRUCTIONS To Program the Oven to begin baking with the Slow Cook feature (example below shows clock at 1:30): 1. Place the food in the oven. 2. Press c".o..o. k. SLO ...a. nd HI" (See Fig. 1) will appear in the display (If no further keypads are touched within 25 seconds the request for Slow Cook will clear). 3. If a low setting is desired, press the cooka"°w2nd time to set the Slow Cook feature with a low setting. "SLO" and "Lo" will appear in the display (See Fig. 2). 5. Press _. The Slow Cook feature will activate (See Fig. 3). 4. If desired, add any Timed Bake or Delay Start (Delayed Timed Bake) settings at this time. 6. To cancel the Slow Cook feature press _ at anytime. PRESS Slow Cook Slow Cook DISPLAY Fig. 1 Fig. 2 26
-
 1
1 -
2
-
3
-
4
-
5
-
6
-
7
-
8
-
9
-
10
-
11
-
12
-
13
-
14
-
15
-
16
-
17
-
18
-
19
-
20
-
 21
21 -
 22
22 -
 23
23 -
 24
24 -
 25
25 -
 26
26 -
 27
27 -
 28
28 -
 29
29 -
 30
30 -
 31
31 -
32
-
33
-
34
-
35
-
36
-
37
-
38
-
39
-
40
 |
 |
