Kenmore 9746 Use and Care Guide - Page 25
Roasting, optional, accessory
 |
View all Kenmore 9746 manuals
Add to My Manuals
Save this manual to your list of manuals |
Page 25 highlights
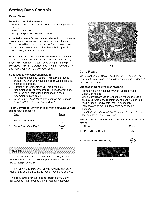
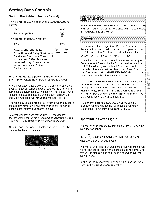
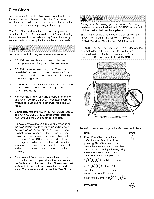
Setting Oven Controls Roasting Rack instructions (optional accessory) When preparing meats for Conv Roast, use the broiler pan and insert (if equipped) along with the roasting rack. The broiler pan will catch grease spills and the broil pan insert will help prevent grease splatters. The roasting rack will allow the heat to circulate around the meat. Using the Roasting Rack: 1. Place oven rack on bottom or next to the bottom rack position• See "Arranging Oven Racks" in Before Setting Oven Controls section. 2• Place the broil pan insert in the broiler pan. The roasting rack fits on the insert allowing the heated air to circulate under the food for even cooking and helps to increase browning on the underside. Make sure the roasting rack is securely seated on the insert in the broiler pan. DO NOT use the broiler pan without the insert. DO NOT cover the insert with aluminum foil. 3. Position food (fat side up) on the roasting rack (See Fig. 1). 4• Place the broiler pan on the oven rack. Conv Convect The Conv Convert feature provides a way to convert any standard baking recipe for convection baking. The oven control uses the standard bake recipe setting instructions and adjusts to a lower temperature for convection baking• Conv Convert cannot be used with Conv Roast feature• To start with a standard bake recipe using oven default temperature of 350°F for 30 minutes and converts recipe for convection baking: Step Press 1• Press Cook Time. 2. Enter minutes for cook time. L_,../ @@ 3. Press Start. 4. Press Cony Bake. B°ak°e" 5. Press ConvConvert. c0,_ Convert To prevent food from contacting the broil element and to prevent grease splattering, DO NOT use the roasting rackwhen broiling. When using Conv Convert with a Cook Time or a Delay Start setting, the Conv Convert feature will display a "CF" for check food when the bake time is 75% complete (See Fig. 2). At this time the oven control will sound 1 long beep at regular intervals until the cook time hasfinished• Roasting rack -Insert Fig. 1 Broil pan Fig. 2 If no cook time is set when setting Conv Convert the check food reminder (CF) will not appear in the display and the oven will continue to cook until Stop/Clear is pressed• The convection fan will begin rotating once the Conv Convert feature is activated• When using Conv Convert cook time reductions may vary depending on the oven set temperature• The minimum amount of cook time allowed using the Conv Convert feature with a Bake Time or a Delay Start setting is 20 minutes• Layer cakes will have better results using the standard Bake feature. 25
-
 1
1 -
2
-
3
-
4
-
5
-
6
-
7
-
8
-
9
-
10
-
11
-
12
-
13
-
14
-
15
-
16
-
17
-
18
-
19
-
 20
20 -
 21
21 -
 22
22 -
 23
23 -
 24
24 -
 25
25 -
 26
26 -
 27
27 -
 28
28 -
 29
29 -
 30
30 -
31
-
32
-
33
-
34
-
35
-
36
-
37
-
38
-
39
-
40
 |
 |