Kenwood DDX419BT Instruction Manual - Page 34
Other External Components
 |
View all Kenwood DDX419BT manuals
Add to My Manuals
Save this manual to your list of manuals |
Page 34 highlights
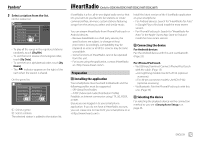
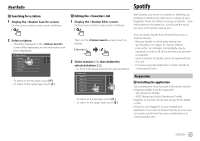
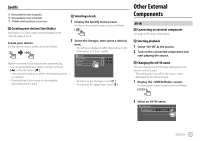
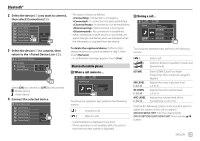
Other External Components Rear view camera Install the rear view camera (separately purchased) in the appropriate position according to the instructions supplied with the rear view camera. Connecting a rear view camera See page 57 for more information. • To use the rear view camera, a reverse lead (REVERSE) connection is required. (Page 56) Using the rear view camera • For rear camera settings, see on page 45. To display the rear view camera screen The rear view screen is displayed by shifting the gear to the reverse (R) position when is set to [ON]. (Page 45) • A caution message appears on the screen. To remove the caution message, touch the screen. You can also display the picture from the rear view camera manually without shifting the gear to the reverse (R) position. On the pop-up short-cut menu, touch as follows: Operations while the camera screen is displayed To adjust the picture Touch the area shown below. Video menu control is shown. For details, see "Video menu control operations" on page 12. • To exit video menu control, touch the same area again. To display parking guide line Set to [ON] (Page 45) or touch the area shown below. • To close the parking guidelines, touch the same area again. To exit the camera screen Press HOME on the monitor panel or touch the area shown below. Using an external component via ADS adapter-OEM Features (Only for DDX396/DDX376BT/DDX276BT) By connecting this unit to the bus system of the vehicle using iDataLink (commercially available), this unit can access the satellite radio source provided for the vehicle and vehicle information can be displayed on this unit. • Displayable screens, button names, and screen names vary depending on the type of the connected iDataLink and the model of the vehicle. • For details, visit . Connecting an ADS adapter See page 57 for more information. Using an external component via an ADS adapter • For settings to use an ADS adapter, see page 46. 1 Select "OEM Features" as the source. On the Home screen, touch as follows: 2 Turn on the connected component and start playing the source. 32 ENGLISH
-
 1
1 -
2
-
3
-
4
-
5
-
6
-
7
-
8
-
9
-
10
-
11
-
12
-
13
-
14
-
15
-
16
-
17
-
18
-
19
-
20
-
21
-
22
-
23
-
24
-
25
-
26
-
27
-
28
-
 29
29 -
 30
30 -
 31
31 -
 32
32 -
 33
33 -
 34
34 -
 35
35 -
 36
36 -
 37
37 -
 38
38 -
 39
39 -
40
-
41
-
42
-
43
-
44
-
45
-
46
-
47
-
48
-
49
-
50
-
51
-
52
-
53
-
54
-
55
-
56
-
57
-
58
-
59
-
60
-
61
-
62
-
63
-
64
-
65
-
66
-
67
-
68
-
69
-
70
-
71
-
72
 |
 |
