Kenwood DNX571HD User Manual 3 - Page 7
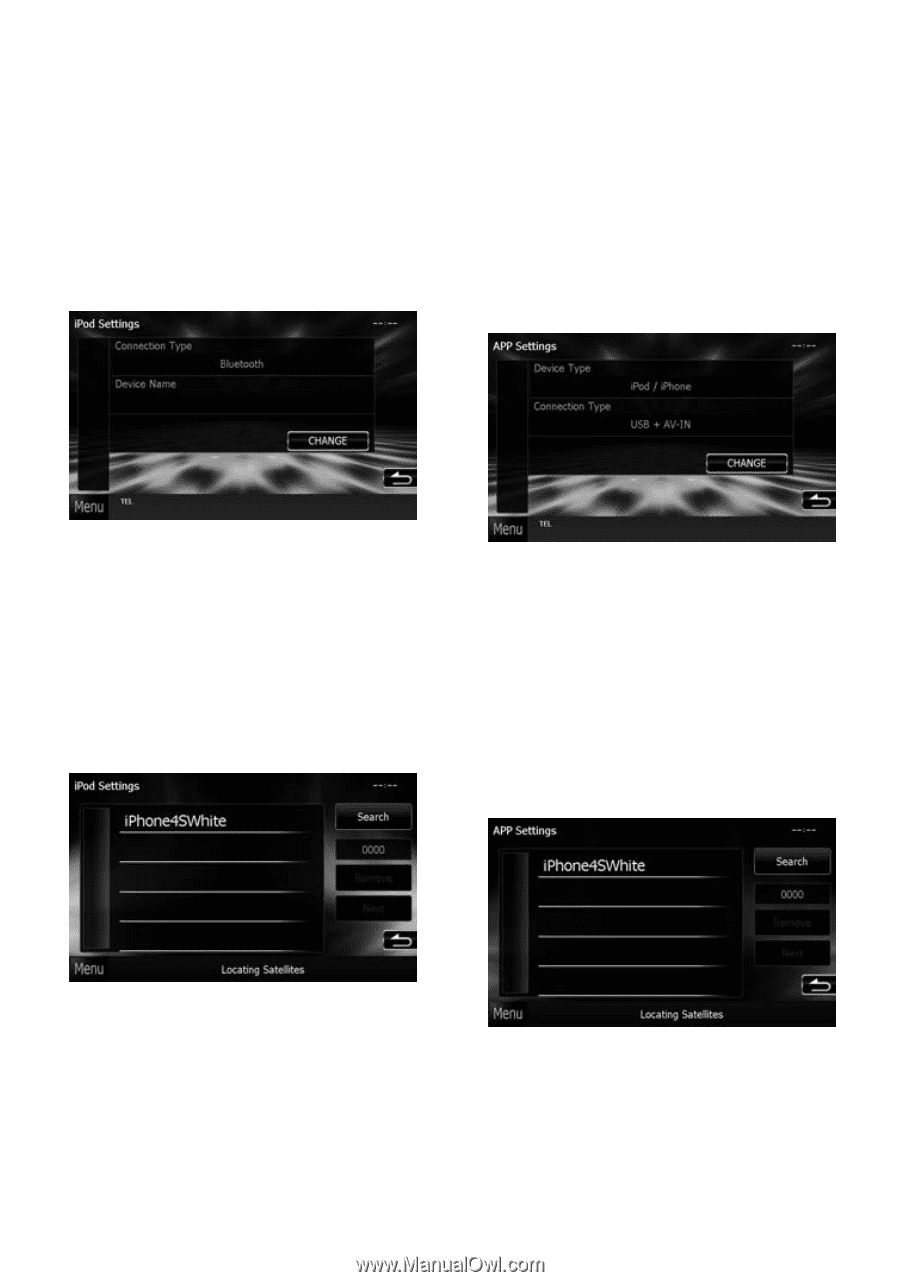
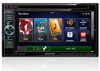
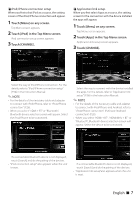
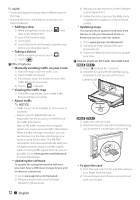
Touch [Menu] on any screen., Touch [iPod] in the Top Menu screen., Touch [CHANGE]., Touch [Apps] - hdmi cable
 |
View all Kenwood DNX571HD manuals
Add to My Manuals
Save this manual to your list of manuals |
Page 7 highlights
ÑÑiPod/iPhone connection setup When you first select iPod as a source, the setting screen of the iPod/iPhone connection will appear. 1 Touch [Menu] on any screen. Top Menu screen appears. 2 Touch [iPod] in the Top Menu screen. iPod connection setup screen appears. 3 Touch [CHANGE]. ÑÑApplication link setup When you first select Apps as a source, the setting screen for the connection with the device installed the apps will appear. 1 Touch [Menu] on any screen. Top Menu screen appears. 2 Touch [Apps] in the Top Menu screen. Application link setup screen appears. 3 Touch [CHANGE]. Select the way of iPod/iPhone connection. For the details, refer to "iPod/iPhone connection setup" (P.54) in the Instruction Manual. ✎✎NOTE • For the details of the necessary cable and adapter to connect with iPod/iPhone, refer to "iPod/iPhone connection" (P.26). • When you select "HDMI + BT" or "Bluetooth", Bluetooth device selection screen will appear. Select the iPod/iPhone to be connected. Select the way to connect with the device installed the apps. For the details, refer to "Application link setup" (P.56) in the Instruction Manual. ✎✎NOTE • For the details of the necessary cable and adapter to connect with iPod/iPhone and Android, refer to "iPod/iPhone connection" (P.26) and "Android connection" (P.26). • When you select "HDMI + BT", "HDMI/MHL + BT" or "Bluetooth", Bluetooth device selection screen will appear. Select the device to be connected. If a connectable Bluetooth device is not displayed, touch [Search] and do the pairing of the devices. • "iPod connection setup" also appears when the unit is reset. If a connectable Bluetooth device is not displayed, touch [Search] and do the pairing of the devices. • "Application link setup"also appears when the unit is reset. English ñ 7
-
 1
1 -
 2
2 -
 3
3 -
 4
4 -
 5
5 -
 6
6 -
 7
7 -
 8
8 -
 9
9 -
 10
10 -
 11
11 -
 12
12 -
13
-
14
-
15
-
16
-
17
-
18
-
19
-
20
-
21
-
22
-
23
-
24
-
25
-
26
-
27
-
28
-
29
-
30
-
31
-
32
-
33
-
34
-
35
-
36
-
37
-
38
-
39
-
40
-
41
-
42
-
43
-
44
-
45
-
46
-
47
-
48
-
49
-
50
-
51
-
52
-
53
-
54
-
55
-
56
 |
 |