Kodak 1252972 User Guide - Page 92
To print the network configuration Port 5353 UDP
 |
UPC - 041771252977
View all Kodak 1252972 manuals
Add to My Manuals
Save this manual to your list of manuals |
Page 92 highlights
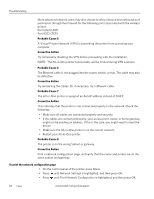
Troubleshooting More advanced network users may also choose to allow inbound and outbound port permission through their firewall for the following ports associated with the wireless printer: Port 5353 (UDP) Port 9322 (TCP) Probable Cause 5 A Virtual Private Network (VPN) is preventing the printer from accessing your computer. Corrective Action Try temporarily disabling the VPN before proceeding with the installation. NOTE: The All-in-One printer functionality will be limited during VPN sessions. Probable Cause 6 The Ethernet cable is not plugged into the router, switch, or hub. The cable may also be defective. Corrective Action Try reinserting the cables. Or, if necessary, try a different cable. Probable Cause 7 The All-in-One printer is assigned an AutoIP address instead of DHCP. Corrective Action This indicates that the printer is not connected properly to the network. Check the following: • Make sure all cables are connected properly and securely. • If the cables are connected properly, your access point, router, or home gateway might not be sending an address. If this is the case, you might need to reset the device. • Make sure the All-in-One printer is on the correct network. • Restart your All-in-One printer. Probable Cause 8 The printer is on the wrong Subnet or gateway. Corrective Action Print a network configuration page, and verify that the router and printer are on the same subnet and gateway. To print the network configuration page • On the control panel of the printer, press Menu. • Press until Network Settings is highlighted, and then press OK. • Press until Print Network Configuration is highlighted, and then press OK. 84 www.kodak.com/go/aiosupport
-
 1
1 -
2
-
3
-
4
-
5
-
6
-
7
-
8
-
9
-
10
-
11
-
12
-
13
-
14
-
15
-
16
-
17
-
18
-
19
-
20
-
21
-
22
-
23
-
24
-
25
-
26
-
27
-
28
-
29
-
30
-
31
-
32
-
33
-
34
-
35
-
36
-
37
-
38
-
39
-
40
-
41
-
42
-
43
-
44
-
45
-
46
-
47
-
48
-
49
-
50
-
51
-
52
-
53
-
54
-
55
-
56
-
57
-
58
-
59
-
60
-
61
-
62
-
63
-
64
-
65
-
66
-
67
-
68
-
69
-
70
-
71
-
72
-
73
-
74
-
75
-
76
-
77
-
78
-
79
-
80
-
81
-
82
-
83
-
84
-
85
-
86
-
 87
87 -
 88
88 -
 89
89 -
 90
90 -
 91
91 -
 92
92 -
 93
93 -
 94
94 -
 95
95 -
 96
96 -
 97
97 -
98
-
99
-
100
-
101
-
102
-
103
-
104
-
105
-
106
-
107
-
108
-
109
-
110
-
111
-
112
-
113
-
114
-
115
-
116
-
117
-
118
-
119
-
120
 |
 |