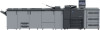
Konica Minolta AccurioPress 6120 IC-309m2 User Guide
Konica Minolta AccurioPress 6120 Manual
 |
View all Konica Minolta AccurioPress 6120 manuals
Add to My Manuals
Save this manual to your list of manuals |
Konica Minolta AccurioPress 6120 manual content summary:
- Konica Minolta AccurioPress 6120 | IC-309m2 User Guide - Page 1
User Guide English IC-309m2 Print Controller, Powered by Creo Server Technology, for the Konica Minolta monochrome bizhub presses Version 1.0 731-02145A-EN RevA - Konica Minolta AccurioPress 6120 | IC-309m2 User Guide - Page 2
- Konica Minolta AccurioPress 6120 | IC-309m2 User Guide - Page 3
included on the candidate list according to article 59(1) of Regulation (EC) No. 1907/2006 (REACH). Limitation of liability The product, software or services are being provided on an "as is" and "as available" basis. Except as may be stated specifically in your contract, Kodak, its subsidiaries - Konica Minolta AccurioPress 6120 | IC-309m2 User Guide - Page 4
of your products, software or data; (iv) statements or conduct of any third party; (v) any other matter relating to the product, software, or services. The text and drawings herein are for illustration and reference only. The specifications on which they are based are subject to change. Kodak may - Konica Minolta AccurioPress 6120 | IC-309m2 User Guide - Page 5
started...1 Printing this guide...1 What's new?...2 System overview...3 Hardware and software components 4 Supported formats...4 Action Pack Print Driver software for the first time 18 Shortcut for adding a printer...19 Deactivating the Print Driver software 20 Removing the Print Driver software - Konica Minolta AccurioPress 6120 | IC-309m2 User Guide - Page 6
vi IC-309m2 Print Controller, Powered by Creo Server Technology, for Konica Minolta monochrome bizhub presses Performing an extended preflight check 38 Viewing and printing a preflight report 38 Preflight report window...39 Submitting urgent jobs...40 Running a job - Konica Minolta AccurioPress 6120 | IC-309m2 User Guide - Page 7
Definition Format...104 Submitting pages from Prinergy using basic JDF instructions 104 8 Variable data printing jobs 107 Variable data the job parameters window 124 Exceptions tab in the job parameters window 133 Services tab in the job parameters window 134 Summary tab in the job parameters - Konica Minolta AccurioPress 6120 | IC-309m2 User Guide - Page 8
Print Controller, Powered by Creo Server Technology, for Konica Minolta monochrome bizhub presses 11 Working with Creo server 169 Changing the Network settings to TCP/IPv6 on a remote computer 169 12 Troubleshooting 171 Job History window...171 Handling alerts and jobs...172 Aborting a job...173 - Konica Minolta AccurioPress 6120 | IC-309m2 User Guide - Page 9
1 Getting started Printing this guide Change the paper size to print this document on any printer. 1. Open the PDF file in Adobe Acrobat. 2. From the File menu, select Print. The - Konica Minolta AccurioPress 6120 | IC-309m2 User Guide - Page 10
queue-Provides improved job management and analysis ● Job slug in Job Preview tool ● PDF/VT support ● Optimized processing of jobs with page ranges ● Extended page exceptions support-For example, mix-plex ● Dynamic page exceptions editing ● Thumbnail preview during imposition programming ● Edit - Konica Minolta AccurioPress 6120 | IC-309m2 User Guide - Page 11
System overview 3 ○ AFP file format support (FSM mode) ○ CMOCA-Supports full color management for AFP/IPDS System overview The IC-309m2 print controller, powered by Creo Server Technology, for the Konica Minolta monochrome bizhub presses is an on-demand prepress system that runs on a Microsoft - Konica Minolta AccurioPress 6120 | IC-309m2 User Guide - Page 12
4 Chapter 1-Getting started ● File submission mode, which enables you to print from any computer, import and process all the supported file formats, apply and edit the job parameters, and manage your files. ● IPDS mode, which enables you to process and print IPDS jobs from the - Konica Minolta AccurioPress 6120 | IC-309m2 User Guide - Page 13
TIFF 6.0 files saved with sliced internal data structure, regardless of the BPP (Bits per Pixel) and compression method. Includes support for multi-page TIFF This pack is optional. To activate the features in the software you need to install the dongle that is supplied with - Konica Minolta AccurioPress 6120 | IC-309m2 User Guide - Page 14
. 4. Click Install and follow the on-screen instructions until the installation is complete. 5. When the iKey driver window appears, type your license key to complete to print from any computer, import and process all the supported file formats, apply and edit the job parameters, and manage your files - Konica Minolta AccurioPress 6120 | IC-309m2 User Guide - Page 15
Turning on the IC-309m2 print controller 7 Turning on the IC-309m2 print controller 1. Turn on the monitor. 2. Turn on the printer. 3. Open the door on the front of the IC-309m2 print controller, and push the power control button. The power indicator on the front panel lights up, and the Windows - Konica Minolta AccurioPress 6120 | IC-309m2 User Guide - Page 16
8 Chapter 1-Getting started Note: When the IPDS workflow mode is selected, certain features and options are not available in the workspace. Workspace area Toolbar The workspace contains different areas that enable you to monitor your job during the process and print stages. In addition, the - Konica Minolta AccurioPress 6120 | IC-309m2 User Guide - Page 17
jobs in the queues. The jobs and RTP files are deleted. If you need to disconnect from the IPDS host, click Disconnect. If there is a problem with one of the printer components or with the server, a red indicator appears in the printer icon and next to the relevant component-for example - Konica Minolta AccurioPress 6120 | IC-309m2 User Guide - Page 18
10 Chapter 1-Getting started Workspace area Incoming Queue, Process Queue and Print Queue Description The Incoming Queue area lists all incoming jobs. This queue is available by selecting the Full View option from the View menu. The Process Queue area lists the files to be processed. After a file - Konica Minolta AccurioPress 6120 | IC-309m2 User Guide - Page 19
Overview of the workspace Workspace area Storage area 11 Description The Storage area contains jobs that were: ● Successfully printed ● Held, aborted, or failed during processing or printing ● Sent directly from the client workstation, or imported into the Storage area There are three different - Konica Minolta AccurioPress 6120 | IC-309m2 User Guide - Page 20
12 Chapter 1-Getting started Customizing the workspace toolbar Add shortcut buttons to the workspace toolbar, remove buttons from the toolbar, and rearrange buttons on the toolbar. 1. From the Tools menu, select Toolbar customization. 2. Perform any of the following actions: ○ To add a button to - Konica Minolta AccurioPress 6120 | IC-309m2 User Guide - Page 21
Customizing the user interface font size 13 Customizing the user interface font size Select a font size for the user interface that accommodates the resolution of your monitor. 1. From the File menu, select Preferences. 2. Click UI Customization. 3. In the Font size area, select a font size. The - Konica Minolta AccurioPress 6120 | IC-309m2 User Guide - Page 22
14 Chapter 1-Getting started - Konica Minolta AccurioPress 6120 | IC-309m2 User Guide - Page 23
can change the default settings of the network printer to use the PPD parameters instead of the Print Driver software. The IC-309m2 print controller supports printing from the following operating systems: ● Microsoft Windows Server 2008, Microsoft Windows Server 2003, Microsoft Windows 7, Microsoft - Konica Minolta AccurioPress 6120 | IC-309m2 User Guide - Page 24
installed on a Windows computer when you set up a network printer. Note: On a Mac computer, you must install the Print Driver software manually. In the Print Driver window, you can perform the following actions: ● Define or change job parameters regardless of whether your computer is connected to - Konica Minolta AccurioPress 6120 | IC-309m2 User Guide - Page 25
a Windows computer 17 Note: Custom imposition templates, including the pre-defined Folded Signature imposition templates, cannot be previewed from the Printer Driver software. Setting up printing on a Windows computer Adding a network printer to Windows Server 2008/2003/XP To print from a Windows - Konica Minolta AccurioPress 6120 | IC-309m2 User Guide - Page 26
print controller network printer is added to your printer list. When you add a network printer, the Print Driver software and PPD file are installed on your computer. Loading the Print Driver software for the first time Requirements: A network printer must be defined on your Windows-based computer. - Konica Minolta AccurioPress 6120 | IC-309m2 User Guide - Page 27
appears. 4. Close the job parameters window and the Print Dialog box to complete the installation of the Print Driver. The network printer is set up for printing using the Print Driver software. Shortcut for adding a printer 1. From the Start menu, select Run. 2. In the Open box, type \\, followed - Konica Minolta AccurioPress 6120 | IC-309m2 User Guide - Page 28
type \\, followed by the host name or IP address of the server, and click OK. The server window opens. 3. Navigate to \Utilities\PC Utilities\Driver Extension. 4. Perform one of the following: ○ If you are using Windows XP, double-click DEX_Uninstaller.exe ○ If you are using Windows Vista or Windows - Konica Minolta AccurioPress 6120 | IC-309m2 User Guide - Page 29
of port list, select Standard TCP/IP Port. 5. Click Next. If you have Print Services for UNIX installed on your computer, you can also select LPR Port from the Type of Query the printer and automatically select the driver to use check box. 8. Click Next. 9. In the Device Type area, select - Konica Minolta AccurioPress 6120 | IC-309m2 User Guide - Page 30
and then click Next. 13. Click Have Disk. 14. Click Browse, and locate the OEMSETUP.INF file in the \ \\Utilities\PC Utilities\Printer Driver\Printer driver application\US-Letter or Europe-A4 folder. 15. Select the file, and click OK. 16. Click Next. 17. In the Printer name box, delete - Konica Minolta AccurioPress 6120 | IC-309m2 User Guide - Page 31
OS X Installing the Print Driver software in Mac OS X 10.6 (64 bit) and later During the installation of the Print Driver software, the PPD file your computer. Follow the Java installation procedure on the Apple site, http://support.apple.com/kb/DL1421. This will ensure that the Creo server tools - Konica Minolta AccurioPress 6120 | IC-309m2 User Guide - Page 32
type the address of your server. ○ In the Queue box, type the name of the network printer that you want to use with the Print Driver software-for example, CreoCS_Process. ○ In the Name box, type a name for the printer. ○ In the Print Using list, select Other. 4. Navigate to Library / Printers / PPDs - Konica Minolta AccurioPress 6120 | IC-309m2 User Guide - Page 33
if you need to upgrade to a later software version of the Print Driver software. Requirements: All applications must be closed. 1. From the Go menu Mac computer, and then click OK. 10. Select the suitable Creo printer driver, and then click OK. 11. If necessary, type your name and password, and then - Konica Minolta AccurioPress 6120 | IC-309m2 User Guide - Page 34
26 Chapter 2-Setting up your computer for printing - Konica Minolta AccurioPress 6120 | IC-309m2 User Guide - Page 35
3 Printing a file in Windows and Mac OS Printing a file to the IC-309m2 print controller Requirements: A network printer must be defined on your Windows and Mac computer. 1. Open a file with its corresponding application-for example, open a PDF file in Adobe Acrobat. 2. From the File menu, - Konica Minolta AccurioPress 6120 | IC-309m2 User Guide - Page 36
network printer must exist on your client workstation. ● The printer status on the IC-309m2 print controller must be in Ready mode. Using the Print Driver software, you can apply a password to a job that was created in any application. Whoever prints or reprints the job must use the password to - Konica Minolta AccurioPress 6120 | IC-309m2 User Guide - Page 37
Password protect jobs 29 8. In the Print Driver window, click OK. The password-protected job is submitted to the network printer, which sends it to the IC-309m2 print controller for processing and - Konica Minolta AccurioPress 6120 | IC-309m2 User Guide - Page 38
30 Chapter 3-Printing a file in Windows and Mac OS - Konica Minolta AccurioPress 6120 | IC-309m2 User Guide - Page 39
you can work with embedded ICC profiles. The IC-309m2 print controller includes APPE RIP support for both CMYK and RGB embedded ICC profiles. The IC-309m2 print controller is compatible with , and overprinting or trapping problems). See also: Services tab in the job parameters window on page 134. - Konica Minolta AccurioPress 6120 | IC-309m2 User Guide - Page 40
32 Chapter 4-Processing and printing from the Creo server Importing and printing a job You can import a job in any of the following circumstances: ● When a page-description language (PDL) file-for example, PDF or PostScript-is created on a computer that is not connected to the IC-309m2 print - Konica Minolta AccurioPress 6120 | IC-309m2 User Guide - Page 41
Resubmitting several jobs via a virtual printer 33 Note: Some RTP jobs might require reprocessing after you edit certain parameters. Resubmitting several jobs via a virtual printer Apply a modified set of parameters to selected jobs, and then resubmit the jobs for processing and printing. - Konica Minolta AccurioPress 6120 | IC-309m2 User Guide - Page 42
34 Chapter 4-Processing and printing from the Creo server ● Replacing specific pages of your job with pages from another job ● Merging one or more jobs with another job Note: The Job Editor tool always creates a new PDF file, combined with all the operations that have been applied by it, such as: - Konica Minolta AccurioPress 6120 | IC-309m2 User Guide - Page 43
it is important to check the job and make sure that it will print correctly. Proofing your job can reveal problems such as missing fonts, wrong colors, incorrect imposition or positioning. If a problem is found, you can modify your job before it is approved and sent for printing. The IC-309m2 print - Konica Minolta AccurioPress 6120 | IC-309m2 User Guide - Page 44
36 Chapter 4-Processing and printing from the Creo server Job Preview tool The Job Preview tool enables you to preview partially RIPed and fully RIPed jobs. The preview displays the final printed sheets and includes raster data and layout data. The Job Preview tool includes three main areas: ● - Konica Minolta AccurioPress 6120 | IC-309m2 User Guide - Page 45
Verifying the content of the job 37 1. Select an RTP job in the IC-309m2 print controller Storage area. 2. Right-click the job and select Export for Proofing. 3. Select if you want to export Pages, Booklets or All. If you selected Pages or Booklets, enter the page or booklet numbers and/or ranges - Konica Minolta AccurioPress 6120 | IC-309m2 User Guide - Page 46
stating that the file is encrypted. 1. Open the job parameters window of the job on which you want to perform a preflight check. 2. Select Services, and then select Preflight. 3. Select the Run extended preflight check check box. By default, Inspect the main file only is selected. (Checks the - Konica Minolta AccurioPress 6120 | IC-309m2 User Guide - Page 47
Preflight report window 39 Preflight report window The Preflight Report window is opened by right-clicking your job and selecting Preflight report. Fonts Spot Colors Exceptions External files Preflight options The heading area lists the number of found and missing fonts. The report body lists - Konica Minolta AccurioPress 6120 | IC-309m2 User Guide - Page 48
40 Chapter 4-Processing and printing from the Creo server AFP resources Preflight options Lists the missing AFP resources and the found AFP resources in the file. Found Missing Not preflighted Warning Indicators Appears when all of the files are found for the selected option. Appears when key - Konica Minolta AccurioPress 6120 | IC-309m2 User Guide - Page 49
you to work in a more secure environment, by permanently removing data left by files that you have deleted. ● Password Protect Jobs (set in the Print Driver software) ● Deletion policy (set in the Preferences window) See also: Preferences window on page 139 - Konica Minolta AccurioPress 6120 | IC-309m2 User Guide - Page 50
42 Chapter 4-Processing and printing from the Creo server - Konica Minolta AccurioPress 6120 | IC-309m2 User Guide - Page 51
job name, not the name assigned when archived. Archived jobs are an important tool for reporting and resolving problems as they contain all the information for the service personnel. Archiving a job Archive a job so that more disk space becomes available. Requirements: A folder for storing the - Konica Minolta AccurioPress 6120 | IC-309m2 User Guide - Page 52
44 Chapter 5-Managing jobs to the job (for example, PDL) are also retrieved and the cabinet file is not deleted. You can retrieve more than one job at a time. 1. From the File menu, select Retrieve from archive. 2. Locate the archived job under its archive name, and select the related cabinet file - Konica Minolta AccurioPress 6120 | IC-309m2 User Guide - Page 53
Duplicating jobs 45 print controller, select Start > Run and connect to the destination IC-309m2 print controller. Log on using the new operator password. ● You cannot forward a job to another IC-309m2 print controller if files have never been RIPed on the destination IC-309m2 print controller. - Konica Minolta AccurioPress 6120 | IC-309m2 User Guide - Page 54
46 Chapter 5-Managing jobs ● Show, hide, and move columns. This is a quick way to customize the table. Changes that you make to the table are not saved permanently. ● Create a customized accounting view that you can edit and save. Show, hide, and move columns in the Accounting Viewer table A quick - Konica Minolta AccurioPress 6120 | IC-309m2 User Guide - Page 55
Record deletion from the Accounting Viewer table 47 9. Click OK. You can select the customized view in the Accounting Viewer, in the View list. Record deletion from the Accounting Viewer table There are two ways to delete accounting records from the Accounting Viewer table: ● Clear all-Click the - Konica Minolta AccurioPress 6120 | IC-309m2 User Guide - Page 56
48 Chapter 5-Managing jobs 1. From the Info menu, select Accounting. 2. In the Accounting Viewer, filter the information as desired. 3. Click Export. 4. Locate the folder in which to save the report. 5. (Optional) Change the file name. 6. From the Files of Type drop-down list, select the file type - Konica Minolta AccurioPress 6120 | IC-309m2 User Guide - Page 57
6 Managing color Color management on the IC-309m2 print controller Color management is a series of steps taken to ensure that colors are accurate and repeatable when transferred from one device to another. These steps enable you to reproduce the color conceived by a graphic artist or photographer - Konica Minolta AccurioPress 6120 | IC-309m2 User Guide - Page 58
50 Profiles Chapter 6-Managing color Profiles are used to reproduce color from one device's color space to another device's color space in a consistent manner. They provide the necessary information to convert color data between device-dependent color spaces and device-independent color spaces. You - Konica Minolta AccurioPress 6120 | IC-309m2 User Guide - Page 59
Spot Color Editor overview 51 8. Click Close to close the Resource Center. The new source ICC profile is added to the Color flow tab in the job parameters window. Spot Color Editor overview A spot color is a specially mixed ink that you can use to reproduce colors that are difficult to reproduce - Konica Minolta AccurioPress 6120 | IC-309m2 User Guide - Page 60
52 Chapter 6-Managing color Adding a spot color - Global Library 1. From the Tools menu, select Spot Color Editor. 2. In the Spot Color Editor dialog box, click Add. 3. Type the new color name as it is in the original file. Note: The spot color names are case sensitive and should match the names - Konica Minolta AccurioPress 6120 | IC-309m2 User Guide - Page 61
Deleting a spot color - Global Library 53 Deleting a spot color - Global Library You can delete spot colors from the custom color dictionary. 1. From the Tools menu, select Spot Color Editor. 2. Select the Spot color tab. 3. In the Spot color library list, select Custom Dictionary. 4. From the - Konica Minolta AccurioPress 6120 | IC-309m2 User Guide - Page 62
54 Chapter 6-Managing color 10. To apply this to your job, in the job parameters window, in the Color tab, select Protected Colors, and then select the Use protected RGB values check box. Protecting a gray color as a spot color The gray spot workflow applies to graphics and text elements. 1. From - Konica Minolta AccurioPress 6120 | IC-309m2 User Guide - Page 63
Color adjustment with the Gradation Tool 55 10. To apply this to your job, in the job parameters window, in the Color tab, select Protected Colors, and then select the Use protected CMY values check box. Color adjustment with the Gradation Tool Sometimes you need to perform tone corrections when - Konica Minolta AccurioPress 6120 | IC-309m2 User Guide - Page 64
56 Chapter 6-Managing color 4. Click the curve in the graph to add a point, and then drag the point to modify the separation. The value appears in the Input or Output boxes. 5. To remove a point on the curve, select the point and then click Remove. 6. To reset the gradation curve to a 45° curve, - Konica Minolta AccurioPress 6120 | IC-309m2 User Guide - Page 65
Color adjustment with the Gradation Tool 57 The gradation table is saved and added to the Gradation Table list on the Color Adjustments tab in the job parameters window. - Konica Minolta AccurioPress 6120 | IC-309m2 User Guide - Page 66
58 Chapter 6-Managing color - Konica Minolta AccurioPress 6120 | IC-309m2 User Guide - Page 67
7 Production workflows Printing using imposition Imposition overview Imposition is the process of positioning page images on a sheet of paper so that when a printer or digital printing press prints the sheet, the page images will be in the right order. It is part of the process of producing - Konica Minolta AccurioPress 6120 | IC-309m2 User Guide - Page 68
60 Chapter 7-Production workflows Imposition method Description Step and continue This method enables you to place different pages of a job on one sheet so that the sheet is filled to capacity. Cut and stack Saddle stitch This method is used to print, cut, and stack pages while preserving a - Konica Minolta AccurioPress 6120 | IC-309m2 User Guide - Page 69
Previewing an imposition layout 61 Imposition method Description Folded signatures A signature is a large printed sheet of paper folded many times to form a section of a book, magazine, or pamphlet. As a unit, the signature usually contains from four to ninety-six pages, usually in multiples of - Konica Minolta AccurioPress 6120 | IC-309m2 User Guide - Page 70
62 Chapter 7-Production workflows Printing a business card job Use the step-and-repeat imposition method to print multiple copies of the same business card on one printed sheet. Requirements: This example assumes that your job contains one-sided business cards that are 50 mm × 90 mm or 1.96 in. × - Konica Minolta AccurioPress 6120 | IC-309m2 User Guide - Page 71
Printing a saddle-stitch job 63 12. Click the Preview button to preview the layout. The Preview window appears, displaying a schematic representation of your imposition layout.The layout of three columns by eight rows appears with no imposition conflict. 13. Leave the Preview window open, and, if - Konica Minolta AccurioPress 6120 | IC-309m2 User Guide - Page 72
64 Chapter 7-Production workflows 7. Change the position of the marks on the image by adjusting the values in the Horizontal Offset and Vertical Offset boxes. 8. In the Mark color list, select the color for the mark. 9. Click the Spacing parameter. 10. In the Spacing area adjust the values for: ● - Konica Minolta AccurioPress 6120 | IC-309m2 User Guide - Page 73
Printing a folded signature job 65 6. Select the Nested-Saddle-Sheet per group check box, and type 4. Note: You might have blank pages in the last booklet of your job. The number of blank pages depends on how many pages are in the entire job, and how many sheets you set per group. 7. (Optional) - Konica Minolta AccurioPress 6120 | IC-309m2 User Guide - Page 74
66 Chapter 7-Production workflows 1. In the Storage area, double-click your job. 2. In the job parameters window, click the Print tab, and then click the Paper Stock parameter. 3. In the Paper Stock list, select the paper name for your job. 4. Click the Imposition tab, and then click the - Konica Minolta AccurioPress 6120 | IC-309m2 User Guide - Page 75
Folded signature templates 67 Folded signature templates The Imposition Template Builder provides many folded signature templates. The templates that you choose determine how the signature sheet is folded. Note: When duplicating and editing a predefined folded signature template, pagination might - Konica Minolta AccurioPress 6120 | IC-309m2 User Guide - Page 76
68 Chapter 7-Production workflows Imposition Template Builder tool Imposition Template Builder overview The Imposition Template Builder is available only with the Action Pack. The Imposition Template Builder enables you to define all imposition settings without having to adjust imposition - Konica Minolta AccurioPress 6120 | IC-309m2 User Guide - Page 77
Creating an imposition template 69 IC-309m2 print controller automatically updates the imposition settings in your job according to the selected imposition template. In addition, when you create a template, the IC-309m2 print controller publishes the list of imposition templates via JMF. Via JDF, - Konica Minolta AccurioPress 6120 | IC-309m2 User Guide - Page 78
70 Chapter 7-Production workflows 2. In the Method list, select an imposition method. You can select from the following methods: ● Saddle Stitch-A book-finishing technique in which the pages of a book are attached through stitching or stapling in the spine fold-for example, in brochures. ● Perfect - Konica Minolta AccurioPress 6120 | IC-309m2 User Guide - Page 79
Imposition template viewer window 71 5. In the Layout area, type the number of columns and number of rows that you need. Note: The imposition method that you select determines the number of columns and rows that you can enter. For saddle stitch and perfect bound, you can place up to 64 pages on - Konica Minolta AccurioPress 6120 | IC-309m2 User Guide - Page 80
72 Chapter 7-Production workflows Note: For the Cut&Stack imposition method, a Step & Repeat pagination is displayed. When applied to a job, a correct pagination preview is displayed, in the Job Parameters window. Buttons Notes: ● When Simplex is selected, only the Front view is available. ● - Konica Minolta AccurioPress 6120 | IC-309m2 User Guide - Page 81
Rotating both the front and back sides of a page 180° 73 1. Make sure that the Apply changes to front and back check box is clear. 2. Select the desired page. Note: To select multiple consecutive pages, click the first page, press and hold Shift, and then click the last page. Select multiple - Konica Minolta AccurioPress 6120 | IC-309m2 User Guide - Page 82
to its new location. Note: The page that was previously in the target location is not automatically moved to another location. To retain this page, manually move it to a new location. If you have a duplex template and the Apply changes to front and back check box is selected, the page number - Konica Minolta AccurioPress 6120 | IC-309m2 User Guide - Page 83
embedded in the file, such as dynamic page exeptions, or you can manually program the media print parameters for a range of pages in a job. uses those types of paper for the job. The IC-309m2 print controller supports dynamic page exceptions for the following file formats: ● PostScript ● VPS ● - Konica Minolta AccurioPress 6120 | IC-309m2 User Guide - Page 84
page exceptions is available only with the Action Pack. Requirements: A file with embedded setpagedevice keys. The IC-309m2 print controller supports the following setpagedevice keys: ● MediaType Note: There is an option in the Preferences window to determine whether MediaType is automatically - Konica Minolta AccurioPress 6120 | IC-309m2 User Guide - Page 85
Printing dynamic page exceptions 77 4. Define a new rule according to the setpagedevice keys found in your file. What do you want to do? Here's how to do it Map MediaType,MediaColor, MediaWeight, or PageSize keys to the paper stock parameters in the job parameters window. a. On the Paper Name - Konica Minolta AccurioPress 6120 | IC-309m2 User Guide - Page 86
78 Chapter 7-Production workflows 1. In the Storage area, double-click your job. 2. Click Exceptions, and then click Exceptions From File. 3. In the Select Rules Set list, select the rule set that you created for your file. 4. (Optional) To verify or edit the mapping for the dynamic page - Konica Minolta AccurioPress 6120 | IC-309m2 User Guide - Page 87
Setting custom page exceptions via the job parameters window 79 1. In the Storage area, double-click your job. The job parameters window appears. 2. Under Print, click Paper stock. The Parameters from file option is selected by default. Note: The IC-309m2 print controller automatically maps the - Konica Minolta AccurioPress 6120 | IC-309m2 User Guide - Page 88
80 Chapter 7-Production workflows 1. In the Storage area, double-click your job. The job parameters window appears. 2. Click Exceptions. 3. Click Add (+) and then select the type of page exception that you want to add-for example, Front cover. 4. In the Advanced Options window, you can define - Konica Minolta AccurioPress 6120 | IC-309m2 User Guide - Page 89
Tabs plug-in window 81 Tabs plug-in window Text attributes - tabs Tabs Size The size of the tabbed sheet. By default, the tab size for letter jobs is set at 9 × 11, and for A4 jobs to A4+. Type The number and type of tabs that you can select. Note: If you want your tabs to be reversed- that is - Konica Minolta AccurioPress 6120 | IC-309m2 User Guide - Page 90
82 Chapter 7-Production workflows Text attributes - tabs Length The length of the tab. Width The width of the tab. Text attributes - text Text Font The font for the tab text. Size The font size for the tab text. Color The color of the tab text. Bold Bolds the tab text. Italic Makes the tab text - Konica Minolta AccurioPress 6120 | IC-309m2 User Guide - Page 91
Working with the Creo Server Tabs plug-in for Acrobat 83 Text attributes - text Underline Underlines the tab text. Alignment The alignment of the tab, according to the orientation of the tab. The orientation that you select determines the alignment buttons that are displayed. ● Align Left - Konica Minolta AccurioPress 6120 | IC-309m2 User Guide - Page 92
84 Chapter 7-Production workflows Text attributes - text Direction Direction of the text. ● Vertical ● Counter-clockwise ● Clockwise Note: The Direction options are available only for portrait jobs. Content # Before Page Text The tab number. The page number that the tab precedes. The - Konica Minolta AccurioPress 6120 | IC-309m2 User Guide - Page 93
Adding tabs to a file 85 Thumbnails area Remove Content A thumbnail view of the job with page numbers and tabs indicated. Removes the selected page or tab. Settings Saved Settings Save Delete Lists the saved settings files. Saves the currently selected settings in a file. This settings file - Konica Minolta AccurioPress 6120 | IC-309m2 User Guide - Page 94
86 Chapter 7-Production workflows 3. In the Tabs area, set the tab attributes. 4. (Optional) In the Text area, set the attributes of the text on the tabs. 5. Click the Content tab. 6. In the Before Page column, click the first cell and type the number of the page that you want the tab to precede. - Konica Minolta AccurioPress 6120 | IC-309m2 User Guide - Page 95
Working with the Creo Server Tabs plug-in for Acrobat 87 8. To add more tabs, repeat steps 6 and 7. 9. Click Apply to apply the tab settings to your document. The Tabs Printing window closes, and the tabs that you added become part of the document. 10. From the Acrobat File menu, select Save, and - Konica Minolta AccurioPress 6120 | IC-309m2 User Guide - Page 96
88 Chapter 7-Production workflows Managing tabs Changing the location of a tab 1. In the Storage area, right-click your unprocessed job, and select Job Preview. The job opens in Acrobat software. 2. From the Plug-Ins menu, select Tabs Printing. The Tabs Printing window opens, displaying the Text - Konica Minolta AccurioPress 6120 | IC-309m2 User Guide - Page 97
Removing a page or tab from the file 89 Removing a page or tab from the file 1. In the Storage area, right-click your unprocessed job, and select Job Preview. The job opens in Acrobat software. 2. From the Plug-Ins menu, select Tabs Printing. The Tabs Printing window opens, displaying the Text - Konica Minolta AccurioPress 6120 | IC-309m2 User Guide - Page 98
list, select the desired saved settings. 4. Click Delete. Working with near-line finishers Near-line finisher overview The IC-309m2 print controller supports three near-line finishers- the Duplo DC-645 slitter/cutter/creaser, Duplo DSF-2000 sheet feeder, and Duplo DSF-5000 sheet feeder. Using - Konica Minolta AccurioPress 6120 | IC-309m2 User Guide - Page 99
Generating a corner mark and bar code 91 Generating a corner mark and bar code Generate a bar code, or corner mark, and print the finishing marks for a near-line finisher. Requirements: The job details that you are going to use must already be programmed on the near-line finisher. 1. Open the job - Konica Minolta AccurioPress 6120 | IC-309m2 User Guide - Page 100
that enables databases, text, and graphic elements to be merged and displayed on the printed sheet. There are specific IPDS printers installed to support this workflow. These IPDS printers can also be customized according to your needs. In IPDS printing the IC-309m2 print controller emulates an - Konica Minolta AccurioPress 6120 | IC-309m2 User Guide - Page 101
Selecting the IPDS workflow mode 93 in freeze status in the Incoming queue, until switching back to File Submission mode. ● The Import button and also most of the IC-309m2 print controller's tools such as calibration, job preview, gradation and more are unavailable. Some stay accessible, for - Konica Minolta AccurioPress 6120 | IC-309m2 User Guide - Page 102
Requirements: Note: The IPDS workflow is available only with the Trans Pack. This procedure is performed on the IPDS host computer. 1. Create a Print Services Facility (PSF) TCP/IP printer. This printer will be used as the IC-309m2 print controller IPDS printer. 2. Set the following options for the - Konica Minolta AccurioPress 6120 | IC-309m2 User Guide - Page 103
many of the emulations, the resolution is limited by the printer, and the IPDS Resolution is ignored. ● IPDS Resolution-This option specifies the press supported resolution. You can select: Auto, 240, 300, 480, or 600. ● Valid printing area-Select Border, Move, Edge, or, Fit ● Report to host on-To - Konica Minolta AccurioPress 6120 | IC-309m2 User Guide - Page 104
96 Chapter 7-Production workflows Parameter Option Default font Default font size Font substitution Description The selected font is used as the default font for the job, unless the IPDS stream already contains the fonts. Enables you to set the default font size for the default font. Provides - Konica Minolta AccurioPress 6120 | IC-309m2 User Guide - Page 105
be visible. ● Transparent only on front-Only on front side any elements that are under the white IOCA image will be visible. Support font modification Font modification parameters alter the appearance of a typeface. By default, the following font modification parameters are defined: double high - Konica Minolta AccurioPress 6120 | IC-309m2 User Guide - Page 106
98 Chapter 7-Production workflows Parameter Marks and barcodes Option Marks and barcodes Description Enables you to add a mark set that was defined in the Resource Center, and define on which sheets the marks appear. Provides the following options: ● All-Prints the marks on each sheet in your - Konica Minolta AccurioPress 6120 | IC-309m2 User Guide - Page 107
Quality parameters 99 Parameter Parameter Quality Overprint Option Face down Description Delivers the job face down Quality parameters Note: The IPDS workflow is available only with the Trans Pack. Option Image quality Description Provides the following options: ● Normal-Processes the image - Konica Minolta AccurioPress 6120 | IC-309m2 User Guide - Page 108
. Provides the following options: ● Use tone transfer curve settings ● Use ICC profiles embedded in objects container data In case Audit profiles is equal to instruction profile: ● Use direct path ● Perform Color Management Profile CMYK source profile Enables you to select a CMYK source profile. - Konica Minolta AccurioPress 6120 | IC-309m2 User Guide - Page 109
Working in IPDS mode 101 Parameter Option CMYK rendering intent Description All printers, monitors, and scanners have a gamut or range of colors that they can output (or view in the case of a scanner). If a color needs to be output and is outside the gamut of the output device, it must be mapped - Konica Minolta AccurioPress 6120 | IC-309m2 User Guide - Page 110
102 Parameter Adjustments Chapter 7-Production workflows Option RGB source profile RGB rendering intent Brightness Contrast Gradation Description colors in the original images are changed, but the relationship between the colors does not change. Enables you to select an RGB source profile. - Konica Minolta AccurioPress 6120 | IC-309m2 User Guide - Page 111
that are defined in the spot color dictionaries. You can edit these values using the Spot Color Editor tool. The supported spot color dictionaries are: HKS, DIC Color Guide, Pantone, Pantone GOE, Pantone Plus, and TOYO. Refer to the Spot Color Editor window for the complete list. ● Original CMYK - Konica Minolta AccurioPress 6120 | IC-309m2 User Guide - Page 112
from this information. In addition, the IC-309m2 print controller supports JMF when JDF jobs request it specifically (Audit Pool). It sends is useful for job tracking. Submitting pages from Prinergy using basic JDF instructions 1. In Kodak Prinergy Workshop, in the Job Manager window, select one - Konica Minolta AccurioPress 6120 | IC-309m2 User Guide - Page 113
Working with Job Definition Format 105 6. Click Browse next to the JDF path box, and locate the path to the hot folder on the IC-309m2 print controller. - Konica Minolta AccurioPress 6120 | IC-309m2 User Guide - Page 114
106 Chapter 7-Production workflows - Konica Minolta AccurioPress 6120 | IC-309m2 User Guide - Page 115
Markup Language (PPML) ● PDF/VT ● Variable Data Exchange (VDX) Variable data printing (VDP jobs are created using VDP authoring programs that support Variable Print Specification formats. Most VDP authoring programs can convert VDP files to conventional PostScript files, which can also be processed - Konica Minolta AccurioPress 6120 | IC-309m2 User Guide - Page 116
stored as EPS files when appropriate. Reusable elements include clipping and scaling instructions as well as the image data. ● Inline elements-Unique information that that can generate PPML files. The IC-309m2 print controller supports PPML formats and enables you to process PPML jobs efficiently and - Konica Minolta AccurioPress 6120 | IC-309m2 User Guide - Page 117
several PDF features and relied on constructs external to PDF. The modern standard PDF/VT is based on the PDF/X-4 and PDF/X-5 standards and supports PDF 1.6 features including transparency, layers, and ICC-based color management. In addition to the requirements of PDF/X, the PDF/VT standard adds - Konica Minolta AccurioPress 6120 | IC-309m2 User Guide - Page 118
110 Chapter 8-Variable data printing jobs 1. From the Tools menu, select Resource Center. 2. In the Resource list, select Reusable Elements management. Your VDP jobs are listed in the left pane. In the right pane, all of the reusable elements that are associated with your job are listed. 3. Select - Konica Minolta AccurioPress 6120 | IC-309m2 User Guide - Page 119
9 Job parameters Print tab in the job parameters window Parameter Paper stock Edit print parameters for your job. Option Description Paper stock Provides the following options: ● Parameters from file-Maps the paper parameters according to one of the following options: ○ Paper name available - Konica Minolta AccurioPress 6120 | IC-309m2 User Guide - Page 120
head to toe-Two-sided printing for calendar-style hard copies (usually used with landscape jobs). Layout Scaling Provides the following options: ● Manual-Increases or decreases the image size according to the percentage that you enter. Note: The default option, 100%, prints the original image - Konica Minolta AccurioPress 6120 | IC-309m2 User Guide - Page 121
Print tab in the job parameters window 113 Parameter Image alignment Option Rotate 180º Description Rotates your job by 180°. Provides the following options: ● All pages ● All front pages ● All back pages ● All landscape pages ● All portrait pages Image alignment Position of the image on the - Konica Minolta AccurioPress 6120 | IC-309m2 User Guide - Page 122
114 Chapter 9-Job parameters Imposition tab in the job parameters window Parameter Imposition method Set and apply imposition settings to your job. Option Description Method Provides the following options: ● None-Imposition parameters are not available, and the thumbnail viewer does not - Konica Minolta AccurioPress 6120 | IC-309m2 User Guide - Page 123
Imposition tab in the job parameters window 115 Parameter Size Templates Option Preview Trim size Trim orientation Preview Layout Description same sheet. The booklets are arranged in the cut-and-stack method. ○ Nested Saddle - Sheet per group-A book-finishing technique that combines the saddle- - Konica Minolta AccurioPress 6120 | IC-309m2 User Guide - Page 124
116 Chapter 9-Job parameters Parameter Option Print method Description Provides the following options for how the document will be printed: ● Simplex Note: This option is not available for the saddle-stitch and perfect bound imposition methods. ● Duplex HTH ● Duplex HTT Binding selection North - Konica Minolta AccurioPress 6120 | IC-309m2 User Guide - Page 125
Imposition tab in the job parameters window 117 Parameter Marks Option Marks Description Provides the following options: ● None-Does not apply any marks on the imposition layout for the printed job. ● Crop marks-Prints the lines that indicate where the sheet should be cropped to the trim size. - Konica Minolta AccurioPress 6120 | IC-309m2 User Guide - Page 126
118 Chapter 9-Job parameters Parameter Signature marks Spacing Option Mode Description Enables you to print a mark on the front or back of a folded signature. Signature marks help in assembling printed signatures for binding in the correct order. Provides the following options: ● Off-Signature - Konica Minolta AccurioPress 6120 | IC-309m2 User Guide - Page 127
Imposition tab in the job parameters window 119 Parameter Option Spine Gap Between Sets Bleed Description Note: This option is available only when the imposition method is set to Perfect Bound. Determines where the signatures are joined at the center fold and then stitched or bound. The value - Konica Minolta AccurioPress 6120 | IC-309m2 User Guide - Page 128
120 Chapter 9-Job parameters Parameter Creep Option Creep Description Note: Creep is only available when imposition is set to Saddle stitch, or when the Nested Saddle option is selected for the Perfect Bound imposition method. Creep is used to compensate for the physical shift of the inner - Konica Minolta AccurioPress 6120 | IC-309m2 User Guide - Page 129
Quality tab in the job parameters window 121 Parameter Overprint Resolution Screening Option Image compression quality Description Enables you to control the quality of JPEG images in your job. Provides the following options: ● Normal ● High Improve text/ line in Image Significantly improves - Konica Minolta AccurioPress 6120 | IC-309m2 User Guide - Page 130
122 Chapter 9-Job parameters Monochrome tab in the job parameters window Parameter Profile Although the IC-309m2 print controller drives monochrome printers, you apply various color settings and options to improve the color quality of your job when the job is processed. Option Description - Konica Minolta AccurioPress 6120 | IC-309m2 User Guide - Page 131
Monochrome tab in the job parameters window 123 Parameter Option RGB source profile RGB rendering intent Adjustments Brightness Contrast Gradation Description Enables you to select an RGB source profile. Provides the following options (for information on each option, see the descriptions of the - Konica Minolta AccurioPress 6120 | IC-309m2 User Guide - Page 132
are defined in the spot color dictionaries. You can edit these values using the Spot Color Editor tool. The spot color dictionaries supported are: HKS, DIC Color Guide, Pantone, Pantone GOE, Pantone Plus, and TOYO. See the Spot Color Editor window for the complete list. ● Original CMYK file values - Konica Minolta AccurioPress 6120 | IC-309m2 User Guide - Page 133
Finishing tab in the job parameters window 125 Parameter Option Stapler Main tray Description ● Staples ○ None ○ Rear ○ Front ○ Dual ● Multi hole punch-This option is available only if the multi hole punch module is connected. ● Offset Stapler Fold tray ● Fold type ○ Multi half fold ○ Multi - Konica Minolta AccurioPress 6120 | IC-309m2 User Guide - Page 134
126 Parameter Option Multi fold sub tray Description ● Fold type ○ Tri-fold-in Chapter 9-Job parameters ○ Tri-fold-out ○ Double parallel fold ○ Gate fold ● Punch-The values vary according to the type of punch unit connected. The number of holes is 2, 3, or 4. - Konica Minolta AccurioPress 6120 | IC-309m2 User Guide - Page 135
Finishing tab in the job parameters window 127 Parameter Option Multi fold main tray Description ● Fold type ○ Half fold ○ Z fold ○ Tri-fold-in ○ Tri-fold-out ○ Double parallel fold ○ Gate fold - Konica Minolta AccurioPress 6120 | IC-309m2 User Guide - Page 136
128 Parameter Option Description Chapter 9-Job parameters ● Punch-The values vary according to the type of punch unit connected. The number of holes is 2, 3, or 4. Multi Tri-foldin Saddle stitch sub tray Saddle stitch main tray Multi hole punch-This option is available only if the multi hole - Konica Minolta AccurioPress 6120 | IC-309m2 User Guide - Page 137
Finishing tab in the job parameters window 129 Parameter Option Description Perfect binder main tray The perfect binder provides the following options: ● Pull Cover from-Enables you to select the tray that contains the paper on which the cover will be printed ● Cover content ○ Blank/ - Konica Minolta AccurioPress 6120 | IC-309m2 User Guide - Page 138
documents using registration marks and barcodes. Note: A barcode is used only if you want to use a preset job number. Otherwise, you can select it manually on the Duplo DC-645. ● DSF-2000 finisher is a sheet feeder that is configured with a barcode reader. ● DSF-5000 finisher is a sheet feeder that - Konica Minolta AccurioPress 6120 | IC-309m2 User Guide - Page 139
Finishing tab in the job parameters window 131 Parameter Option Generate corner mark Generate barcode Position Side Registration line offset Corner mark offset Barcode offset End mark Description Select Generate corner mark to print correct corner marks on sheets. The long line is parallel with - Konica Minolta AccurioPress 6120 | IC-309m2 User Guide - Page 140
132 Chapter 9-Job parameters Parameter Marks and barcodes Slip Sheet Option Description Enables you to add a mark set that was defined in the Resource Center, and define on which sheets the marks appear. Provides the following options: ● All-Prints the marks on each sheet in your job. ● - Konica Minolta AccurioPress 6120 | IC-309m2 User Guide - Page 141
for the exception programming. Note: This option is only available for jobs that are split to sets in the Services tab. ● Front cover or Back cover-Select one of the duplex options to print the first two (or last : This option is only available for jobs that are split to sets in the Services tab. - Konica Minolta AccurioPress 6120 | IC-309m2 User Guide - Page 142
the mapping results See also: Printing dynamic page exceptions on page 77 Setting custom page exceptions via the job parameters window on page 79 Services tab in the job parameters window Set parameters that will facilitate your job workflow. For example, you can set workflow policies and activate - Konica Minolta AccurioPress 6120 | IC-309m2 User Guide - Page 143
Services tab in the job parameters window 135 Parameter Job flow Option Job flow Description Defines the flow that the job associated with this job ticket - Konica Minolta AccurioPress 6120 | IC-309m2 User Guide - Page 144
136 Chapter 9-Job parameters Parameter Job slug Preflight Option Description PDF optimization Significantly the decreases processing time for PDF jobs with repeated elements by applying a workflow intended for PDF jobs. Job name Prints the name of the job in the margin of the sheets. Sheet - Konica Minolta AccurioPress 6120 | IC-309m2 User Guide - Page 145
booklets (if necessary) to close the job. Select this option to support APR and OPI. Displays the original name of the file related to specific customer or group. Displays the name of the customer. Displays special instructions that you want to include in your job. Displays the relevant URL for - Konica Minolta AccurioPress 6120 | IC-309m2 User Guide - Page 146
138 Chapter 9-Job parameters - Konica Minolta AccurioPress 6120 | IC-309m2 User Guide - Page 147
10 Setting up your Creo server Preferences window Manage your system and resources. The Preferences window is available from the File menu. Most of these settings are configured when the system is set up for the first time. You should consult with the site administrator before changing any of the - Konica Minolta AccurioPress 6120 | IC-309m2 User Guide - Page 148
140 Option Remote Tools Setup Chapter 10-Setting up your Creo server Description Provides the following options: ● Enable WebViewer-Enables you to use the Web Viewer to connect from your computer to the IC-309m2 print controller via the network. ● Enable Remote Connection-Enables you to open an - Konica Minolta AccurioPress 6120 | IC-309m2 User Guide - Page 149
Preferences window Option Security Image Disks 141 Description If the Auto log on check box is selected, you can open the workspace automatically as an operator without logging on each time. Notes: ● You can log on as an operator or as a guest if neither the Auto log on check box nor the Disable - Konica Minolta AccurioPress 6120 | IC-309m2 User Guide - Page 150
days or hours, you want jobs to be deleted from the Storage area. The default setting holds the jobs in the Storage area until you manually delete them. Held Jobs ● Delete held jobs after-Enables you to select how often, in hours, you want held jobs to be deleted. Delete global - Konica Minolta AccurioPress 6120 | IC-309m2 User Guide - Page 151
Preferences window Option Print Queues Manager Messages JDF Outputs 143 Description Provides the following options: Job batching policy: ● Enable job batching-Prints jobs that have similar attributes one after another, without pausing between jobs. ● Disable job batching-Enables the printer to - Konica Minolta AccurioPress 6120 | IC-309m2 User Guide - Page 152
when Printing via LPR): ○ Use PostScript internal name: Uses the internal file name that the print driver found in the PostScript file. ○ Use files name: Uses the job's given file name. Selecting messages, contact an SMS provider that offers services for SMS transit and register for an SMS account. - Konica Minolta AccurioPress 6120 | IC-309m2 User Guide - Page 153
each user who should receive notifications. 8. Click Save. Note: If you want to deactivate the services for a short period of time- for example, to perform maintenance procedures-clear the Enable Services check box in the Preferences window. All of your settings will be saved. Setting up a virtual - Konica Minolta AccurioPress 6120 | IC-309m2 User Guide - Page 154
146 Chapter 10-Setting up your Creo server Virtual printers are used for automating workflows, which then define job streaming. A virtual printer contains preset workflows that are automatically applied to all print jobs processed with that virtual printer. Because there is no need to reset job - Konica Minolta AccurioPress 6120 | IC-309m2 User Guide - Page 155
Restoring the settings for a default virtual printer 147 7. (Optional) Select the Override PPD parameters check box if you would like the virtual printer settings to override the parameters set in the PPD file. 8. (Optional) In the Comments box, type any comment regarding the virtual printer - Konica Minolta AccurioPress 6120 | IC-309m2 User Guide - Page 156
148 Chapter 10-Setting up your Creo server Best practices for maximizing performance Maximize performance for all file types. Performance will be improved for files whose job parameters include the following settings: ● Delete printed jobs from storage check box and Delete failed jobs from storage - Konica Minolta AccurioPress 6120 | IC-309m2 User Guide - Page 157
Creating a custom mark set 149 Once you save a mark set, you can apply it to your job via the job parameters window. Creating a custom mark set Create a custom mark set for your job. The IC-309m2 print controller includes a set of predefined marks. These marks can not be edited or deleted. 1. In - Konica Minolta AccurioPress 6120 | IC-309m2 User Guide - Page 158
150 Chapter 10-Setting up your Creo server Adding a barcode Add a barcode to a mark set, and define the barcode data code in the Resource Center window. The IC-309m2 print controller provides four predefined types of barcodes: ● Code 39-An alphanumeric barcode of up to 50 characters. ● EAN-8-A - Konica Minolta AccurioPress 6120 | IC-309m2 User Guide - Page 159
Using mark sets 151 8. In the Enter a barcode value area, type the barcode value according to the requirements of the type of barcode that you selected. 9. Define variable information for a barcode-for example, the total number of booklets or the sheet number-by performing the following actions: - Konica Minolta AccurioPress 6120 | IC-309m2 User Guide - Page 160
152 Chapter 10-Setting up your Creo server 12. Select a reference point for the x-coordinate and y-coordinate that you defined for the barcode position. 13. (Optional)To rotate the barcode on the sheet, select a value. Next: You can assign a mark set to your job in the job parameters window by - Konica Minolta AccurioPress 6120 | IC-309m2 User Guide - Page 161
, by permanently removing data left by files that you have deleted. ● Auto update tool: Enables you to install software updates. These updates include the latest service packs, Windows hot fixes, and related patches for your IC-309m2 print controller. - Konica Minolta AccurioPress 6120 | IC-309m2 User Guide - Page 162
154 Chapter 10-Setting up your Creo server - Konica Minolta AccurioPress 6120 | IC-309m2 User Guide - Page 163
11 Working with Creo server tools Remote Site Manager overview The Remote Site Manager enables a site manager to monitor the status of the IC-309m2 print controller and other Creo servers connected to printers on a network. It also enables you, the site manager, to operate these servers from a - Konica Minolta AccurioPress 6120 | IC-309m2 User Guide - Page 164
156 Chapter 11-Working with Creo server tools 6. Click Save. Installing the Remote Site Manager in Windows Install the Remote Site Manager so that you can add servers, monitor their status, and obtain information about the printer, all from your computer. 1. On your desktop, click Start > Run. 2. - Konica Minolta AccurioPress 6120 | IC-309m2 User Guide - Page 165
Adding Creo servers to the Remote Site Manager 157 Adding Creo servers to the Remote Site Manager Using the Remote Site Manager software, set up servers via the Remote Site Manager Setup window. You can add up to 15 Creo servers. 1. On the taskbar, right-click the Remote Site Manager icon. 2. From - Konica Minolta AccurioPress 6120 | IC-309m2 User Guide - Page 166
● \Applications \Creo_Server_Tools\Remote_Site_Manager ● \Library\Application Support \Creo_Server_Client_Tools\Remote_Site_Manager ● \Library\Application Support \Creo_Server_Client_Tools\Remote_Workspace Remote Workspace overview The Remote - Konica Minolta AccurioPress 6120 | IC-309m2 User Guide - Page 167
. The Web center enables you to: ● Download remote client tools and printer drivers ● View related documentation ● Find links to related vendors or products ● Connect to The following Microsoft Office versions are supported: ● Microsoft Office XP ● Microsoft Office 2003 ● Microsoft Office 2007 ● - Konica Minolta AccurioPress 6120 | IC-309m2 User Guide - Page 168
160 Chapter 11-Working with Creo server tools Installing the Office Hot Folder tool Requirements: Microsoft Office must be installed on your computer in order to work with Office Hot Folder tool. 1. On the IC-309m2 print controller, locate the D:\Utilities \PC Utilities folder. 2. Double-click the - Konica Minolta AccurioPress 6120 | IC-309m2 User Guide - Page 169
a remote computer, you don't need to be connected to a Creo server to create a job ticket. You can assign a job ticket to any of the supported file types. With the Remote Job Ticket software you can: ● Create a job ticket ● Open a job ticket ● Load job parameters from a selected server ● Send a job - Konica Minolta AccurioPress 6120 | IC-309m2 User Guide - Page 170
162 Chapter 11-Working with Creo server tools Note: Custom imposition templates, including the pre-defined Folded Signature imposition templates, cannot be previewed from the Remote Job Ticket software. Language settings The Remote Job Ticket software displays the language of your computer's - Konica Minolta AccurioPress 6120 | IC-309m2 User Guide - Page 171
Creating and managing job tickets 163 Creating and managing job tickets Creating a job ticket in Windows 1. From the Start menu, select Programs > Creo Server > Remote Job Ticket > Remote Job Ticket V1_0. The Remote JT window opens. 2. To add a server, perform the following actions: a. From the - Konica Minolta AccurioPress 6120 | IC-309m2 User Guide - Page 172
164 Chapter 11-Working with Creo server tools Creating a job ticket in Mac OS X 1. From the Applications folder, navigate to /Creo_Tools/ Remote_Job_Ticket/ and double click the Remote_Job_Ticket icon. The Remote JT window opens. 2. To add a server, perform the following actions: a. From the Tools - Konica Minolta AccurioPress 6120 | IC-309m2 User Guide - Page 173
Submitting a file with job ticket for printing 165 1. From the Tools menu, select Use JT Settings From. 2. In the list that appears, click the server from which you want to load job parameters. A check mark appears next to the selected server, and the Remote Job Ticket software loads the - Konica Minolta AccurioPress 6120 | IC-309m2 User Guide - Page 174
166 Chapter 11-Working with Creo server tools 9. Click Save, and then close the Remote JT window. Note: When you edit and save Creo server job parameters settings from within Prinergy, the settings are applied only to your current job and not saved for future jobs. 10. From the Submit to Digital - Konica Minolta AccurioPress 6120 | IC-309m2 User Guide - Page 175
Adding a server 167 Adding a server 1. From the Tools menu, select Use JT Settings From . 2. Click the Add button. 3. In the Server Name box, type a name for the server that you want to use. 4. In the IP / Host Name box, type the IP address or host name of the server that you want to use. 5. Click - Konica Minolta AccurioPress 6120 | IC-309m2 User Guide - Page 176
168 Updates Chapter 11-Working with Creo server tools Note: If you have already changed the location, the Default JDF Location box displays the location that you selected previously. 2. In the Default JDF Location box, click Browse and select the desired location. 3. Click OK. 4. In the Preferences - Konica Minolta AccurioPress 6120 | IC-309m2 User Guide - Page 177
Job Ticket software before you can uninstall. Delete the following folders: a. /Applications/Creo_Server_Tools/ Remote_Job_Ticket b. Library/Application Support/ Creo_Server_Client_tools/Creo_Server_JT Changing the Network settings to TCP/IPv6 on a remote computer This procedure describes how to - Konica Minolta AccurioPress 6120 | IC-309m2 User Guide - Page 178
170 Chapter 11-Working with Creo server tools 5. Type 1. 6. On the remote computer, change the Network settings to support TCP/IPv6. 7. Reboot the remote computer. 8. Reconnect the Remote Job Ticket application and continue the set up as usual. - Konica Minolta AccurioPress 6120 | IC-309m2 User Guide - Page 179
12 Troubleshooting Job History window The Job History window lists all of the messages generated during the workflow of the selected job. You can view the job - Konica Minolta AccurioPress 6120 | IC-309m2 User Guide - Page 180
172 Chapter 12-Troubleshooting Handling alerts and jobs If your job has failed or Alert button on the toolbar. If you click the frozen or failed icon, a message appears detailing the problem. If you click the Alert button on the toolbar, the Alerts window appears. 2. Close the alerts information - Konica Minolta AccurioPress 6120 | IC-309m2 User Guide - Page 181
Aborting a job 173 Aborting a job Requirements: A job that is processing or printing. Right-click the running job in one of the queues, and select Abort and then click Yes. The job moves from the queue to the Storage area. The Aborted status is assigned to the job, and the next job in the queue - Konica Minolta AccurioPress 6120 | IC-309m2 User Guide - Page 182
174 Chapter 12-Troubleshooting Printing system messages Print a list of system messages from the Message Viewer window. 1. From the Info menu, select Messages Viewer. 2. Filter and sort the message - Konica Minolta AccurioPress 6120 | IC-309m2 User Guide - Page 183
13 Glossary absolute colorimetric A method of color matching during the translation of files from one device to another. The absolute colorimetric method refers to the use of device-independent color space. amplitude-modulated (AM) screening A type of halftone screening in which the size of the - Konica Minolta AccurioPress 6120 | IC-309m2 User Guide - Page 184
176 Chapter 13-Glossary bounding box In a PostScript file, the smallest rectangle that encloses all of the graphic elements. The bounding box is specified by two sets of coordinates. brightness The amount of light reflected from a surface, regardless of the hue or saturation of color. In print - Konica Minolta AccurioPress 6120 | IC-309m2 User Guide - Page 185
blue. color correction The process of improving or altering the color components of an image to compensate for deficiencies in printing inks, to solve problems in the color separation itself, or to fulfill a customer's request for modification. color gamut The range of possible colors that can be - Konica Minolta AccurioPress 6120 | IC-309m2 User Guide - Page 186
178 Chapter 13-Glossary color space array (CSA) A three-dimensional or four-dimensional lookup table that contains data for translating a device-dependent color space into a deviceindependent L*a*b* color space. composite mode A mode of operation in which all the color information associated with - Konica Minolta AccurioPress 6120 | IC-309m2 User Guide - Page 187
179 database A software module that holds site configuration information, edition plan information, and the current state of each process and planned item. At least one workstation at each site must have a database installed. DCS (desktop color separation) An EPS format containing five files: - Konica Minolta AccurioPress 6120 | IC-309m2 User Guide - Page 188
180 Chapter 13-Glossary device An individual occurrence of a physical device that reproduces an image. Devices have a type and a customer-specified name. Because the declaration of a device does not include its operating conditions-such as ink selection, type of screening, and paper- you cannot - Konica Minolta AccurioPress 6120 | IC-309m2 User Guide - Page 189
181 dot gain A printing effect which results in dots being printed larger than they should be. It occurs as a result of ink spreading on the printed page, and if not compensated for, can lead to an image appearing too dark. element Any item within a job-including an input file, page, page set, - Konica Minolta AccurioPress 6120 | IC-309m2 User Guide - Page 190
A hidden file that is created when you associate an input file with a particular template. The job ticket contains all the instructions for processing the input file. L*a*b* A device-independent color measurement system that measures Lightness (or Luminance) and two color coordinates, A (red - Konica Minolta AccurioPress 6120 | IC-309m2 User Guide - Page 191
Printer Description) A file specification set by Adobe Systems, Inc. It contains outputdevice-specific information, including fonts, line screens, offset margins, supported page sizes, and so on. pre-separated file A PDF, PostScript, or TIFF file that contains a separate page for each color in - Konica Minolta AccurioPress 6120 | IC-309m2 User Guide - Page 192
, and other devices in which the light is direct and not reflected. rich black A black area to which layers of other inks, referred to as support screens or booster colors, have been added to make the color as dark as possible. RTP (ready-to-print) job A job that has been RIPed - Konica Minolta AccurioPress 6120 | IC-309m2 User Guide - Page 193
185 shadows The darkest part of an image (original and reproduction). A shadow has densities near the maximum. In a reproduction, shadows are printed with dot areas between 80 percent and 100 percent. sheet Both surfaces of one printed press sheet. short-edge first (SEF) A printer page - Konica Minolta AccurioPress 6120 | IC-309m2 User Guide - Page 194
. TIFF is crossplatform, highly flexible, and capable of saving a wide variety of image types, including photographs and illustrations. Most page makeup and image editing software supports TIFF. - Konica Minolta AccurioPress 6120 | IC-309m2 User Guide - Page 195
187 TIFF/IT-P1 Acronym for Tagged Image File Format for Image Technology, Profile 1. A file format that is similar to TIFF/IT, but provides a minimized set of options that allows simpler implementation when the full set of TIFF/IT options is not required. tint The percentage value assigned to a - Konica Minolta AccurioPress 6120 | IC-309m2 User Guide - Page 196
188 Chapter 13-Glossary - Konica Minolta AccurioPress 6120 | IC-309m2 User Guide - Page 197
92 print parameters 97 printer parameters 94 quality parameters 99 selecting IPDS mode 93 J Job Definition Format overview 104 Submitting pages from Prinergy using JDF instructions 104 Job Editor merging one job with another 34 overview 33 replacing pages 34 Job History 171 - Konica Minolta AccurioPress 6120 | IC-309m2 User Guide - Page 198
, Powered by Creo Server Technology, for the Konica Minolta monochrome bizhub presses User Guide Job Preview finding CMYK values of a specific 37 Preflight report viewing and printing 38 Preps Pack 5, 6 Installing 6 Print Driver software 15, 18, 20, 23-25, 28 deactivating 20 installing in Mac - Konica Minolta AccurioPress 6120 | IC-309m2 User Guide - Page 199
Index 191 Services tab Optimization 134 APR/OPI 134 Banner Page 134 Font substitution 134 Job deletion 134 Job flow 134 Job Info 134 Job slug 134 Preflight - Konica Minolta AccurioPress 6120 | IC-309m2 User Guide - Page 200
-
 1
1 -
 2
2 -
 3
3 -
 4
4 -
 5
5 -
 6
6 -
 7
7 -
8
-
9
-
10
-
11
-
12
-
13
-
14
-
15
-
16
-
17
-
18
-
19
-
20
-
21
-
22
-
23
-
24
-
25
-
26
-
27
-
28
-
29
-
30
-
31
-
32
-
33
-
34
-
35
-
36
-
37
-
38
-
39
-
40
-
41
-
42
-
43
-
44
-
45
-
46
-
47
-
48
-
49
-
50
-
51
-
52
-
53
-
54
-
55
-
56
-
57
-
58
-
59
-
60
-
61
-
62
-
63
-
64
-
65
-
66
-
67
-
68
-
69
-
70
-
71
-
72
-
73
-
74
-
75
-
76
-
77
-
78
-
79
-
80
-
81
-
82
-
83
-
84
-
85
-
86
-
87
-
88
-
89
-
90
-
91
-
92
-
93
-
94
-
95
-
96
-
97
-
98
-
99
-
100
-
101
-
102
-
103
-
104
-
105
-
106
-
107
-
108
-
109
-
110
-
111
-
112
-
113
-
114
-
115
-
116
-
117
-
118
-
119
-
120
-
121
-
122
-
123
-
124
-
125
-
126
-
127
-
128
-
129
-
130
-
131
-
132
-
133
-
134
-
135
-
136
-
137
-
138
-
139
-
140
-
141
-
142
-
143
-
144
-
145
-
146
-
147
-
148
-
149
-
150
-
151
-
152
-
153
-
154
-
155
-
156
-
157
-
158
-
159
-
160
-
161
-
162
-
163
-
164
-
165
-
166
-
167
-
168
-
169
-
170
-
171
-
172
-
173
-
174
-
175
-
176
-
177
-
178
-
179
-
180
-
181
-
182
-
183
-
184
-
185
-
186
-
187
-
188
-
189
-
190
-
191
-
192
-
193
-
194
-
195
-
196
-
197
-
198
-
199
-
200
 |
 |

User Guide
English
IC-309m2
Print Controller, Powered by
Creo
Server Technology, for the Konica
Minolta
monochrome bizhub presses
Version 1.0
731-02145A-EN RevA