Konica Minolta AccurioPrint C3070L AccurioPress C2070/C3080 Series Daily Maint - Page 153
Execute Calibration] screen., When the chart measurement is completed
 |
View all Konica Minolta AccurioPrint C3070L manuals
Add to My Manuals
Save this manual to your list of manuals |
Page 153 highlights
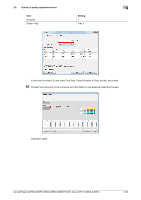
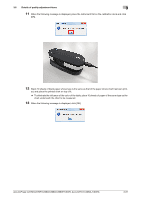
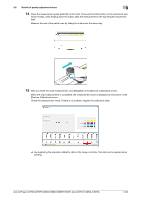
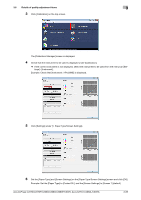
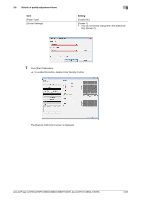
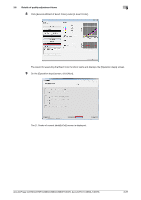
3.6 Details of quality adjustment items 3 14 Place the measurement guide plate flat on the chart. Press and hold the button on the instrument and when it beeps, while holding down the button slide the instrument from the top left patch toward the right. Measure the rest of the patch rows by sliding the instrument the same way. 15 After you finish the chart measurement, click [Register] on the [Execute Calibration] screen. When the chart measurement is completed, the measurement result is displayed at the bottom of the [Execute Calibration] screen. Check the measurement result. If there is no problem, register the calibration table. % By registering the acquired calibration data in the image controller, this data can be applied when printing. AccurioPress C2070/C2070P/C2060/C3080/C3080P/C3070, AccurioPrint C2060L/C3070L 3-82
-
 1
1 -
2
-
3
-
4
-
5
-
6
-
7
-
8
-
9
-
10
-
11
-
12
-
13
-
14
-
15
-
16
-
17
-
18
-
19
-
20
-
21
-
22
-
23
-
24
-
25
-
26
-
27
-
28
-
29
-
30
-
31
-
32
-
33
-
34
-
35
-
36
-
37
-
38
-
39
-
40
-
41
-
42
-
43
-
44
-
45
-
46
-
47
-
48
-
49
-
50
-
51
-
52
-
53
-
54
-
55
-
56
-
57
-
58
-
59
-
60
-
61
-
62
-
63
-
64
-
65
-
66
-
67
-
68
-
69
-
70
-
71
-
72
-
73
-
74
-
75
-
76
-
77
-
78
-
79
-
80
-
81
-
82
-
83
-
84
-
85
-
86
-
87
-
88
-
89
-
90
-
91
-
92
-
93
-
94
-
95
-
96
-
97
-
98
-
99
-
100
-
101
-
102
-
103
-
104
-
105
-
106
-
107
-
108
-
109
-
110
-
111
-
112
-
113
-
114
-
115
-
116
-
117
-
118
-
119
-
120
-
121
-
122
-
123
-
124
-
125
-
126
-
127
-
128
-
129
-
130
-
131
-
132
-
133
-
134
-
135
-
136
-
137
-
138
-
139
-
140
-
141
-
142
-
143
-
144
-
145
-
146
-
147
-
 148
148 -
 149
149 -
 150
150 -
 151
151 -
 152
152 -
 153
153 -
 154
154 -
 155
155 -
 156
156 -
 157
157 -
 158
158 -
159
-
160
-
161
-
162
-
163
-
164
-
165
-
166
-
167
-
168
-
169
-
170
-
171
-
172
-
173
-
174
-
175
-
176
-
177
-
178
 |
 |
