Konica Minolta Kodak i1860 User Guide - Page 98
Problem, Possible Solution, before, Vertical streaks appear on the image
 |
View all Konica Minolta Kodak i1860 manuals
Add to My Manuals
Save this manual to your list of manuals |
Page 98 highlights
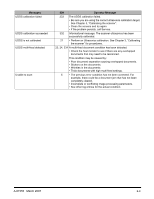
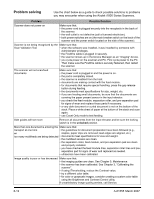
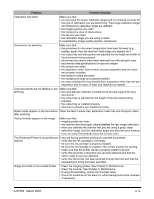
Problem Possible Solution Calibration has failed Make sure that: • you are using the proper calibration target and it is oriented correctly for the type of calibration you are performing. The Image calibration target and Ultrasonics calibration target are different. • the imaging guides are clean. • the transport is clear of obstructions. • the sensors are clean. • the calibration target you are using is clean. If unsatisfactory image quality persists, call Service. Documents are jamming Make sure that: • the guidelines for document preparation have been followed (e.g., staples, paper clips are removed; lead edges are aligned, etc.) • the output tray and side guides are adjusted for the length and width of the documents being scanned. • all jammed documents have been removed from the transport area. • documents meet specifications for size and weight. • the sensors are clean. • the separation roller, feed module, and pre-separation pad are clean and properly installed. • the transport rollers are clean. • the background strips are properly installed. • you have checked the feed module tires, separation roller tires and pre- separation pad for signs of wear and replaced as needed. Long documents are not feeding or are Make sure that: jamming • the input elevator extender is pulled out to provide support for long documents. • the output tray is adjusted for the length of the documents being scanned. • the output tray is installed properly. • document extenders are installed correctly. Roller marks appear on the documents Clean the feed module tires, separation roller tires and transport rollers. after scanning Vertical streaks appear on the image Make sure that: • imaging guides are clean. • the scanner was thoroughly cleaned before the last image calibration. • when you calibrate the scanner that you are using a good, clean calibration target. Use the calibration target provided with your scanner. • If you are using iThresholding, reduce the Contrast value. The Enhanced Printer is not printing as If you are having problems printing on scanned documents: desired • verify that the ink cartridge is not empty. • be sure the ink cartridge is properly installed. • be sure the ink cartridge is located in the correct position for printing. • make sure that the printer carrier is properly seated in its slot. • verify that all printer connectors are securely fastened and that the ribbon cable is securely attached. • verify that the printer has been enabled through the host and that the expected print string has been specified. Image too small or has a black border • Clean the imaging guides. See Chapter 5, Maintenance. • Clean the scanner. See Chapter 5, Maintenance. • If using iThresholding, reduce the Contrast value. • Check for scratches on the black (or white) background strips. Replace if necessary. A-61555 March 2007 6-13
-
 1
1 -
2
-
3
-
4
-
5
-
6
-
7
-
8
-
9
-
10
-
11
-
12
-
13
-
14
-
15
-
16
-
17
-
18
-
19
-
20
-
21
-
22
-
23
-
24
-
25
-
26
-
27
-
28
-
29
-
30
-
31
-
32
-
33
-
34
-
35
-
36
-
37
-
38
-
39
-
40
-
41
-
42
-
43
-
44
-
45
-
46
-
47
-
48
-
49
-
50
-
51
-
52
-
53
-
54
-
55
-
56
-
57
-
58
-
59
-
60
-
61
-
62
-
63
-
64
-
65
-
66
-
67
-
68
-
69
-
70
-
71
-
72
-
73
-
74
-
75
-
76
-
77
-
78
-
79
-
80
-
81
-
82
-
83
-
84
-
85
-
86
-
87
-
88
-
89
-
90
-
91
-
92
-
 93
93 -
 94
94 -
 95
95 -
 96
96 -
 97
97 -
 98
98 -
 99
99 -
 100
100 -
 101
101
 |
 |
