Konica Minolta bizhub 25e bizhub 25e Printer Guide - Page 13
Installing to Windows, Installing via network connection
 |
View all Konica Minolta bizhub 25e manuals
Add to My Manuals
Save this manual to your list of manuals |
Page 13 highlights
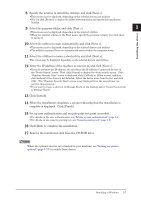
Installing to Windows Please read the following instructions to install printer drivers to Windows operating system. When you connect the machine via network, see "Installing via network connection" (page 1-6). When you connect the machine and computer with USB cable, see "Installing via local connection" (page 1-15). Installing via network connection An IP address is required to install the network driver and use your machine as a network printer and network scanner. You need to obtain the IP address from your network administrator and register it. For details on the IP address settings, see chapter 2, "Specifying the network settings" in the Administrator's Guide. „„ Installing driver NOTE • You must have administrator privileges in order to install the printer driver. • If the [User Account Control] window appears when installing on Windows 8 / Windows 7 / Windows Vista / Windows Server 2012 / Windows Server 2008 R2 / Windows Server 2008, click [Continue] or [Yes]. • If a message regarding the certificate is displayed during installation, click [Install this driver software anyway], [Continue Anyway] or [Yes]. (The displayed message and button names may differ according to the version of the operating system you are using.) 1 Insert the installation disk into the CD-ROM drive of the computer. • The installer starts automatically. • If the installation top screen is not displayed, double-click the "InstMenu.exe" file on the disk. • If the "AutoPlay" dialog box appears, click [InstMenu.exe]. 2 Select your machine name from the "Select Model" menu, and click [Install Drivers]. Click the "Select Language" menu to select the language to display the installer in. 3 Read the license agreement, and click [I agree] if you agree with the terms. • Click [I disagree] return to the installation top screen. • Click [< Back] to return to the installation top screen. 4 Select "Network (connected via LAN cable)", and click [Next >]. 5 Select the installation type, and click [Next >]. • If you selected "Typical Installation (Recommended)", PCL 6 printer driver and scanner driver will be installed. Proceed to step 9. • If you selected "Custom Installation", proceed to step 6. 6 Select the drivers to install, and click [Next >]. Clicking the "+" allows to expand the menu. 7 Select the utilities to install, and click [Next >]. 1-6 Installing to Windows
-
 1
1 -
2
-
3
-
4
-
5
-
6
-
7
-
 8
8 -
 9
9 -
 10
10 -
 11
11 -
 12
12 -
 13
13 -
 14
14 -
 15
15 -
 16
16 -
 17
17 -
 18
18 -
19
-
20
-
21
-
22
-
23
-
24
-
25
-
26
-
27
-
28
-
29
-
30
-
31
-
32
-
33
-
34
-
35
-
36
-
37
-
38
-
39
-
40
-
41
-
42
-
43
-
44
-
45
-
46
-
47
-
48
-
49
-
50
-
51
-
52
-
53
-
54
-
55
-
56
-
57
-
58
-
59
-
60
-
61
-
62
-
63
-
64
-
65
-
66
-
67
-
68
-
69
-
70
-
71
-
72
-
73
-
74
-
75
-
76
-
77
-
78
-
79
-
80
-
81
-
82
-
83
-
84
-
85
-
86
-
87
-
88
-
89
-
90
-
91
-
92
-
93
-
94
-
95
-
96
-
97
-
98
-
99
-
100
-
101
-
102
-
103
-
104
-
105
-
106
-
107
-
108
-
109
-
110
-
111
-
112
-
113
-
114
-
115
-
116
-
117
-
118
-
119
-
120
 |
 |
