Konica Minolta bizhub 25e bizhub 25e Printer Guide - Page 24
Preparation for local installation, Windows 8 and Windows Server 2012 users - driver download
 |
View all Konica Minolta bizhub 25e manuals
Add to My Manuals
Save this manual to your list of manuals |
Page 24 highlights
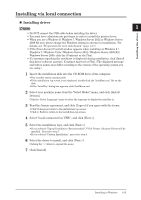
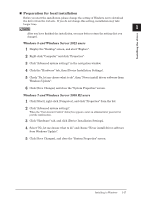
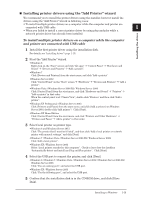
„„ Preparation for local installation Before you start the installation, please change the setting of Windows not to download the driver from the web site. If you do not change this setting, installation may take longer time. NOTE 1 After you have finished the installation, you may better return the setting that you changed. Installing the driver Windows 8 and Windows Server 2012 users 1 Display the "Desktop" screen, and start "Explore". 2 Right-click "Computer" and click "Properties". 3 Click "Advanced system settings" in the navigation window. 4 Click the "Hardware" tab, then [Device Installation Settings]. 5 Check "No, let me choose what to do", then "Never install driver software from Windows Update". 6 Click [Save Changes] and close the "System Properties" screen. Windows 7 and Windows Server 2008 R2 users 1 Click [Start], right-click [Computer], and click "Properties" from the list. 2 Click "Advanced system settings". When the "User Account Control" dialog box appears, enter an administrator password or provide confirmation. 3 Click "Hardware" tab, and click [Device Installation Settings]. 4 Select "No, let me choose what to do" and choose "Never install driver software from Windows Update". 5 Click [Save Changes], and close the "System Properties" screen. Installing to Windows 1-17
-
 1
1 -
2
-
3
-
4
-
5
-
6
-
7
-
8
-
9
-
10
-
11
-
12
-
13
-
14
-
15
-
16
-
17
-
18
-
 19
19 -
 20
20 -
 21
21 -
 22
22 -
 23
23 -
 24
24 -
 25
25 -
 26
26 -
 27
27 -
 28
28 -
 29
29 -
30
-
31
-
32
-
33
-
34
-
35
-
36
-
37
-
38
-
39
-
40
-
41
-
42
-
43
-
44
-
45
-
46
-
47
-
48
-
49
-
50
-
51
-
52
-
53
-
54
-
55
-
56
-
57
-
58
-
59
-
60
-
61
-
62
-
63
-
64
-
65
-
66
-
67
-
68
-
69
-
70
-
71
-
72
-
73
-
74
-
75
-
76
-
77
-
78
-
79
-
80
-
81
-
82
-
83
-
84
-
85
-
86
-
87
-
88
-
89
-
90
-
91
-
92
-
93
-
94
-
95
-
96
-
97
-
98
-
99
-
100
-
101
-
102
-
103
-
104
-
105
-
106
-
107
-
108
-
109
-
110
-
111
-
112
-
113
-
114
-
115
-
116
-
117
-
118
-
119
-
120
 |
 |
