Konica Minolta bizhub 25e bizhub 25e Printer Guide - Page 37
Setting the printer, Displaying the printer settings screen
 |
View all Konica Minolta bizhub 25e manuals
Add to My Manuals
Save this manual to your list of manuals |
Page 37 highlights
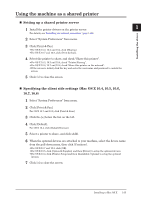
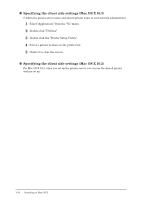
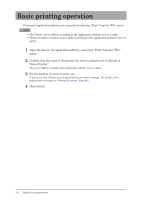
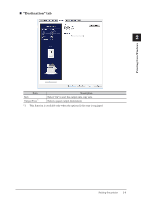
Setting the printer Displaying the printer settings screen This section describes the procedure for displaying the printer settings screen for setting the printer function. The printer settings screen is displayed by clicking "Properties" or "Preferences" in the print dialog box of the application software or by right-clicking the printer icon on the printers screen of Windows and clicking "Printing Preference". NOTE • If you change the settings by opening the printer settings screen from the application software, the settings are applied only while you use that application software, and the settings return to the default values when that application software is closed. • To register the settings as the default values, open the printer settings screen from the printers screen of Windows. „„ From application software 1 Select "Print" from the "File" menu of the application software. 2 Click [Preferences]. „„ From the "Printers" screen NOTE • It is necessary to log in with administrator privileges to change the print settings. • This section describes the procedure using Windows 7. The procedure may slightly vary according to the version of the operating system. 1 Click [Start] [Devices and Printers]. 2 Right-click the printer icon, and click "Printing preferences" from the menu. When multiple printer drivers are installed, right-click the printer icon, then select "Printing preferences" and select the printer driver. 2-4 Setting the printer
-
 1
1 -
2
-
3
-
4
-
5
-
6
-
7
-
8
-
9
-
10
-
11
-
12
-
13
-
14
-
15
-
16
-
17
-
18
-
19
-
20
-
21
-
22
-
23
-
24
-
25
-
26
-
27
-
28
-
29
-
30
-
31
-
 32
32 -
 33
33 -
 34
34 -
 35
35 -
 36
36 -
 37
37 -
 38
38 -
 39
39 -
 40
40 -
 41
41 -
 42
42 -
43
-
44
-
45
-
46
-
47
-
48
-
49
-
50
-
51
-
52
-
53
-
54
-
55
-
56
-
57
-
58
-
59
-
60
-
61
-
62
-
63
-
64
-
65
-
66
-
67
-
68
-
69
-
70
-
71
-
72
-
73
-
74
-
75
-
76
-
77
-
78
-
79
-
80
-
81
-
82
-
83
-
84
-
85
-
86
-
87
-
88
-
89
-
90
-
91
-
92
-
93
-
94
-
95
-
96
-
97
-
98
-
99
-
100
-
101
-
102
-
103
-
104
-
105
-
106
-
107
-
108
-
109
-
110
-
111
-
112
-
113
-
114
-
115
-
116
-
117
-
118
-
119
-
120
 |
 |
