Konica Minolta bizhub 3300P bizhub 3300P Quick Reference - Page 21
Assigning a custom paper type
 |
View all Konica Minolta bizhub 3300P manuals
Add to My Manuals
Save this manual to your list of manuals |
Page 21 highlights
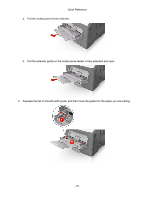
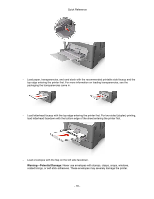
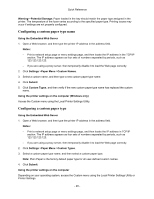
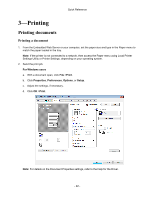
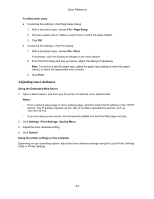
Quick Reference Assigning a custom paper type Using the Embedded Web Server 1. Open a Web browser, and then type the printer IP address in the address field. Notes: - Print a network setup page or menu settings page, and then locate the IP address in the TCP/IP section. The IP address appears as four sets of numbers separated by periods, such as 123.123.123.123. - If you are using a proxy server, then temporarily disable it to load the Web page correctly. 2. Click Settings >Paper Menu. 3. From the Tray Configuration section, select a paper source, and then select a custom paper type under the paper type column. 4. Click Submit. Using the printer settings on the computer Depending on your operating system, access the Paper menu using the Local Printer Settings Utility or Printer Settings. - 21 -
-
 1
1 -
2
-
3
-
4
-
5
-
6
-
7
-
8
-
9
-
10
-
11
-
12
-
13
-
14
-
15
-
 16
16 -
 17
17 -
 18
18 -
 19
19 -
 20
20 -
 21
21 -
 22
22 -
 23
23 -
 24
24 -
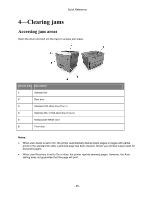 25
25 -
 26
26 -
27
-
28
-
29
-
30
-
31
-
32
-
33
-
34
-
35
-
36
-
37
-
38
-
39
-
40
 |
 |