Konica Minolta bizhub 3300P bizhub 3300P Quick Reference - Page 40
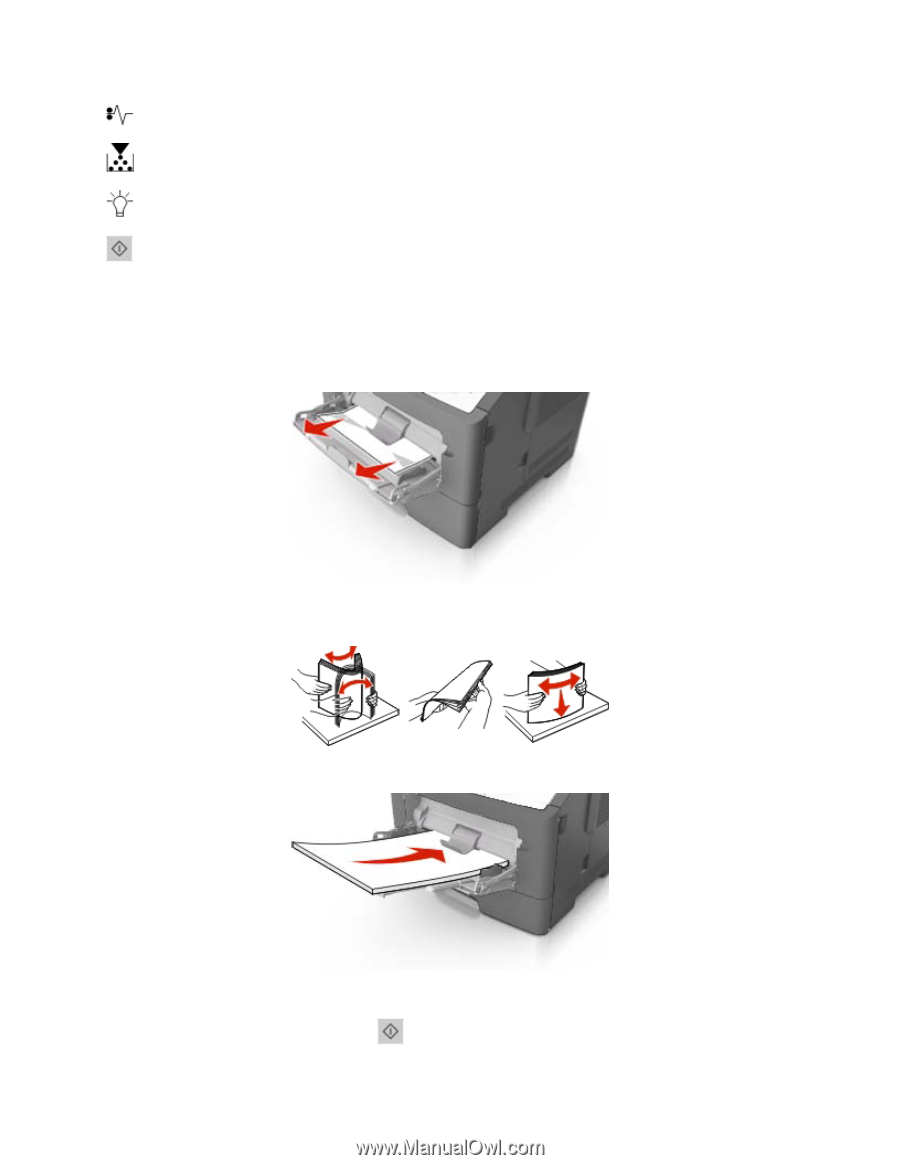
paper. Straighten the edges on a level surface.
 |
View all Konica Minolta bizhub 3300P manuals
Add to My Manuals
Save this manual to your list of manuals |
Page 40 highlights
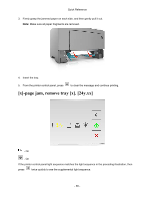
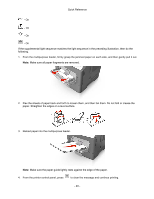
Quick Reference - On - On - On - On If the supplemental light sequence matches the light sequence in the preceding illustration, then do the following. 1. From the multipurpose feeder, firmly grasp the jammed paper on each side, and then gently pull it out. Note: Make sure all paper fragments are removed. 2. Flex the sheets of paper back and forth to loosen them, and then fan them. Do not fold or crease the paper. Straighten the edges on a level surface. 3. Reload paper into the multipurpose feeder. Note: Make sure the paper guide lightly rests against the edge of the paper. 4. From the printer control panel, press to clear the message and continue printing. - 40 -
-
 1
1 -
2
-
3
-
4
-
5
-
6
-
7
-
8
-
9
-
10
-
11
-
12
-
13
-
14
-
15
-
16
-
17
-
18
-
19
-
20
-
21
-
22
-
23
-
24
-
25
-
26
-
27
-
28
-
29
-
30
-
31
-
32
-
33
-
34
-
 35
35 -
 36
36 -
 37
37 -
 38
38 -
 39
39 -
 40
40
 |
 |
Quick Reference
- 40 -
- On
- On
- On
- On
If the supplemental light sequence matches the light sequence in the preceding illustration, then do the
following.
1.
From the multipurpose feeder, firmly grasp the jammed paper on each side, and then gently pull it out.
Note:
Make sure all paper fragments are removed.
2.
Flex the sheets of paper back and forth to loosen them, and then fan them. Do not fold or crease the
paper. Straighten the edges on a level surface.
3.
Reload paper into the multipurpose feeder.
Note:
Make sure the paper guide lightly rests against the edge of the paper.
4.
From the printer control panel, press
to clear the message and continue printing.