Konica Minolta bizhub 601 bizhub 751/601 Fax Driver Operations User Manual - Page 35
Setting up the fax driver Windows
 |
View all Konica Minolta bizhub 601 manuals
Add to My Manuals
Save this manual to your list of manuals |
Page 35 highlights
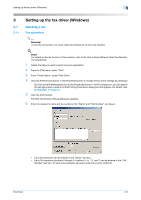
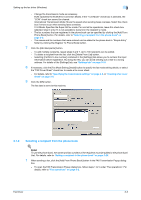
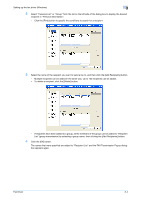
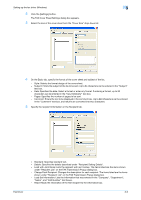
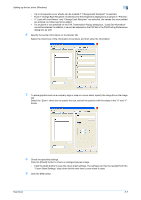
Setting up the fax driver (Windows) 3 3 3.1 3.1.1 Setting up the fax driver (Windows) Sending a fax Fax operations 2 Reminder To use the fax function, you must install the optional fax kit onto this machine. ! Detail For details on the fax function of this machine, refer to the User's Guide [Network Scan/Fax/Network Fax Operations]. 1 Create the data you want to send using any application. 2 From the [File] menu, select "Print". 3 From "Printer Name", select "FAX Driver". 4 Click the [Preferences] button or the [Properties] button to change the fax driver settings as necessary. - By clicking the [Preferences] button or the [Properties] button in the Print dialog box, you can specify the settings of each model in the FAX Printing Preferences dialog box that appears. For details, refer to "Settings" on page 3-8. 5 Click the [Print] button. The FAX Transmission Popup dialog box appears. 6 Enter the recipient's name and fax number in the "Name" and "FAX Number" text boxes. - Up to 80 characters can be entered in the "Name" text box. - Up to 38 characters (numbers 0 through 9, hyphens (-), #, *, P, and T) can be entered in the "FAX Number" text box. To send a fax overseas, be sure to enter the country code first. Fax Driver 3-2
-
 1
1 -
2
-
3
-
4
-
5
-
6
-
7
-
8
-
9
-
10
-
11
-
12
-
13
-
14
-
15
-
16
-
17
-
18
-
19
-
20
-
21
-
22
-
23
-
24
-
25
-
26
-
27
-
28
-
29
-
 30
30 -
 31
31 -
 32
32 -
 33
33 -
 34
34 -
 35
35 -
 36
36 -
 37
37 -
 38
38 -
 39
39 -
 40
40 -
41
-
42
-
43
-
44
-
45
-
46
-
47
-
48
-
49
-
50
-
51
-
52
-
53
-
54
-
55
-
56
-
57
-
58
-
59
-
60
-
61
-
62
-
63
-
64
-
65
-
66
-
67
-
68
-
69
 |
 |
