Konica Minolta bizhub 601 bizhub 751/601 Fax Driver Operations User Manual - Page 38
Specifying the transmission settings, Creating a fax cover sheet
 |
View all Konica Minolta bizhub 601 manuals
Add to My Manuals
Save this manual to your list of manuals |
Page 38 highlights
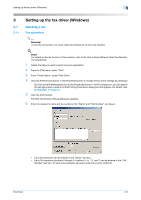
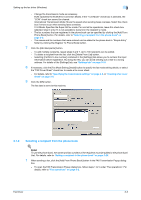
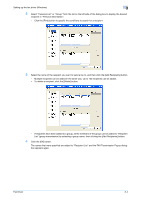
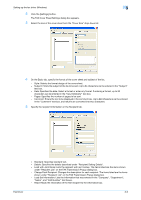
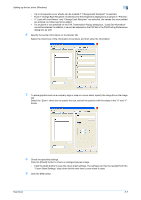
Setting up the fax driver (Windows) 3 3.1.3 Specifying the transmission settings When sending a fax, you can specify the transmission settings in the Fax Mode Details dialog box that appears when the [Fax Mode Setting Details] button is clicked in the FAX Transmission Popup dialog box. 3.1.4 Print Recipient File: Prints the document after a fax was sent. Timer Send: Sets the transmission time. By clicking the [Reflect Current Time] button, the current time set on the computer is displayed in the "Send Time" boxes. SUB Address: Specifies the sub address for sending confidential faxes using F-codes. Sender ID: Specifies the sender ID for sending confidential faxes using F-codes. 2 Note When using Timer Send, check that the time set on the computer is synchronized with the time on this machine. If the transmission time is earlier than the current time of this machine, the fax is sent the next day. If sending confidential faxes using F-codes to another fax model, enter the sub address and sender ID in the "SUB Address" and the "Sender ID" text boxes. Up to 20 characters (numbers 0 through 9) can be entered in the "Sub Address" text box. Up to 20 characters (numbers 0 through 9, #, and *) can be entered in the "Sender ID" text box. For the details on the sub address and the sender ID, refer to the User's Guide [Network Scan/Fax/Network Fax Operations]. Creating a fax cover sheet When sending a fax, you can attach a cover sheet to the fax message by selecting the "FAX Cover Sheet" check box in the FAX Transmission Popup dialog box. You can edit the cover sheets from the FAX Cover Sheet Settings dialog box that appears by clicking the [Settings] button in the Fax Transmission Popup dialog box. In the FAX Cover Sheet Settings dialog box, you can change the settings on the Basic, Recipient, Sender, or Image tab by switching between each screen. 2 Note For Windows Vista x64/Server 2008 x64/7 x 64 editions, the "FAX Cover Sheet" check box cannot be selected from the FAX Transmission Popup dialog box. It must be specified in the Print settings for the fax driver in advance. In addition, "FAX Cover Sheet" cannot be selected with any of the following functions at the same time. - [User Authentication] - [Account Track] - [Verify Authentication settings before printing] - [Popup Authentication Dialog when printing] 1 Select the "FAX Cover Sheet" check box in the FAX Transmission Popup dialog box. Fax Driver 3-5
-
 1
1 -
2
-
3
-
4
-
5
-
6
-
7
-
8
-
9
-
10
-
11
-
12
-
13
-
14
-
15
-
16
-
17
-
18
-
19
-
20
-
21
-
22
-
23
-
24
-
25
-
26
-
27
-
28
-
29
-
30
-
31
-
32
-
 33
33 -
 34
34 -
 35
35 -
 36
36 -
 37
37 -
 38
38 -
 39
39 -
 40
40 -
 41
41 -
 42
42 -
 43
43 -
44
-
45
-
46
-
47
-
48
-
49
-
50
-
51
-
52
-
53
-
54
-
55
-
56
-
57
-
58
-
59
-
60
-
61
-
62
-
63
-
64
-
65
-
66
-
67
-
68
-
69
 |
 |
