Konica Minolta bizhub 950i bizhub 950i/850i Quick Guide - Page 34
Registering a Destination
 |
View all Konica Minolta bizhub 950i manuals
Add to My Manuals
Save this manual to your list of manuals |
Page 34 highlights
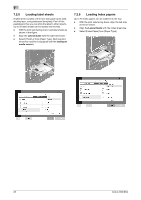
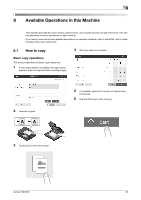
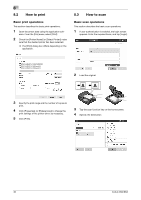
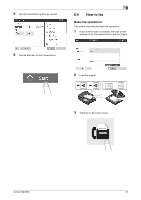
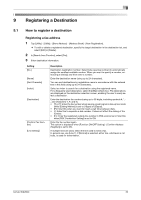
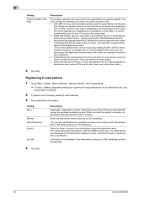
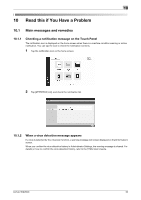
9 9 Registering a Destination 9.1 How to register a destination Registering a fax address 1 Tap [Utility] - [Utility] - [Store Address] - [Address Book] - [New Registration]. % To edit or delete a registered destination, specify the target destination in the destination list, and select [Edit] or [Delete]. 2 In [Search from Function], select [Fax]. 3 Enter destination information. Setting [No.] [Name] [Sort Character] [Index] [Destination] [Confirm Fax Number] [Line Setting] Description Destination registration number. Select [Use opening number] to automatically assign the smallest available number. When you want to specify a number, select [Input directly] and then enter a number. Enter the destination name (using up to 24 characters). You can sort destinations by registration name in accordance with the entered text in this field (using up to 24 characters). Select an index to search for a destination using the registered name. For a frequently used destination, select the [Main] check box. The destinations are displayed on the destination selection screen, enabling the user to easily select a destination. Enter the destination fax number (using up to 38 digits, including symbols #, *, , and characters T, P, and E). • [T] or [*]: Enter the fax number when issuing a push signal in dial-up line mode (while [Dialing Method] is set to [10pps] or [20pps]). • [P]: Enter this when you want to insert a wait time between dials. • [-]: Enter this to separate a dial number. It does not affect the dialing of the number. • [E-]: Enter the registered outside line number in PBX environment. Enter this when [PBX Connection Setting] is set to ON. Enter the fax number again. This option is displayed when [Function ON/OFF Setting] - [Confirm Address (Register)] is set to ON. If multiple lines are used, select the line used to send a fax. In general use, use [Line 1]. If [Normal] is selected, either line, whichever is not busy, is used for transmission. bizhub 950i/850i 33
-
 1
1 -
2
-
3
-
4
-
5
-
6
-
7
-
8
-
9
-
10
-
11
-
12
-
13
-
14
-
15
-
16
-
17
-
18
-
19
-
20
-
21
-
22
-
23
-
24
-
25
-
26
-
27
-
28
-
 29
29 -
 30
30 -
 31
31 -
 32
32 -
 33
33 -
 34
34 -
 35
35 -
 36
36 -
 37
37 -
 38
38 -
 39
39 -
40
-
41
-
42
-
43
-
44
-
45
-
46
-
47
-
48
-
49
-
50
-
51
-
52
-
53
-
54
-
55
-
56
-
57
-
58
-
59
-
60
-
61
 |
 |