Kyocera FS 720 FS-720 Operation Guide - Page 23
Loading Software
 |
View all Kyocera FS 720 manuals
Add to My Manuals
Save this manual to your list of manuals |
Page 23 highlights
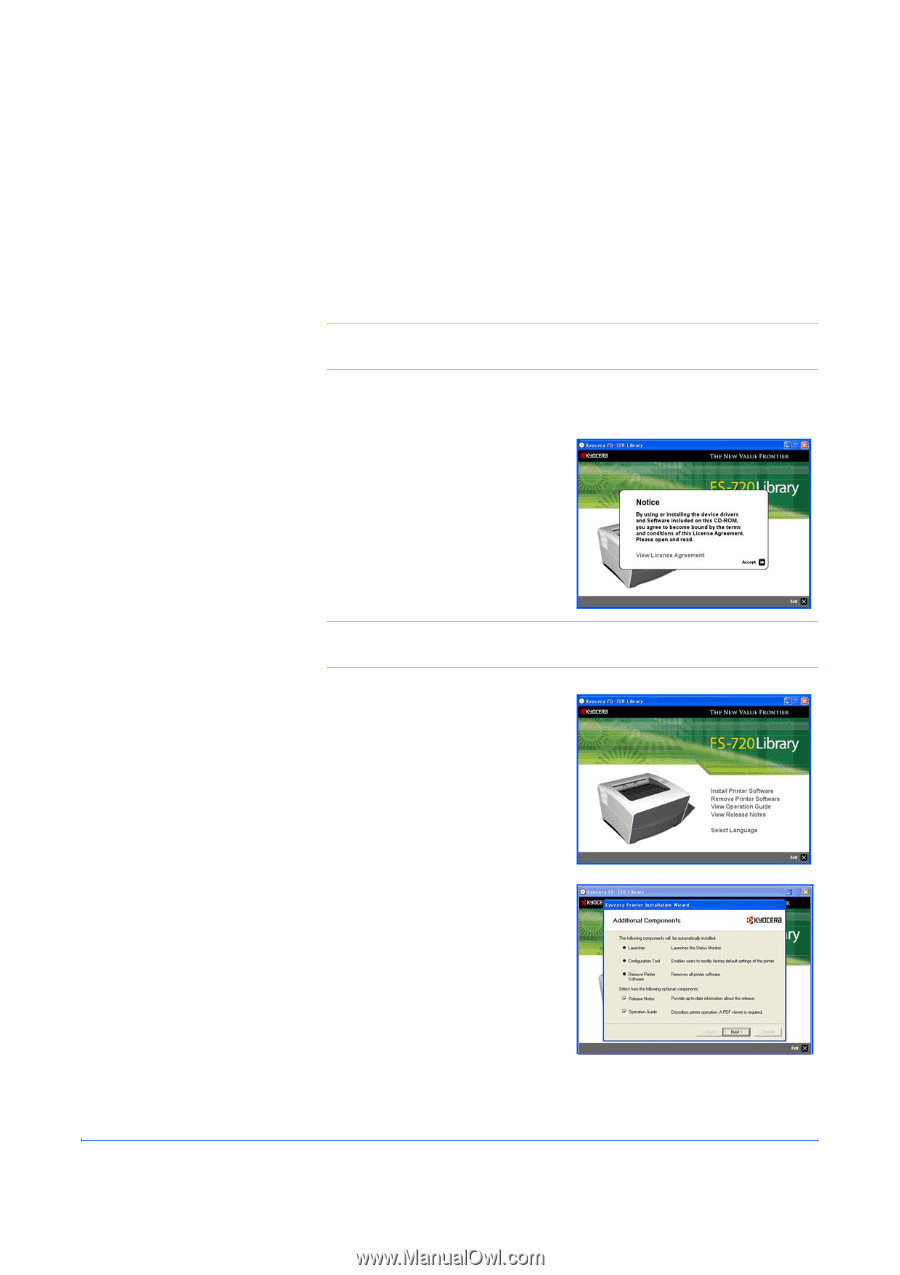
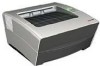
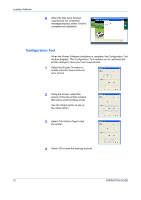
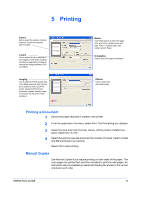
4 Loading Software Ensure the printer is plugged in and connected to the computer's USB port before installing software from the CD-ROM. 1 Switch on the PC and activate Windows. NOTE: If the Welcome to the Found New Hardware Wizard dialog box displays, select Cancel. 2 Insert the CD-ROM (Kyocera FS-720 Library) into the CD-ROM drive. 3 The installation program launches and the License Agreement Notice displays. Select Accept to proceed. NOTE: If the installation program fails to launch, use Windows Explorer to access the CD-ROM and select Setup.exe. 4 Select Install Printer Software and follow the on-screen instructions to install the printer. 5 When the Additional Components screen displays, select Next to install the components required. OPERATION GUIDE 11
-
 1
1 -
2
-
3
-
4
-
5
-
6
-
7
-
8
-
9
-
10
-
11
-
12
-
13
-
14
-
15
-
16
-
17
-
 18
18 -
 19
19 -
 20
20 -
 21
21 -
 22
22 -
 23
23 -
 24
24 -
 25
25 -
 26
26 -
 27
27 -
 28
28 -
29
-
30
-
31
-
32
-
33
-
34
-
35
-
36
-
37
-
38
-
39
-
40
-
41
-
42
-
43
-
44
-
45
-
46
 |
 |