LG 26LX1D Owners Manual - Page 19
and Setup Guide.
 |
UPC - 719192168695
View all LG 26LX1D manuals
Add to My Manuals
Save this manual to your list of manuals |
Page 19 highlights
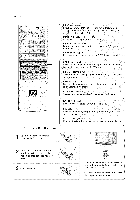
Introduction I For proper ventilation, allow a clearance of 4" on each side and from the wall. Detailed installation instructions are available from your dealer, see the optional Tilt Wall Mounting Bracket Installation and Setup Guide. For proper ventilation, allow a clearance of 4" on each side and from the wall. iiiiiiiiiiiiiiiiJ_l i i_i_i!!i_iii_i!ii_i_ili_!i:!_ii!:%_:il%_ii%_iii_i ii_iiii_ 19
-
 1
1 -
2
-
3
-
4
-
5
-
6
-
7
-
8
-
9
-
10
-
11
-
12
-
13
-
 14
14 -
 15
15 -
 16
16 -
 17
17 -
 18
18 -
 19
19 -
 20
20 -
 21
21 -
 22
22 -
 23
23 -
 24
24 -
25
-
26
-
27
-
28
-
29
-
30
-
31
-
32
-
33
-
34
-
35
-
36
-
37
-
38
-
39
-
40
-
41
-
42
-
43
-
44
-
45
-
46
-
47
-
48
-
49
-
50
-
51
-
52
-
53
-
54
-
55
-
56
-
57
-
58
-
59
-
60
-
61
-
62
-
63
-
64
-
65
-
66
-
67
-
68
-
69
-
70
-
71
-
72
-
73
-
74
-
75
-
76
-
77
-
78
-
79
-
80
-
81
-
82
-
83
-
84
-
85
-
86
-
87
-
88
-
89
-
90
-
91
-
92
-
93
-
94
-
95
-
96
-
97
-
98
-
99
-
100
-
101
-
102
-
103
-
104
-
105
-
106
-
107
-
108
-
109
-
110
-
111
-
112
-
113
-
114
-
115
-
116
 |
 |

Introduction
I
For proper ventilation,
allow a clearance
of 4" on each side and from the
wall.
Detailed
installation
instructions
are available
from your dealer, see the optional
Tilt Wall Mounting
Bracket
Installation
and Setup Guide.
For proper ventilation,
allow
a clearance
of 4" on each side and from the wall.
iiiiiiiiiiiiiiiiJ_l
ii
i
i_i_i!!i_iii_i!ii_i_ili!i!ii!%i%%iii
_:_:_:l_ii_ii_ii_iiii_
19