LG LTG4715BD Owners Manual - Page 20
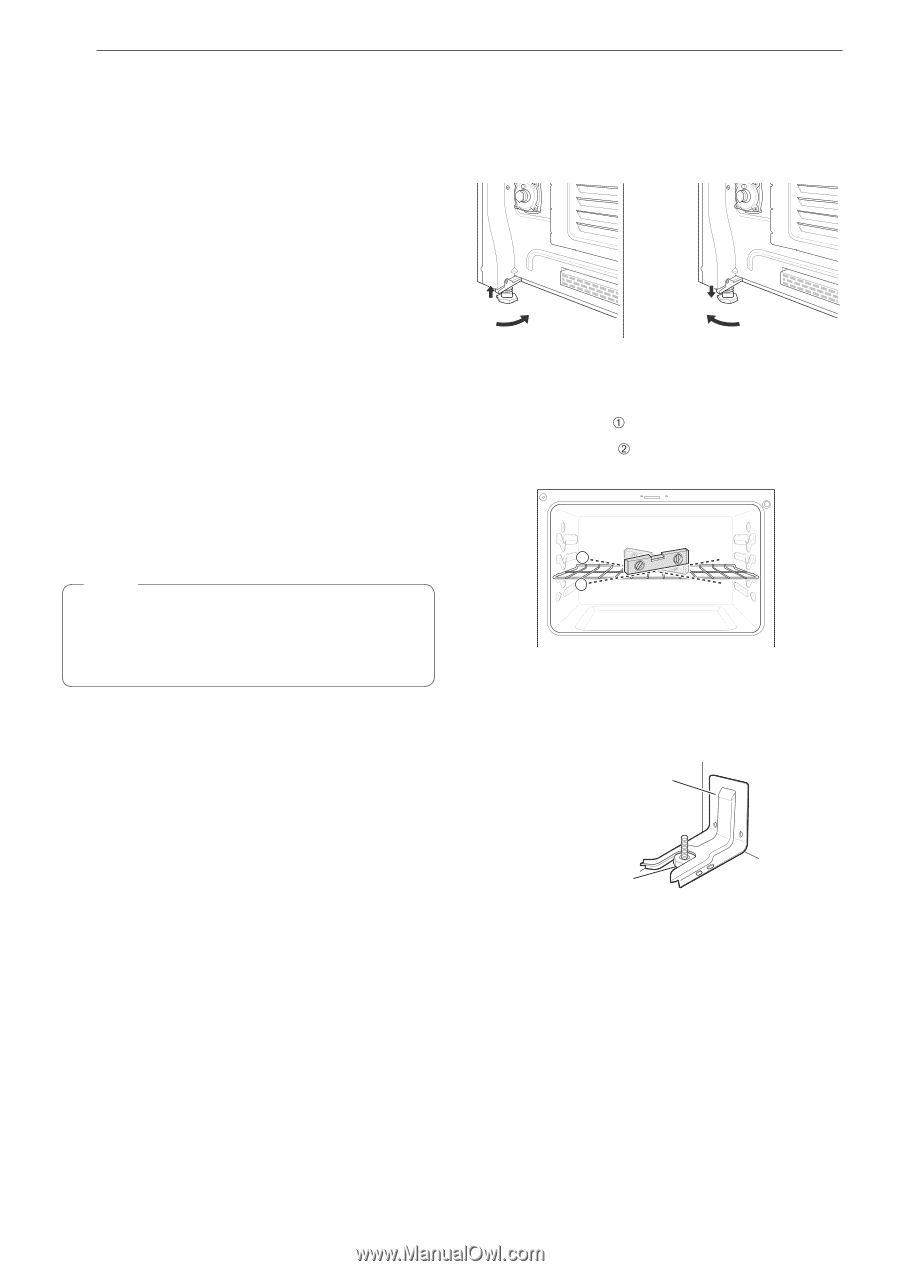
Leveling the Range, Engaging the Anti-tip Device
 |
View all LG LTG4715BD manuals
Add to My Manuals
Save this manual to your list of manuals |
Page 20 highlights
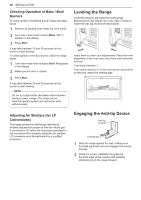
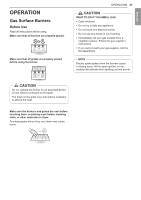
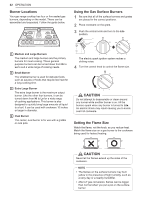
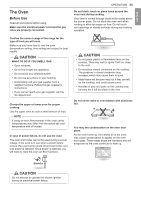
20 INSTALLATION Checking Operation of Bake / Broil Burners To check ignition of the Bake burner, follow the steps below: 1 Remove all packing from inside the oven cavity. 2 Turn oven mode knob to select Bake. 350 °F appears in the display. 3 Press Start. It may take between 30 and 90 seconds for the burner to start heating. To check ignition of the Broil burner, follow the steps below: 1 Turn oven mode knob to select Broil. Hi appears in the display. 2 Make sure the door is closed. 3 Press Start. It may take between 30 and 90 seconds for the burner to start heating. NOTE Do not try to light either the Bake or Broil burners during a power outage. The range has an electrical ignition system and cannot be used without power. Leveling the Range Level the range by adjusting the leveling legs. Extending the legs slightly may also make it easier to insert the rear leg into the anti-tip bracket. Use a level to check your adjustments. Place the level diagonally on the oven rack, and check each direction for level. First check direction . Then check direction . If the level doesn't show level on the rack, adjust the leveling legs. 2 1 Adjusting Air Shutters (for LP Conversions) The range comes from the factory with the air shutters adjusted for proper air flow for natural gas. If converted to LP, follow the instructions provided in the conversion kit to properly adjust the air shutters. LP conversion must be performed by a qualified technician. Engaging the Anti-tip Device Anti-tip bracket Leveling leg 1 Slide the range against the wall, making sure the back leg slides into and engages the anti-tip bracket. 2 Check for proper installation by grasping the front edge of the cooktop and carefully attempting to tilt the range forward.
-
 1
1 -
2
-
3
-
4
-
5
-
6
-
7
-
8
-
9
-
10
-
11
-
12
-
13
-
14
-
 15
15 -
 16
16 -
 17
17 -
 18
18 -
 19
19 -
 20
20 -
 21
21 -
 22
22 -
 23
23 -
 24
24 -
 25
25 -
26
-
27
-
28
-
29
-
30
-
31
-
32
-
33
-
34
-
35
-
36
-
37
-
38
-
39
-
40
-
41
-
42
-
43
-
44
-
45
-
46
-
47
-
48
-
49
-
50
-
51
-
52
-
53
-
54
-
55
-
56
-
57
-
58
-
59
-
60
-
61
-
62
-
63
-
64
-
65
-
66
-
67
-
68
-
69
-
70
-
71
-
72
-
73
-
74
-
75
-
76
-
77
-
78
-
79
-
80
-
81
-
82
-
83
-
84
-
85
-
86
-
87
-
88
-
89
-
90
-
91
-
92
-
93
-
94
-
95
-
96
-
97
-
98
-
99
-
100
-
101
-
102
-
103
-
104
-
105
-
106
-
107
-
108
-
109
-
110
-
111
-
112
-
113
-
114
-
115
-
116
-
117
-
118
-
119
-
120
-
121
-
122
-
123
-
124
-
125
-
126
-
127
-
128
 |
 |