LG RU-60PZ61 Owners Manual - Page 11
Installation - stand
 |
View all LG RU-60PZ61 manuals
Add to My Manuals
Save this manual to your list of manuals |
Page 11 highlights
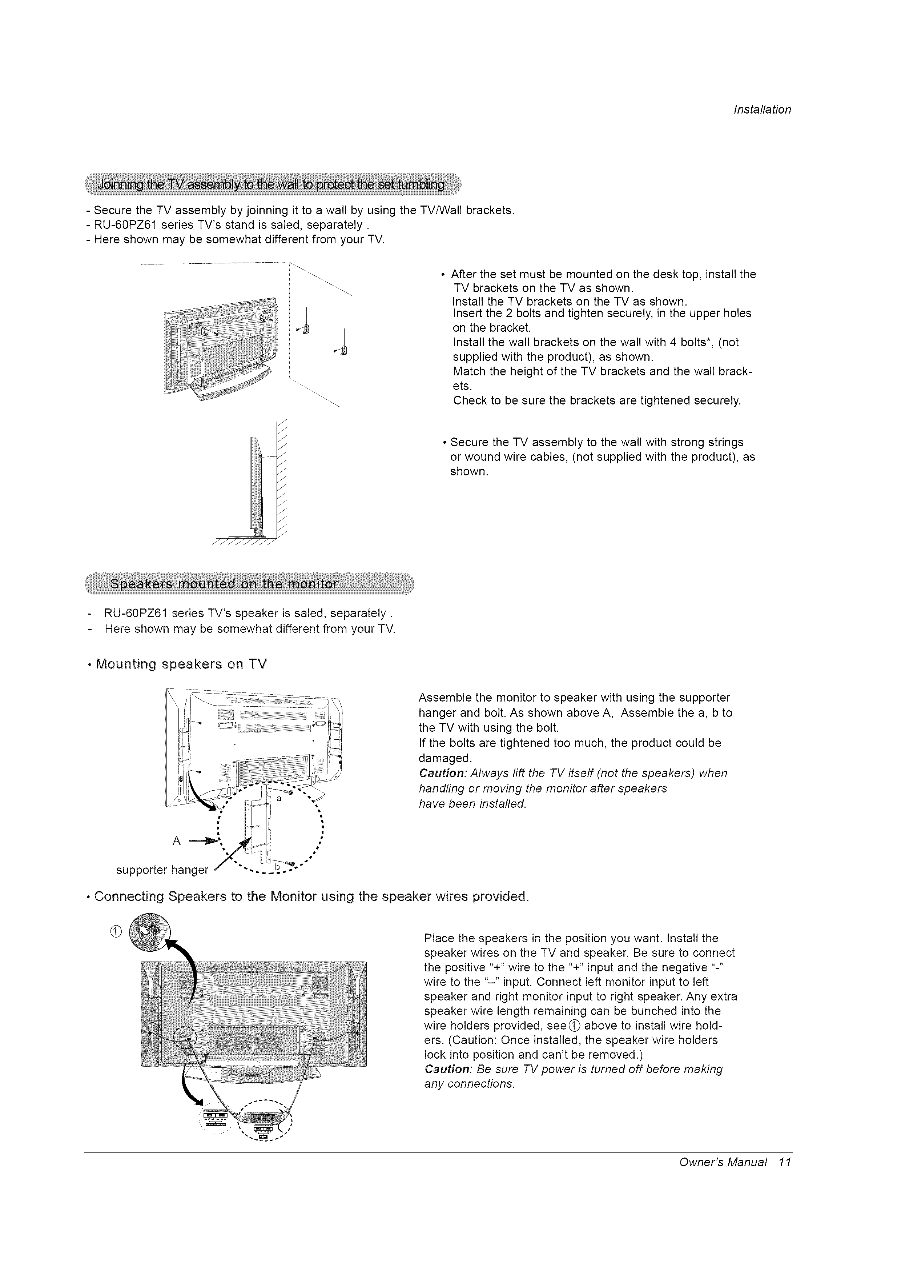
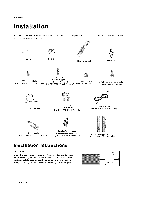
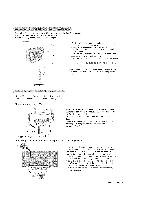
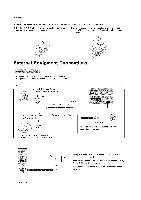
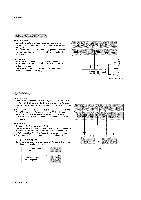
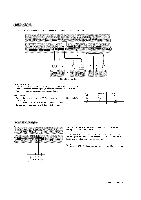
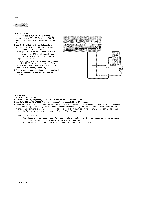
Installation - Secure the TV assembly by joinning it to a wall by using the TV/Wall brackets. - RU-60PZ61 series TV's stand is saled, separately. - Here shown may be somewhat different from your TV. ...i.i iIiii ii !i ilil J J J J f J f f J J f J f f_fJJJJ. After the set must be mounted on the desk top, install the TV brackets on the TV as shown. Install the TV brackets on the TV as shown. Insert the 2 bolts and tighten securely, in the upper holes on the bracket. Install the wall brackets on the wall with 4 bolts*, (not supplied with the product), as shown. Match the height of the TV brackets and the wall brackets. Check to be sure the brackets are tightened securely. • Secure the TV assembly to the wall with strong strings or wound wire cables, (not supplied with the product), as shown. RU-60PZ61 series TV's speaker is saled, separately. Here shown may be somewhat different from your TV. • Mounting speakers on, TV Assemble the monitor to speaker with using the supporter hanger and bolt. As shown above A, Assemble the a, b to the TV with using the bolt. If the bolts are tightened too much, the product could be damaged. Caution: Always lift the TV itself (not the speakers) when handling or moving the monitor after speakers \ have been installed. A supporter hanger • Connecting Speakers to the Monitor using the speaker wires provided. Place the speakers in the position you want. Install the speaker wires on the TV and speaker. Be sure to connect the positive "+" wire to the "+" input and the negative "-" wire to the "-" input. Connect left monitor input to left speaker and right monitor input to right speaker. Any extra speaker wire length remaining can be bunched into the wire holders provided, see(_ above to install wire holders. (Caution: Once installed, the speaker wire holders lock into position and can't be removed.) Caution: Be sure TV power is turned off before making any connections. Owner's Manual 11
-
 1
1 -
2
-
3
-
4
-
5
-
 6
6 -
 7
7 -
 8
8 -
 9
9 -
 10
10 -
 11
11 -
 12
12 -
 13
13 -
 14
14 -
 15
15 -
 16
16 -
17
-
18
-
19
-
20
-
21
-
22
-
23
-
24
-
25
-
26
-
27
-
28
-
29
-
30
-
31
-
32
-
33
-
34
-
35
-
36
-
37
-
38
-
39
-
40
-
41
-
42
-
43
-
44
-
45
-
46
-
47
-
48
-
49
-
50
-
51
-
52
 |
 |