LG RU-60PZ61 Owners Manual - Page 37
External, Control, Device, Setup
 |
View all LG RU-60PZ61 manuals
Add to My Manuals
Save this manual to your list of manuals |
Page 37 highlights
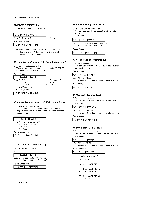
Use this function to specify a monitor ID number. Refer to 'Real Data Mapping 1'. See page 37. 1. Press the MENU button and then use D / E button to select the SPECIAl, menu. 2. Press the G button and then use D / E button to select Set ID. 3. Press the G button and then use F / (5 button to adjust Set ID to choose the desired monitor ID number. The adjustment range of Set ID is 1 ~ 99. 4. Press the ENTER button to save. ExternCaol ntrDolevicSeetup • Baud rate :9600 bps (UART) • Data length : 8 bits • Parity : None * Use a crossed (reverse) cable. • Stop bit : 1 bit • Communication code : ASCII code Transmission COMMAND 1 COMMAND 2 DATA (Hexadecimal) 01. Power k a 0~ 1 02. Input Select k b 0~ 6 03. Aspect Ratio 04. Screen Mute k c 0~ 3 k d 0~ 1 05. Volume Mute k e 0~ 1 06. Volume Control k f 0 ~ 64 07. Contrast 08. Brightness 09. Color k g 0 ~ 64 k h 0 ~ 64 k i 0 ~ 64 10. Tint k 11. Sharpness k 12. OSD Select k 13. Remote Control Lock Mode k 14. PIP/DW k i 0 ~ 64 k 0 ~ 64 I 0~ 1 m 0~ 1 n 0~ 3 [C_ommand2][ ][Set ID][ ][Data][Cr] * [Command 1]: First command to control PDP set. (j, k or m) * [Command 2]: Second command to control PDP set. * [Set ID]: You can adjust the set ID to choose desired monitor ID number in Special menu. Adjustment range is 1 ~ 99. When selecting Set ID 'O', every connected PDP set is controlled. Set ID is indicated as deci- mal (1~99) on menu and as Hexa decimal (0xO~0x63) on transmission/receiving protocol. * [DATA]: To transmit command data. Transmit 'FF' data to read status of command. * [Cr]: Carriage Return ASCII code '0xOD' * [ ]: ASCII code 'space (0x20)' OK Acknowledgement 15. Split Zoom k 16. PIP Position k 17. Treble k 18. Bass k 19. Balance k 20. Color Temperature k 21. Red Adjustment k 22. Green Adjustment k 23. Blue Adjustment k p 0 ~99 q 0~ 3 r 0 ~ 64 s 0 ~ 64 t 0 ~ 64 u 0~ 3 v 0 ~ 3C w 0 ~ 3C $ 0 ~ 3C [[Command2][ ][Set ID][ ][OK][Data][x] [ * The Monitor transmits ACK (acknowledgement) based on this format when receiving normal data. At this time, if the data is data read mode, it indicates present status data. If the data is data write mode, it returns the data of the PC computer. Error Acknowledgement [[Command2][ ][Set ID][ ][NG][Data][x] [ 24. PIP Input Source k 25. Abnormal State k 26. ISM Method i 27. Low Power j 28. Orbiter Time Setting j 29. Orbiter Pixel Setting j 30. Picture Size j y 0~ 6 z 0~ a p 0~ 3 q 0~ 1 r 1 ~ FE s 1~9 t 0 ~14 * The Monitor transmits ACK (acknowledgement) based on this format when receiving abnormal data from non-viable functions or communication errors. Data l:lllegalCode 2: Not supported function 3: Wait more time 31. Auto Config j u 1 COM- COM- DATA0 DATA1 DATA2 DATA3 MAND1 MAND2 (Hexadecimal)(Hexadecimal)(Hexadecimal)(Hexadecimal) 32. Tune Command 33. Channel Add/Del 34. Key ma mb mc 01 ~ 7D 0 0~1 Key code 0 mainsub/Tunet3and Owner's Manual 37
-
 1
1 -
2
-
3
-
4
-
5
-
6
-
7
-
8
-
9
-
10
-
11
-
12
-
13
-
14
-
15
-
16
-
17
-
18
-
19
-
20
-
21
-
22
-
23
-
24
-
25
-
26
-
27
-
28
-
29
-
30
-
31
-
 32
32 -
 33
33 -
 34
34 -
 35
35 -
 36
36 -
 37
37 -
 38
38 -
 39
39 -
 40
40 -
 41
41 -
 42
42 -
43
-
44
-
45
-
46
-
47
-
48
-
49
-
50
-
51
-
52
 |
 |
