Lantronix MatchPort b/g MatchPort - DemoKit Quick Start Guide - Page 8
Option 2: Wireless connection via Access Point or Wireless Router
 |
View all Lantronix MatchPort b/g manuals
Add to My Manuals
Save this manual to your list of manuals |
Page 8 highlights
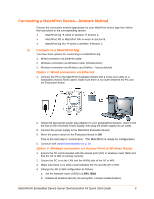
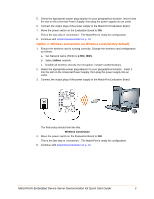
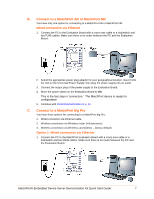
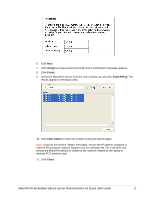
2. Select the appropriate power plug adaptor for your geographical location. Insert it into the slot on the Universal Power Supply; then plug the power supply into an outlet. 3. Connect the output plug of the power supply to the MatchPort Evaluation Board. 4. Move the power switch on the Evaluation Board to ON. This is the last step in 'connection.' The MatchPort device is ready for configuration 5. Continue with Install DeviceInstaller on p. 10. Option 2: Wireless connection via Access Point or Wireless Router 1. Ensure the PC communicates with the access point (AP) or wireless router (WR) and that the AP or WR is running correctly. 2. Ensure the PC is on the LAN (not the WAN) side of the AP or WR. 3. Make sure there is no other router between the PC and the AP or WR. 4. Change the AP or WR configuration as follows: d. Set the Network name (SSID) to the default_infrastructure_profile. e. Disable all wireless security (no encryption, no/open authentication). 5. Select the appropriate power plug adaptor for your geographical location. Insert it into the slot on the Universal Power Supply; then plug the power supply into an outlet. 6. Connect the output plug of the power supply to the MatchPort Evaluation Board. 7. Move the power switch on the Evaluation Board to ON. This is the last step in 'connection.' The MatchPort is ready for configuration 8. Continue with Install DeviceInstaller on p. 10. Option 3: Wireless connection via Wireless card (factory default) 1. Ensure the wireless card is running correctly. Change the wireless card configuration as follows: a. Set Network name (SSID) to default_adhoc_profile. b. Select AdHoc network. c. Disable all wireless security (no encryption, no/open authentication). 2. Select the appropriate power plug adaptor for your geographical location. Insert it into the slot on the Universal Power Supply; then plug the power supply into an outlet. The final setup should look like this: MatchPort® Embedded Device Server Demonstration Kit Quick Start Guide 8
-
 1
1 -
2
-
 3
3 -
 4
4 -
 5
5 -
 6
6 -
 7
7 -
 8
8 -
 9
9 -
 10
10 -
 11
11 -
 12
12
 |
 |
