Lenovo 63 Lenovo 63 Hardware Maintenance Manual - Page 79
At the rear of the computer, remove the screw that secures the PCI card latch.
 |
View all Lenovo 63 manuals
Add to My Manuals
Save this manual to your list of manuals |
Page 79 highlights
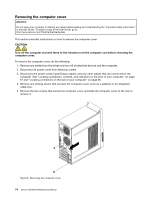
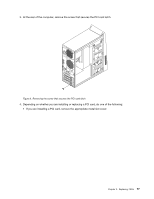
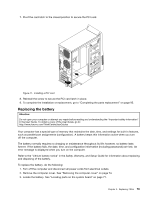
3. At the rear of the computer, remove the screw that secures the PCI card latch. 5 6 34 Figure 9. Removing the screw that secures the PCI card latch 4. Depending on whether you are installing or replacing a PCI card, do one of the following: • If you are installing a PCI card, remove the appropriate metal slot cover. Chapter 9. Replacing FRUs 77
-
 1
1 -
2
-
3
-
4
-
5
-
6
-
7
-
8
-
9
-
10
-
11
-
12
-
13
-
14
-
15
-
16
-
17
-
18
-
19
-
20
-
21
-
22
-
23
-
24
-
25
-
26
-
27
-
28
-
29
-
30
-
31
-
32
-
33
-
34
-
35
-
36
-
37
-
38
-
39
-
40
-
41
-
42
-
43
-
44
-
45
-
46
-
47
-
48
-
49
-
50
-
51
-
52
-
53
-
54
-
55
-
56
-
57
-
58
-
59
-
60
-
61
-
62
-
63
-
64
-
65
-
66
-
67
-
68
-
69
-
70
-
71
-
72
-
73
-
 74
74 -
 75
75 -
 76
76 -
 77
77 -
 78
78 -
 79
79 -
 80
80 -
 81
81 -
 82
82 -
 83
83 -
 84
84 -
85
-
86
-
87
-
88
-
89
-
90
-
91
-
92
-
93
-
94
-
95
-
96
-
97
-
98
-
99
-
100
-
101
-
102
-
103
-
104
-
105
-
106
-
107
-
108
 |
 |
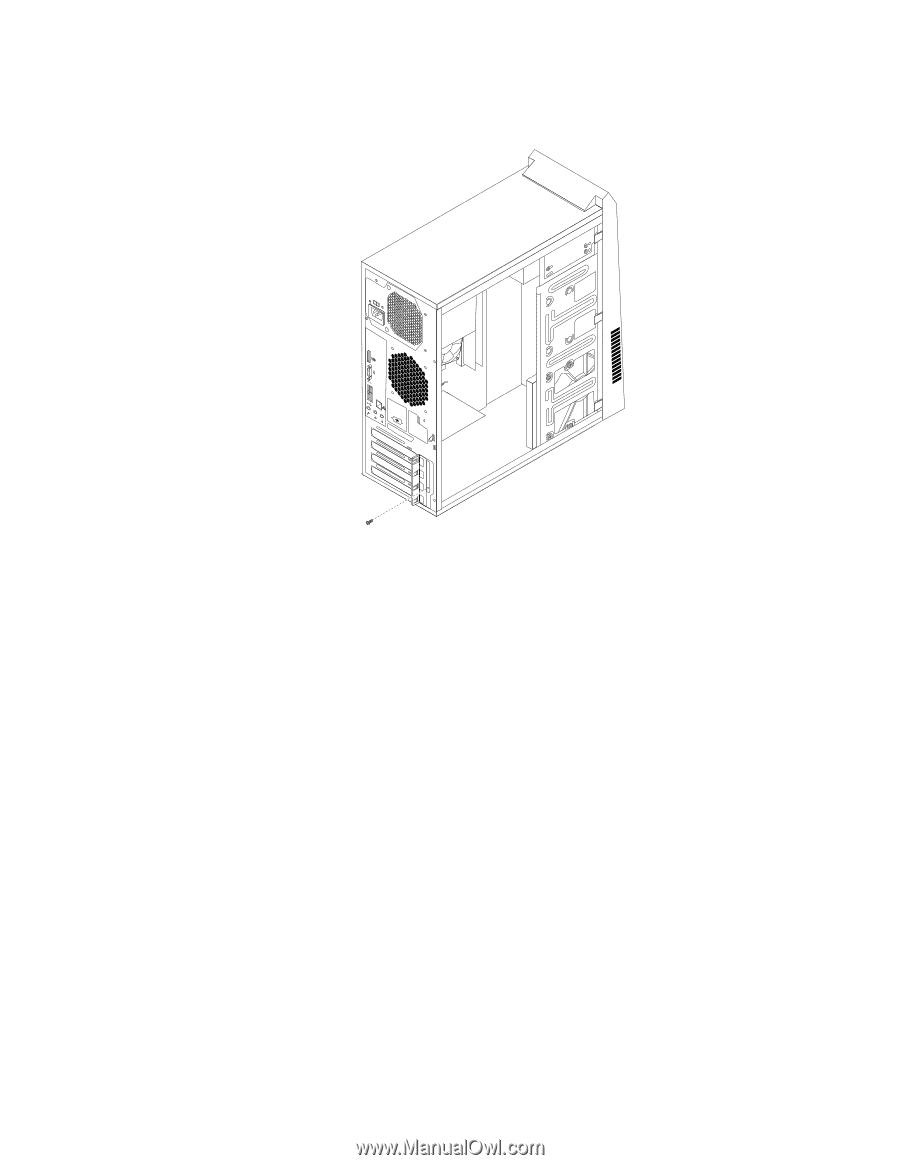
3. At the rear of the computer, remove the screw that secures the PCI card latch.
Figure 9. Removing the screw that secures the PCI card latch
4. Depending on whether you are installing or replacing a PCI card, do one of the following:
•
If you are installing a PCI card, remove the appropriate metal slot cover.
Chapter 9
.
Replacing FRUs
77
3
4
5
6