Lenovo IdeaPad S100 Lenovo IdeaPad S100 Hardware Maintainence Manual - Page 51
Integrated camera
 |
View all Lenovo IdeaPad S100 manuals
Add to My Manuals
Save this manual to your list of manuals |
Page 51 highlights
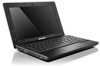
Lenovo IdeaPad S100 Hardware Maintenance Manual Integrated camera For access, remove this FRU: • "Base screws" on page 30 • "Battery pack" on page 32 • "Keyboard" on page 33 • "Base cover" on page 34 • "Hard disk drive" on page 37 • "USB port" on page 39 • "Fan assembly and Heat Sink assembly" on page 40 • "TVturner" on page 41 • "System board" on page 42 Figure 16: Removal steps of integrated camera 1 The integrated camera is stuck to the top center of the LCD cover. Remove the integrated camera in the direction shown by arrow . When installing: Stick the integrated camera to the top center of the LCD cover and ajust the placement of it to make sure the connector is attached firmly. When replacing the integrated camera, route the connector cable as shown in the figure above. 47
-
 1
1 -
2
-
3
-
4
-
5
-
6
-
7
-
8
-
9
-
10
-
11
-
12
-
13
-
14
-
15
-
16
-
17
-
18
-
19
-
20
-
21
-
22
-
23
-
24
-
25
-
26
-
27
-
28
-
29
-
30
-
31
-
32
-
33
-
34
-
35
-
36
-
37
-
38
-
39
-
40
-
41
-
42
-
43
-
44
-
45
-
 46
46 -
 47
47 -
 48
48 -
 49
49 -
 50
50 -
 51
51 -
 52
52 -
 53
53 -
 54
54 -
 55
55 -
 56
56 -
57
-
58
-
59
-
60
-
61
-
62
-
63
-
64
-
65
-
66
 |
 |
