Lenovo ThinkPad Edge E431 Hardware Maintenance Manual - Page 66
Retaining serial numbers, Restoring the serial number of the system unit, Notes
 |
View all Lenovo ThinkPad Edge E431 manuals
Add to My Manuals
Save this manual to your list of manuals |
Page 66 highlights
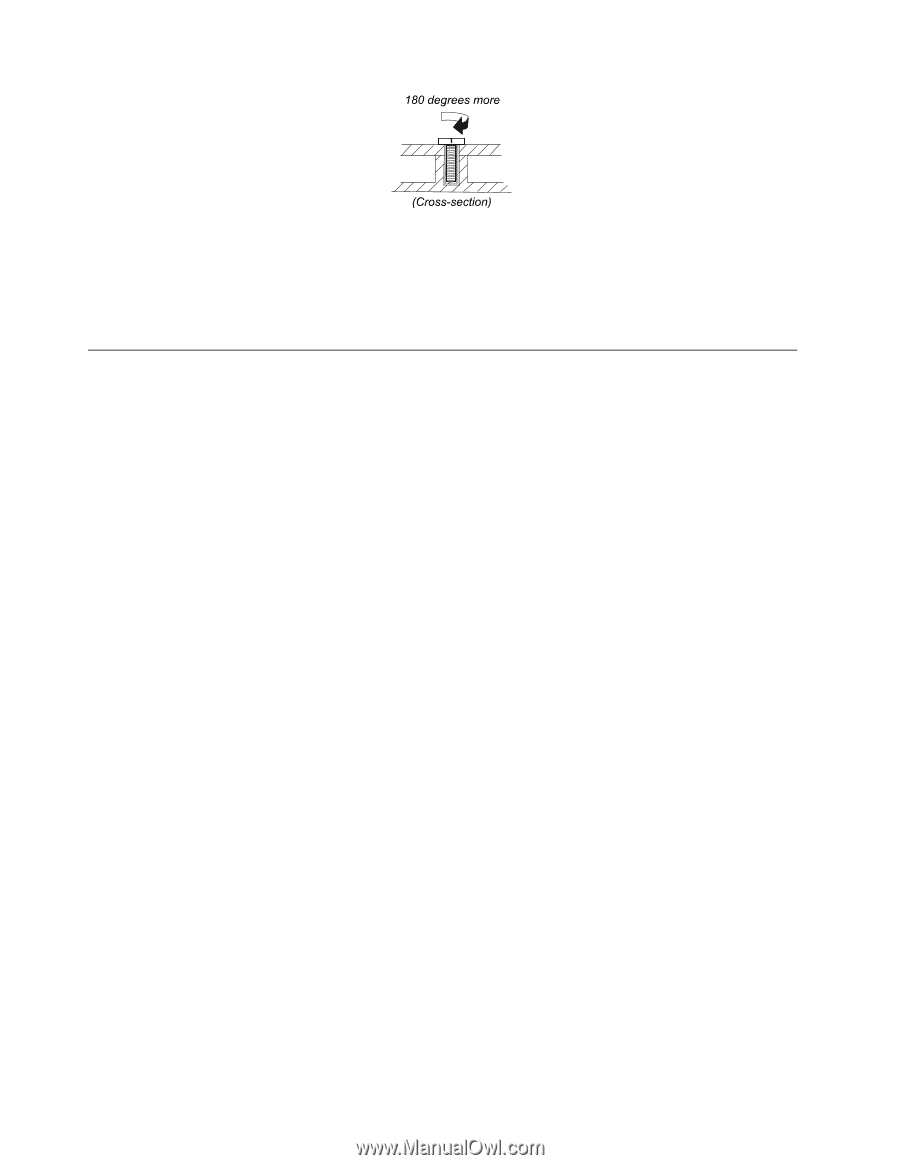
Notes: • Ensure that you use the correct screw. It is recommended to use new screws for replacements. If you have a torque screwdriver, tighten all screws firmly to the torque specified in the screw information table for each step. • Ensure torque screwdrivers are calibrated correctly following country specifications. Retaining serial numbers This topic provides instructions on the following: • "Restoring the serial number of the system unit" on page 60 • "Retaining the UUID" on page 61 • "Reading or writing the ECA information" on page 61 Restoring the serial number of the system unit When the computer was manufactured, the EEPROM on the system board was loaded with the serial numbers of the system and all major components. These numbers need to remain the same throughout the life of the computer. If you replace the system board, you must restore the serial number of the system unit to its original value. Before replacing the system board, save the original serial number by doing the following: 1. Install the latest version of LENOVO ThinkPad Hardware Maintenance Diskette or Maintenance Key, and then restart the computer. 2. From the main menu, select 1. Set system identification. 3. Turn off the computer, and then turn on the computer again. 4. When the ThinkPad logo is displayed, press Esc. 5. Select 2. Read S/N data from EEPROM and follow the instructions on the screen. The serial number of each device in your computer is displayed; the serial number of the system unit is listed as follows: • 20 Serial number 6. Write down that number. Note: The serial number of the system unit is also written on the label attached to the bottom of the computer. After you have replaced the system board, restore the serial number by doing the following: 1. Install the latest version of LENOVO ThinkPad Hardware Maintenance Diskette or Maintenance Key, and then restart the computer. 2. From the main menu, select 1. Set system identification. 3. Turn off the computer, and then turn on the computer again. 4. When the ThinkPad logo is displayed, press Esc. 5. Select 1. Add S/N data from EEPROM. Follow the instructions on the screen. 60 Hardware Maintenance Manual
-
 1
1 -
2
-
3
-
4
-
5
-
6
-
7
-
8
-
9
-
10
-
11
-
12
-
13
-
14
-
15
-
16
-
17
-
18
-
19
-
20
-
21
-
22
-
23
-
24
-
25
-
26
-
27
-
28
-
29
-
30
-
31
-
32
-
33
-
34
-
35
-
36
-
37
-
38
-
39
-
40
-
41
-
42
-
43
-
44
-
45
-
46
-
47
-
48
-
49
-
50
-
51
-
52
-
53
-
54
-
55
-
56
-
57
-
58
-
59
-
60
-
 61
61 -
 62
62 -
 63
63 -
 64
64 -
 65
65 -
 66
66 -
 67
67 -
 68
68 -
 69
69 -
 70
70 -
 71
71 -
72
-
73
-
74
-
75
-
76
-
77
-
78
-
79
-
80
-
81
-
82
-
83
-
84
-
85
-
86
-
87
-
88
-
89
-
90
-
91
-
92
-
93
-
94
-
95
-
96
-
97
-
98
-
99
-
100
-
101
-
102
-
103
-
104
-
105
-
106
-
107
-
108
-
109
-
110
-
111
-
112
-
113
-
114
-
115
-
116
-
117
-
118
-
119
-
120
-
121
-
122
-
123
-
124
-
125
-
126
-
127
-
128
-
129
 |
 |