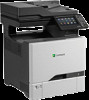
Lexmark CX725 User Guide - Page 156
Scan to Computer, Push Button method - factory reset
 |
View all Lexmark CX725 manuals
Add to My Manuals
Save this manual to your list of manuals |
Page 156 highlights
Index 156 printer settings restoring to factory defaults 52 printing directory list 29 font sample list 28 from a computer 26 from a flash drive 26 menu settings page 16 printing a directory list 29 printing a font sample list 28 printing a menu settings page 16 printing a network setup page 99 printing forms 26 printing from a flash drive 26 printing held jobs from a Macintosh computer 28 from Windows 28 Push Button method 54 R recycling Lexmark packaging 87 Lexmark products 86 toner cartridges 87 reducing a copy 31 repeat print jobs 28 printing from a Macintosh computer 28 printing from Windows 28 repeating print defects 117 replacing imaging unit 61 replacing parts ADF separator roller 79 pick roller 71 separator bracket 74 transfer module 81 replacing the ADF input tray 76 replacing the ADF scan pad 77 replacing the ADF separator roller 79 replacing the imaging kit 65 replacing the pick roller 71 replacing the separator bracket 74 replacing the transfer module 81 replacing the waste toner bottle 69 replacing toner cartridge 59 reserve print jobs printing from a Macintosh computer 28 printing from Windows 28 resetting the fuser page count 85 resetting the maintenance counter 85 resetting the transfer module page count 85 restoring factory default settings 52 RJ11 adapter 43 S safety information 6, 7, 8 saving paper 31 Scan Center setting up 20 Scan to Computer setting up 51 scan troubleshooting cannot scan from a computer 129 partial copies of documents or photos 130 poor copy quality 130 scan job was not successful 130 scanner does not respond 132 scanner unit does not close 131 scanning freezes the computer 131 scanning takes too long 131 scanner glass cleaning 56 scanning to an FTP server 50 scanning to a computer 51 scanning to a flash drive 50 scanning to an FTP server using the control panel 50 scheduling a fax 48 selecting a location for the printer 10 sending a fax scheduled 48 using the computer 47 using the control panel 47 sending an e‑mail 32 separator bracket replacing 74 serial interface card troubleshooting 101 serial printing setting up 55 setting hibernate mode 86 setting sleep mode 86 setting the paper size 21 setting the paper type 21 setting the Universal paper size 21 setting up e‑mail function 32 setting up fax country‑ or region‑specific 43 digital telephone service 41 DSL connection 39 standard telephone line connection 35 VoIP connection 40 setting up fax function 34 setting up serial printing 55 shipping the printer 85 Shortcut Center using 20 shortcuts, creating copy screen 31 FTP address 50 showing icons on the home screen 19 statement of volatility 53 storing print jobs 28 supplies conserving 86 supplies status checking 57 supplies, ordering imaging kit 58 imaging unit 58 toner cartridges 58 waste toner bottle 59 supported file types 27 supported flash drives 27 T toner cartridge replacing 59 toner cartridges ordering 58 recycling 87 toner darkness adjusting 123 transfer module ordering 59 replacing 81
-
 1
1 -
2
-
3
-
4
-
5
-
6
-
7
-
8
-
9
-
10
-
11
-
12
-
13
-
14
-
15
-
16
-
17
-
18
-
19
-
20
-
21
-
22
-
23
-
24
-
25
-
26
-
27
-
28
-
29
-
30
-
31
-
32
-
33
-
34
-
35
-
36
-
37
-
38
-
39
-
40
-
41
-
42
-
43
-
44
-
45
-
46
-
47
-
48
-
49
-
50
-
51
-
52
-
53
-
54
-
55
-
56
-
57
-
58
-
59
-
60
-
61
-
62
-
63
-
64
-
65
-
66
-
67
-
68
-
69
-
70
-
71
-
72
-
73
-
74
-
75
-
76
-
77
-
78
-
79
-
80
-
81
-
82
-
83
-
84
-
85
-
86
-
87
-
88
-
89
-
90
-
91
-
92
-
93
-
94
-
95
-
96
-
97
-
98
-
99
-
100
-
101
-
102
-
103
-
104
-
105
-
106
-
107
-
108
-
109
-
110
-
111
-
112
-
113
-
114
-
115
-
116
-
117
-
118
-
119
-
120
-
121
-
122
-
123
-
124
-
125
-
126
-
127
-
128
-
129
-
130
-
131
-
132
-
133
-
134
-
135
-
136
-
137
-
138
-
139
-
140
-
141
-
142
-
143
-
144
-
145
-
146
-
147
-
148
-
149
-
150
-
 151
151 -
 152
152 -
 153
153 -
 154
154 -
 155
155 -
 156
156 -
 157
157
 |
 |
