Lexmark CX725 User Guide - Page 99
Unable to read flash drive, Enabling the USB port, Checking the printer connectivity, Settings
 |
View all Lexmark CX725 manuals
Add to My Manuals
Save this manual to your list of manuals |
Page 99 highlights
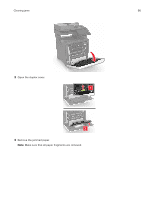
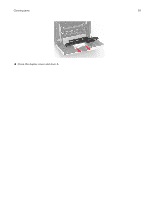
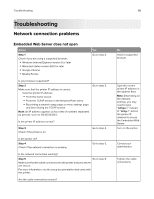
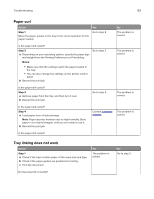
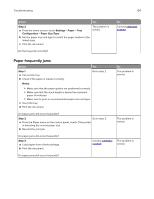
Troubleshooting 99 Action Step 6 Temporarily disable the Web proxy servers. Note: Proxy servers may block or restrict you from accessing certain Web sites including the Embedded Web Server. Yes Go to step 7. Are the Web proxy servers disabled? Step 7 The problem is Access the Embedded Web Server again by typing the correct IP solved. address in the address field. Did the Embedded Web Server open? No Contact your administrator. Contact customer support. Unable to read flash drive Action Step 1 Check if the flash drive is inserted into the front USB port. Note: The flash drive does not work when it is inserted into the rear USB port. Yes Go to step 2. No The problem is solved. Is the flash drive inserted into the front USB port? Step 2 Check if the flash drive is supported. For more information, see "Supported flash drives and file types" on page 27 Go to step 3. The problem is solved. Does the error message still appear? Step 3 Contact customer Check if the front USB port is disabled. For more information, see support. "Enabling the USB port" on page 99. The problem is solved. Does the error message still appear? Enabling the USB port From the home screen, touch Settings > Network/Ports > USB > Enable USB Port. Checking the printer connectivity 1 From the home screen, touch Settings > Reports > Network > Network Setup Page. 2 Check the first section of the network setup page, and confirm that the status is connected. If the status is not connected, then the LAN drop may be inactive, or the network cable may be unplugged or malfunctioning. Contact your administrator for assistance.
-
 1
1 -
2
-
3
-
4
-
5
-
6
-
7
-
8
-
9
-
10
-
11
-
12
-
13
-
14
-
15
-
16
-
17
-
18
-
19
-
20
-
21
-
22
-
23
-
24
-
25
-
26
-
27
-
28
-
29
-
30
-
31
-
32
-
33
-
34
-
35
-
36
-
37
-
38
-
39
-
40
-
41
-
42
-
43
-
44
-
45
-
46
-
47
-
48
-
49
-
50
-
51
-
52
-
53
-
54
-
55
-
56
-
57
-
58
-
59
-
60
-
61
-
62
-
63
-
64
-
65
-
66
-
67
-
68
-
69
-
70
-
71
-
72
-
73
-
74
-
75
-
76
-
77
-
78
-
79
-
80
-
81
-
82
-
83
-
84
-
85
-
86
-
87
-
88
-
89
-
90
-
91
-
92
-
93
-
 94
94 -
 95
95 -
 96
96 -
 97
97 -
 98
98 -
 99
99 -
 100
100 -
 101
101 -
 102
102 -
 103
103 -
 104
104 -
105
-
106
-
107
-
108
-
109
-
110
-
111
-
112
-
113
-
114
-
115
-
116
-
117
-
118
-
119
-
120
-
121
-
122
-
123
-
124
-
125
-
126
-
127
-
128
-
129
-
130
-
131
-
132
-
133
-
134
-
135
-
136
-
137
-
138
-
139
-
140
-
141
-
142
-
143
-
144
-
145
-
146
-
147
-
148
-
149
-
150
-
151
-
152
-
153
-
154
-
155
-
156
-
157
 |
 |
