Lexmark Interact S606 User's Guide - Page 43
Printing photos from a memory device using the proof sheet, Printing from a Bluetooth-enabled device
 |
View all Lexmark Interact S606 manuals
Add to My Manuals
Save this manual to your list of manuals |
Page 43 highlights
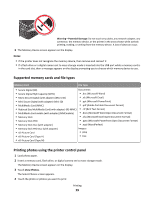
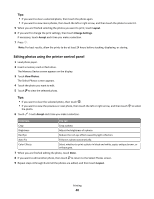
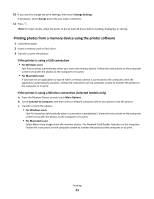
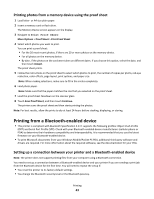
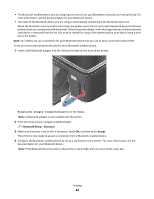
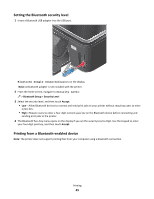
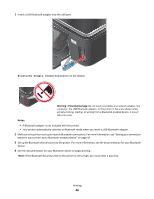
Printing photos from a memory device using the proof sheet 1 Load letter- or A4-size plain paper. 2 Insert a memory card or flash drive. The Memory Device screen appears on the display. 3 Navigate to Print Proof Sheet: More Options > Proof Sheet > Print Proof Sheet 4 Select which photos you want to print. You can print a proof sheet: • For the 20 most recent photos, if there are 20 or more photos on the memory device. • For all photos on the memory device. • By date, if the photos on the card were taken on different dates. If you choose this option, select the date, and then touch Accept. The proof sheet prints. 5 Follow the instructions on the proof sheet to select which photos to print, the number of copies per photo, red-eye reduction, color effects, page layout, print options, and paper size. Note: When making selections, make sure to fill in the circles completely. 6 Load photo paper. Note: Make sure that the paper matches the size that you selected on the proof sheet. 7 Load the proof sheet facedown on the scanner glass. 8 Touch Scan Proof Sheet, and then touch Continue. The printer scans the proof sheet and then starts printing the photos. Note: For best results, allow the prints to dry at least 24 hours before stacking, displaying, or storing. Printing from a Bluetooth-enabled device • This printer is compliant with Bluetooth Specification 2.0. It supports the following profiles: Object Push Profile (OPP) and Serial Port Profile (SPP). Check with your Bluetooth-enabled device manufacturers (cellular phone or PDA) to determine their hardware compatibility and interoperability. It is recommended that you use the latest firmware on your Bluetooth-enabled device. • To print Microsoft documents from your Windows Mobile/Pocket PC PDA, additional third-party software and drivers are required. For more information about the required software, see the documentation for your PDA. Setting up a connection between your printer and a Bluetooth-enabled device Note: The printer does not support printing files from your computer using a Bluetooth connection. You need to set up a connection between a Bluetooth-enabled device and your printer if you are sending a print job from the Bluetooth device for the first time. You will need to repeat the setup if: • You reset the printer to its factory default settings. • You change the Bluetooth security level or the Bluetooth pass key. Printing 43
-
 1
1 -
2
-
3
-
4
-
5
-
6
-
7
-
8
-
9
-
10
-
11
-
12
-
13
-
14
-
15
-
16
-
17
-
18
-
19
-
20
-
21
-
22
-
23
-
24
-
25
-
26
-
27
-
28
-
29
-
30
-
31
-
32
-
33
-
34
-
35
-
36
-
37
-
 38
38 -
 39
39 -
 40
40 -
 41
41 -
 42
42 -
 43
43 -
 44
44 -
 45
45 -
 46
46 -
 47
47 -
 48
48 -
49
-
50
-
51
-
52
-
53
-
54
-
55
-
56
-
57
-
58
-
59
-
60
-
61
-
62
-
63
-
64
-
65
-
66
-
67
-
68
-
69
-
70
-
71
-
72
-
73
-
74
-
75
-
76
-
77
-
78
-
79
-
80
-
81
-
82
-
83
-
84
-
85
-
86
-
87
-
88
-
89
-
90
-
91
-
92
-
93
-
94
-
95
-
96
-
97
-
98
-
99
-
100
-
101
-
102
-
103
-
104
-
105
-
106
-
107
-
108
-
109
-
110
-
111
-
112
-
113
-
114
-
115
-
116
-
117
-
118
-
119
-
120
-
121
-
122
-
123
-
124
-
125
-
126
-
127
-
128
-
129
-
130
-
131
-
132
-
133
-
134
-
135
-
136
-
137
-
138
-
139
-
140
-
141
-
142
-
143
-
144
-
145
-
146
-
147
-
148
-
149
-
150
-
151
-
152
-
153
-
154
-
155
-
156
 |
 |
