Lexmark Interact S606 User's Guide - Page 61
Scanning to a flash drive or memory card, Scanning photos into an editing application, Accept
 |
View all Lexmark Interact S606 manuals
Add to My Manuals
Save this manual to your list of manuals |
Page 61 highlights
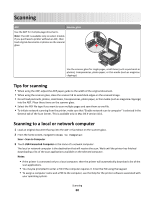
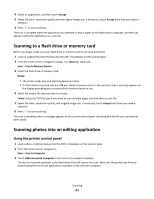
4 Select an application, and then touch Accept. 5 Select the color, resolution quality and the original image size. If necessary, touch Accept each time you make a selection. 6 Press to start scanning. The scan is complete when the application you selected in step 4 opens on the destination computer, and the scan appears within the application as a new file. Scanning to a flash drive or memory card Before you begin, make sure your flash drive or memory card is not write protected. 1 Load an original document faceup into the ADF or facedown on the scanner glass. 2 From the home screen, navigate to Scan to Memory Device: Scan > Scan to Memory Device 3 Insert the flash drive or memory card. Notes: • The printer reads only one memory device at a time. • If a flash drive is inserted into the USB port while a memory card is in the card slot, then a message appears on the display prompting you to select which memory device to use. 4 Select the output file type you want to create. Note: Select the PDF file type if you want to scan multiple pages and save them as one file. 5 Select the color, resolution quality, and original image size. If necessary, touch Accept each time you make a selection. 6 Press to start scanning. The scan is complete when a message appears on the printer control panel indicating that the file you scanned has been saved. Scanning photos into an editing application Using the printer control panel 1 Load a photo or photos faceup into the ADF or facedown on the scanner glass. 2 From the home screen, navigate to: Scan > Scan to Computer 3 Touch USB-Connected Computer or the name of a network computer. The local or network computer is the destination that will receive the scan. Wait until the printer has finished downloading the list of scan applications available on the selected computer. Scanning 61
-
 1
1 -
2
-
3
-
4
-
5
-
6
-
7
-
8
-
9
-
10
-
11
-
12
-
13
-
14
-
15
-
16
-
17
-
18
-
19
-
20
-
21
-
22
-
23
-
24
-
25
-
26
-
27
-
28
-
29
-
30
-
31
-
32
-
33
-
34
-
35
-
36
-
37
-
38
-
39
-
40
-
41
-
42
-
43
-
44
-
45
-
46
-
47
-
48
-
49
-
50
-
51
-
52
-
53
-
54
-
55
-
 56
56 -
 57
57 -
 58
58 -
 59
59 -
 60
60 -
 61
61 -
 62
62 -
 63
63 -
 64
64 -
 65
65 -
 66
66 -
67
-
68
-
69
-
70
-
71
-
72
-
73
-
74
-
75
-
76
-
77
-
78
-
79
-
80
-
81
-
82
-
83
-
84
-
85
-
86
-
87
-
88
-
89
-
90
-
91
-
92
-
93
-
94
-
95
-
96
-
97
-
98
-
99
-
100
-
101
-
102
-
103
-
104
-
105
-
106
-
107
-
108
-
109
-
110
-
111
-
112
-
113
-
114
-
115
-
116
-
117
-
118
-
119
-
120
-
121
-
122
-
123
-
124
-
125
-
126
-
127
-
128
-
129
-
130
-
131
-
132
-
133
-
134
-
135
-
136
-
137
-
138
-
139
-
140
-
141
-
142
-
143
-
144
-
145
-
146
-
147
-
148
-
149
-
150
-
151
-
152
-
153
-
154
-
155
-
156
 |
 |
