Lexmark MX6500e 6500e Scan to Sharepoint Administrator's Guide - Page 4
Configuring Scan to SharePoint
 |
View all Lexmark MX6500e 6500e manuals
Add to My Manuals
Save this manual to your list of manuals |
Page 4 highlights
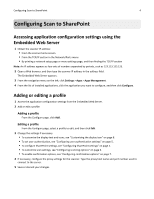
Configuring Scan to SharePoint 4 Configuring Scan to SharePoint Accessing application configuration settings using the Embedded Web Server 1 Obtain the scanner IP address: • From the scanner home screen • From the TCP/IP section in the Network/Ports menu • By printing a network setup page or menu settings page, and then finding the TCP/IP section Note: An IP address appears as four sets of numbers separated by periods, such as 123.123.123.123. 2 Open a Web browser, and then type the scanner IP address in the address field. The Embedded Web Server appears. 3 From the navigation menu on the left, click Settings > Apps > Apps Management. 4 From the list of installed applications, click the application you want to configure, and then click Configure. Adding or editing a profile 1 Access the application configuration settings from the Embedded Web Server. 2 Add or edit a profile: Adding a profile From the Configure page, click Add. Editing a profile From the Configure page, select a profile to edit, and then click Edit. 3 Change the settings if necessary. • To customize the display text and icons, see "Customizing the display icon" on page 8. • To set user authentication, see "Configuring user authentication settings" on page 5. • To configure SharePoint settings, see "Configuring SharePoint settings" on page 5. • To customize scan settings, see "Configuring scanning options" on page 6. • To enable confirmation options, see "Configuring confirmation options" on page 7. 4 If necessary, configure the proxy settings for the scanner. Type the proxy host name and port number used to connect to the server. 5 Save or discard your changes.
-
 1
1 -
 2
2 -
 3
3 -
 4
4 -
 5
5 -
 6
6 -
 7
7 -
 8
8 -
 9
9 -
 10
10 -
11
-
12
-
13
-
14
-
15
-
16
-
17
-
18
-
19
-
20
-
21
-
22
-
23
-
24
-
25
-
26
 |
 |
