Lexmark MX6500e 6500e Scan to Sharepoint Administrator's Guide - Page 5
Configuring user authentication settings, Configuring SharePoint settings
 |
View all Lexmark MX6500e 6500e manuals
Add to My Manuals
Save this manual to your list of manuals |
Page 5 highlights
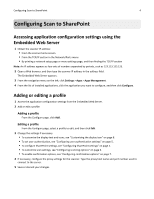
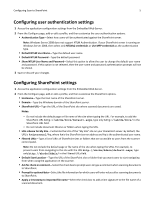
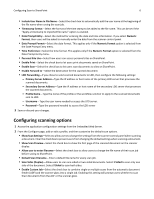
Configuring Scan to SharePoint 5 Configuring user authentication settings 1 Access the application configuration settings from the Embedded Web Server. 2 From the Configure page, add or edit a profile, and then customize the user authentication options. • Authentication Type-Select how users will be authenticated against the SharePoint server. Note: Windows Server 2008 does not support NTLM Authentication. If your SharePoint server is running on Windows Server 2008, then select only NTLMv2 credentials or Use MFP credentials as the authentication type. • Default NTLM User Name-Type the default user name. • Default NTLM Password-Type the default password. • Show NTLM User Name and Password-Select this option to allow the user to change the default user name and password. If this option is not selected, then the user name and password authentication prompts will not be shown. 3 Save or discard your changes. Configuring SharePoint settings 1 Access the application configuration settings from the Embedded Web Server. 2 From the Configure page, add or edit a profile, and then customize the SharePoint options. • Hostname-Type the host name of the SharePoint server. • Domain-Type the Windows domain of the SharePoint server. • SharePoint URL-Type the URL of the SharePoint site where scanned documents are saved. Notes: - Do not include the default page or file name of the site when typing the URL. For example, to add the SharePoint URL http://abcde/Docs/default.aspx, type only http://abcde/Docs/ in the SharePoint URL field. - Do not include document libraries or folders when typing the URL. • URL scheme for My Site-Customize the URL of the "My Site" site on your SharePoint server. By default, the URL is %s/personal/%u, where %s is the SharePoint server address and %u is the authenticated user name. • Filtered URLs-Type a list of URLs of SharePoint sites or folders that are accessible to users from the scanner control panel. Note: Do not include the default page or file name of the site when typing the URLs. For example, to prevent users from navigating to the site with the URL http://abcde/Admin/default.aspx, type only http://abcde/Admin/ in the Filtered URLs field. • Default Start Location-Type the URL of the SharePoint site or folder that you want users to start navigating from when using the application on the scanner. • Ask for check‑in comment-Select the check box to prompt users to type a comment when scanning documents to SharePoint. • Prompt for optional data-Select the file information for which users will enter values after scanning documents to SharePoint. • Apply a timestamp to imported file name-Select the check box to add a time signature to the file name of a scanned document.
-
 1
1 -
 2
2 -
 3
3 -
 4
4 -
 5
5 -
 6
6 -
 7
7 -
 8
8 -
 9
9 -
 10
10 -
 11
11 -
12
-
13
-
14
-
15
-
16
-
17
-
18
-
19
-
20
-
21
-
22
-
23
-
24
-
25
-
26
 |
 |
