Lexmark Optra C710 Setup Guide - Page 97
Novell NetWare, Click Other, Lexmark Network Printer Monitor
 |
View all Lexmark Optra C710 manuals
Add to My Manuals
Save this manual to your list of manuals |
Page 97 highlights
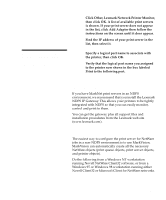
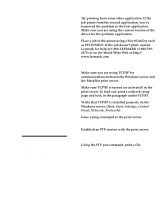
Note: You can print from DOS using LexIP if you assign a logical port name of LPT1, LPT2, LPT3 or LPT4. c:\>copy FileName LPT3 c Click Other, Lexmark Network Printer Monitor, then click OK. A list of available print servers is shown. If your print server does not appear in the list, click Add Adapter then follow the instructions on the screen until it does appear. d Find the IP address of your print server in the list, then select it. e Specify a logical port name to associate with the printer, then click OK. f Verify that the logical port name you assigned to the printer now shows in the box labeled Print to the following port. Novell NetWare NDPS (Novell Distributed Print Services) If you have MarkNet print servers in an NDPS environment, we recommend that you install the Lexmark NDPS IP Gateway. This allows your printers to be tightly integrated with NDPS so that you can easily monitor, control and print to them. You can get the gateway plus all support files and installation procedures from the Lexmark web site (www.lexmark.com). Non-NDPS (queue-based) The easiest way to configure the print server for NetWare jobs in a non-NDPS environment is to use MarkVision. MarkVision can automatically create all the necessary NetWare objects (print queue objects, print server objects, and printer objects). Do the following from a Windows NT workstation running Novell NetWare Client32 software, or from a Windows 95 or Windows 98 workstation running either Novell Client32 or Microsoft Client for NetWare networks. Novell NetWare 93
-
 1
1 -
2
-
3
-
4
-
5
-
6
-
7
-
8
-
9
-
10
-
11
-
12
-
13
-
14
-
15
-
16
-
17
-
18
-
19
-
20
-
21
-
22
-
23
-
24
-
25
-
26
-
27
-
28
-
29
-
30
-
31
-
32
-
33
-
34
-
35
-
36
-
37
-
38
-
39
-
40
-
41
-
42
-
43
-
44
-
45
-
46
-
47
-
48
-
49
-
50
-
51
-
52
-
53
-
54
-
55
-
56
-
57
-
58
-
59
-
60
-
61
-
62
-
63
-
64
-
65
-
66
-
67
-
68
-
69
-
70
-
71
-
72
-
73
-
74
-
75
-
76
-
77
-
78
-
79
-
80
-
81
-
82
-
83
-
84
-
85
-
86
-
87
-
88
-
89
-
90
-
91
-
 92
92 -
 93
93 -
 94
94 -
 95
95 -
 96
96 -
 97
97 -
 98
98 -
 99
99 -
 100
100 -
 101
101 -
 102
102 -
103
-
104
-
105
-
106
-
107
-
108
-
109
-
110
-
111
 |
 |
